Connecting to Your Machine (Video Guide)
With OpenPnP installed on your computer and the default configuration installed, the next step is connecting to the machine and getting familiar with OpenPnP's UI.
- Make sure OpenPnP is closed.
-
Plug the barrel jack power plug into your LumenPnP.
Always Plug In Barrel Jack First
Always plug in the barrel jack before USB power. This ensures the proper power up sequence for the LumenPnP motherboard. When plugging in the barrel jack, always make sure the USB type B connector is unplugged.
-
Connect your LumenPnP to your computer using the included USB cable.
Plug in USB before opening OpenPnP
Always plug your LumenPnP USB cable into your computer before launching OpenPnP. If OpenPnP is already open, it might have a hard time finding the correct communication port. Make sure OpenPnP is closed before plugging in your USB cable.
-
Connect both cameras to your computer using the USB cables.
Camera USB Ports
Use separate USB ports directly into your computer. The cameras require a lot of USB bandwidth, and many USB hubs aren't capable of handling it. For best results, make sure each camera is plugged into a different USB port directly into your computer, ideally on different interal USB hubs.
-
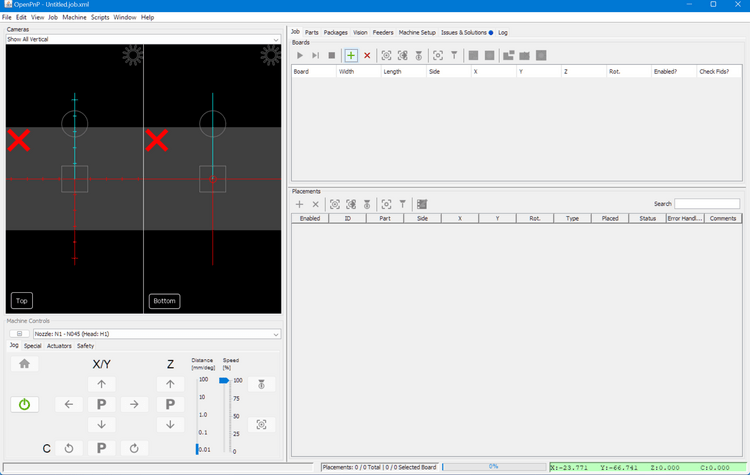
Open OpenPnP on your computer. You should now see the OpenPnP UI:
Serial Port Configuration
Before connecting to the LumenPnP, you need to set which USB port to use for communication in OpenPnP.
-
Click on the
Machine Setuptab.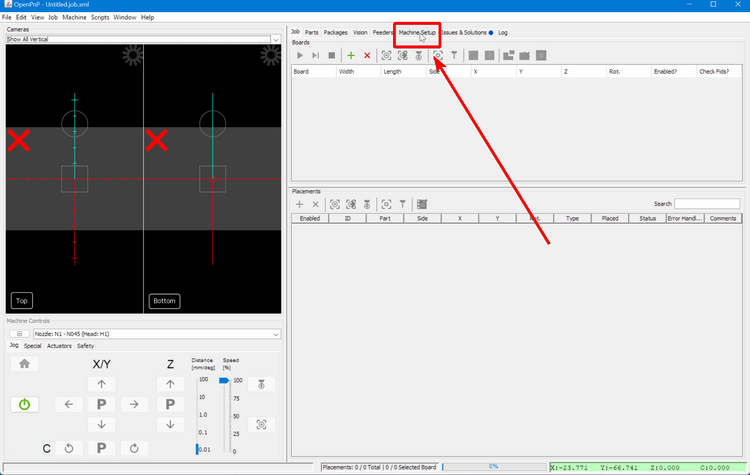
-
Click on the "Expand" checkbox to open all of the features.

-
Under
Driversclick onGcodeDriver GcodeDriver. Below the list of machine settings you'll find the details of the GcodeDriver.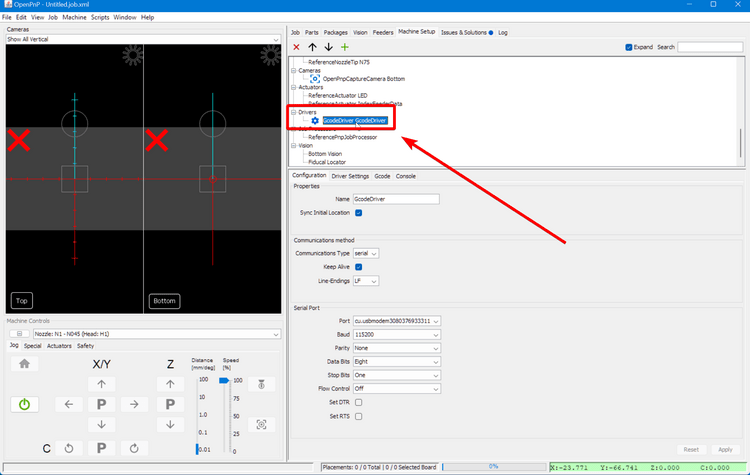
-
In the
Configurationtab, select thePortfor your LumenPnP.- On Windows, the
Portwill look likeCOM2orCOM3. - On Mac, the
Portwill be in the format:cu.usbmodem<a-lot-of-numbers> -
On Linux, Set the
Portto the option in the format:ttyACM0.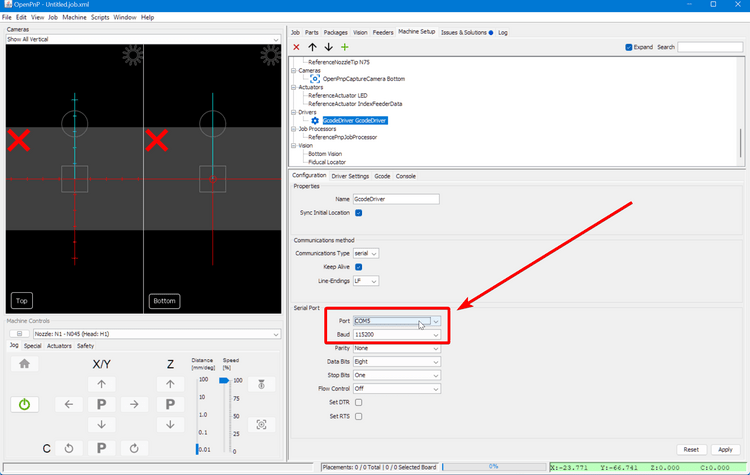
Port Not Found
If your machine's port does not show up in the drop down, check that your USB cable is plugged in to both your computer and the LumenPnP. Also check that the motherboard is powered on. If you still cannot find the port, try pressing the reset button on the motherboard and closing and reopening OpenPnP.
- On Windows, the
-
Click
Applyin the lower right corner to save your changes.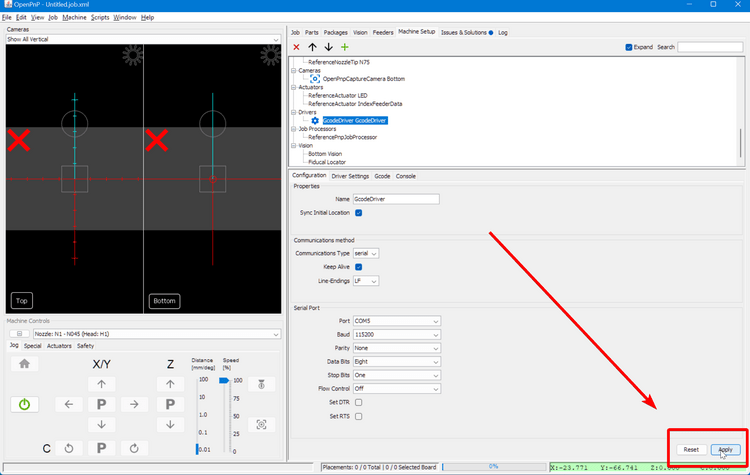
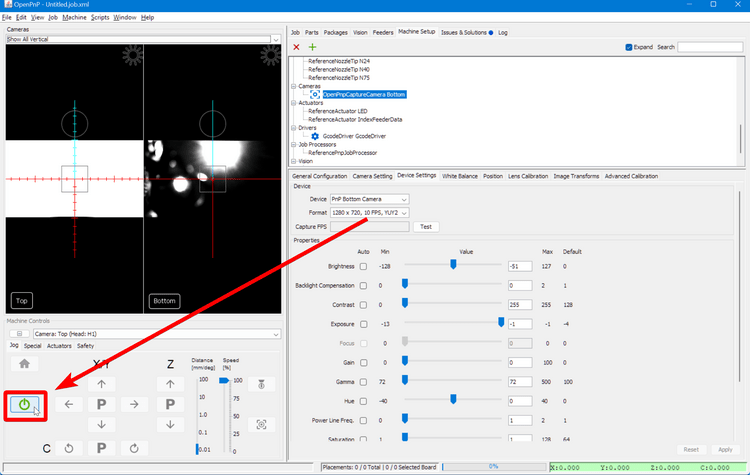
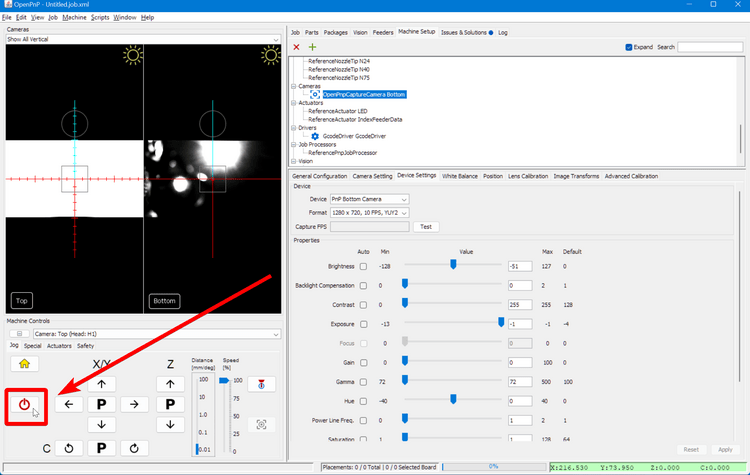
Establishing Serial Connection
-
Click the green power button in the Machine Controls section of the UI to connect to your machine.
-
The power button will turn red when OpenPnP has connected to your machine. If this doesn't work, check your serial port.
-
Save your OpenPnP settings with
File > Save Configuration.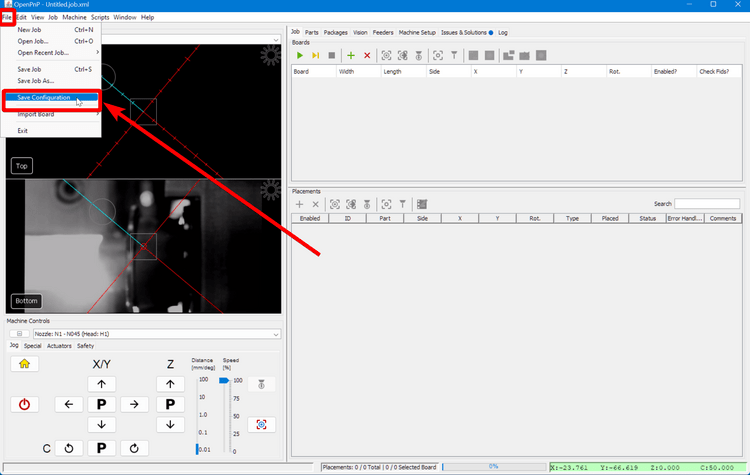
-
Turn on your machine's Ring Lights. Click the
LEDbutton under theActuatorstab underMachine Controls. ClickOnin the popup.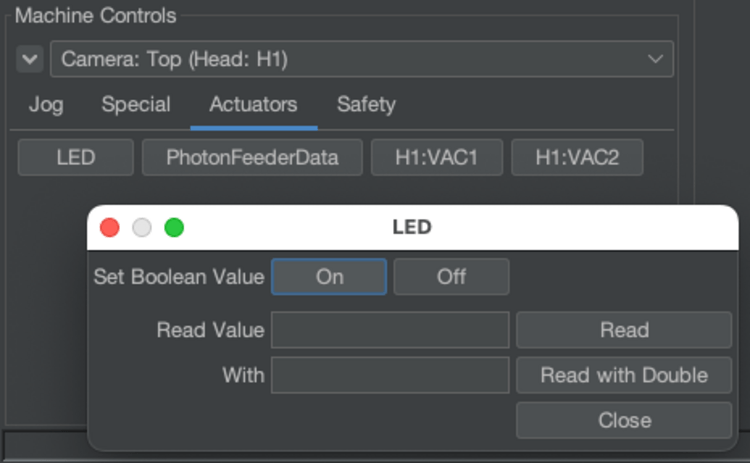
Keep Ring Lights On
Keep the ring lights on for the rest of calibration. All calibrations should be based on the lighting from the ring lights.
When running jobs, the ring lights will turn on automatically when homing, so it's not necessary to turn them on manually in normal operation.
Bottom Camera Configuration
Next, you'll configure the cameras.
Note
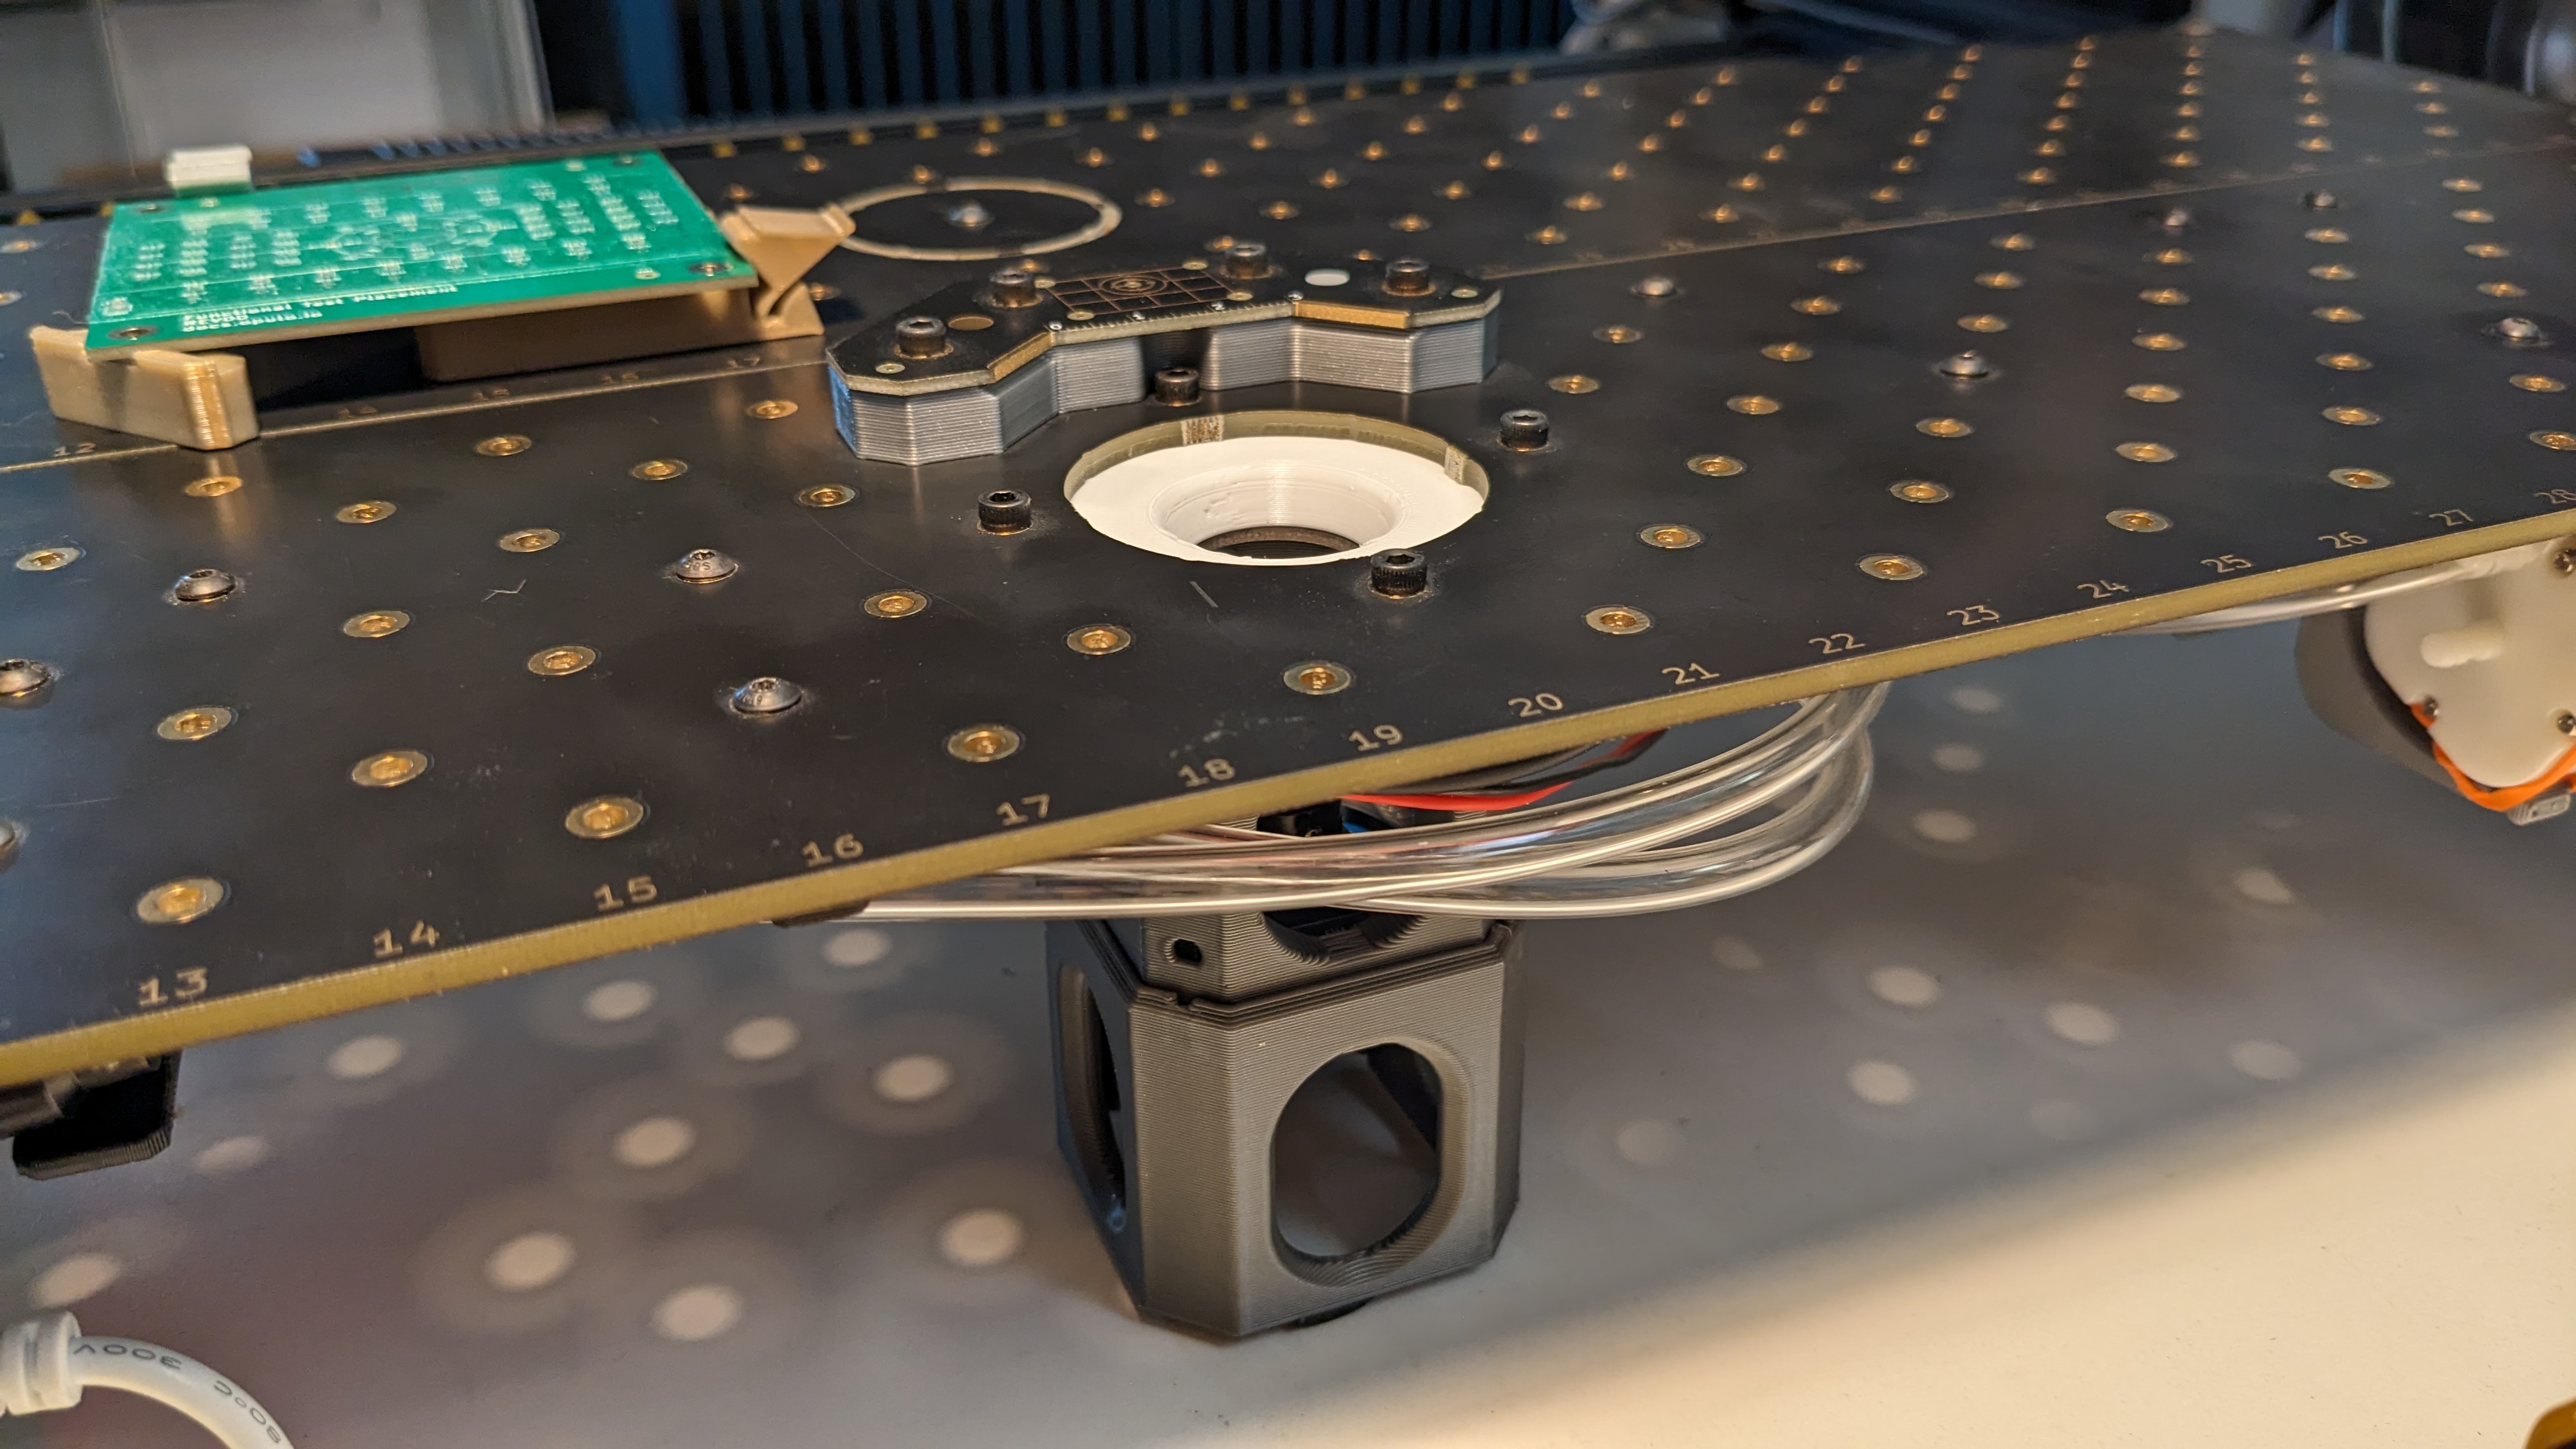
More recent LumenPnP machines ship with a more recessed bottom camera, shown below. The images in our setup guides mostly show an older mounting solution, but either works the same.
-
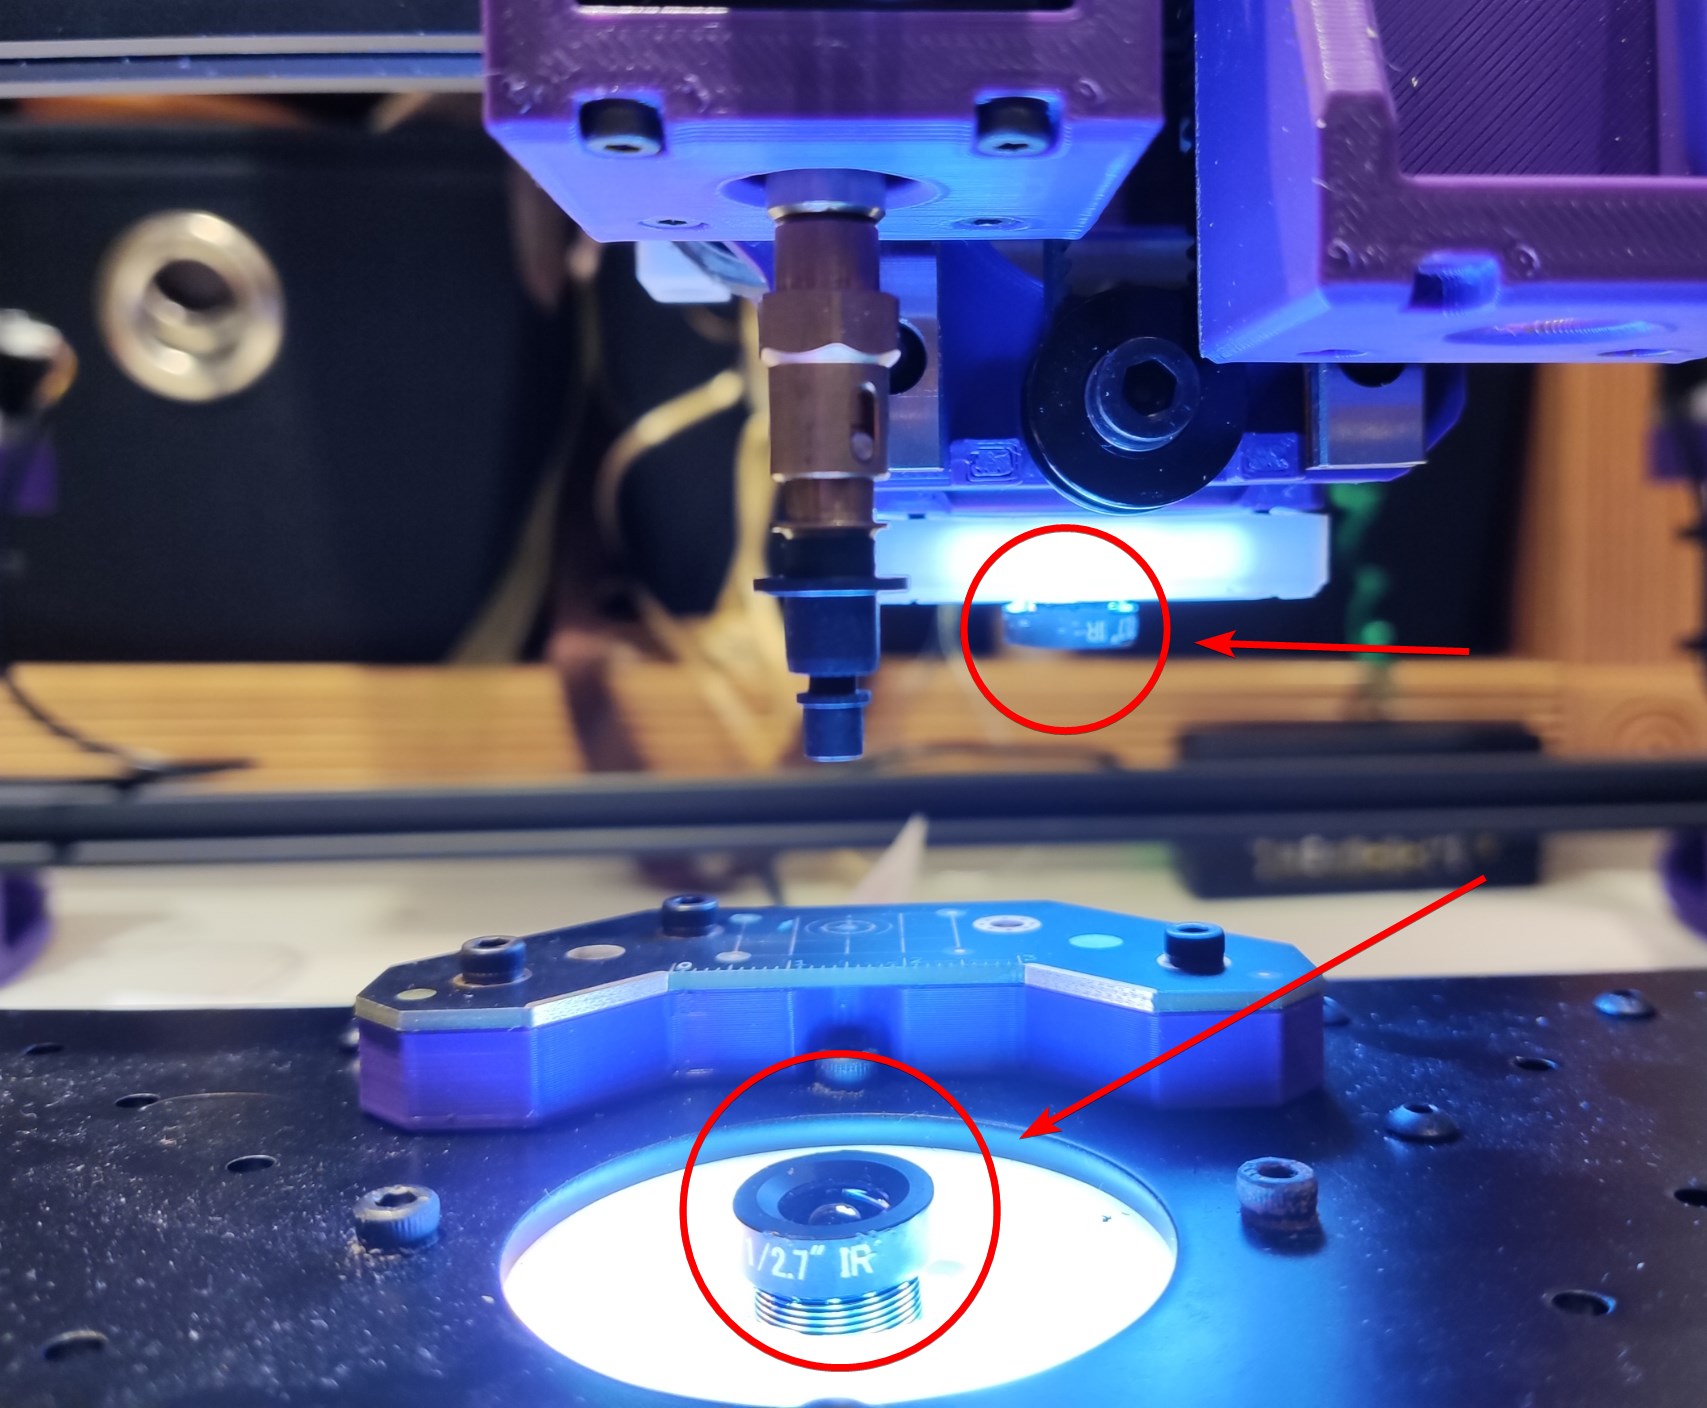
Make sure both camera's lens caps are removed. (They are already removed in the image below.)
-
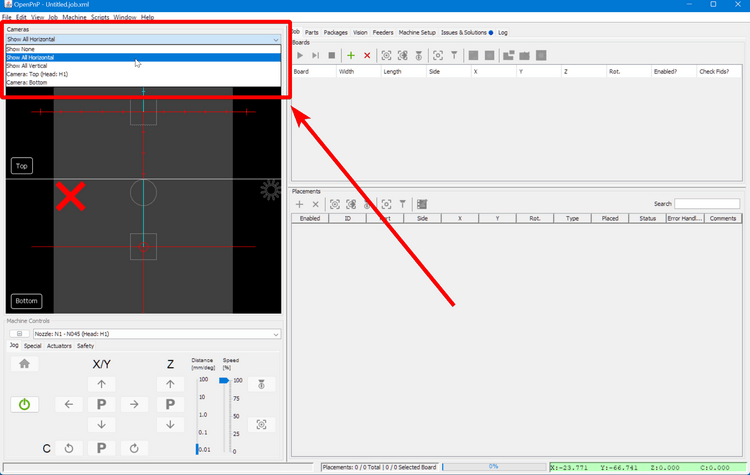
In the top-left corner, change the camera view to "Show All Horizontal". You will see two sections for camera feeds that have a red "X". An "X" in the camera views means that OpenPnP isn't yet configured to receive that camera feed.
-
Under the
Machine Setuptab, click onCameras > OpenPnpCaptureCamera Bottom.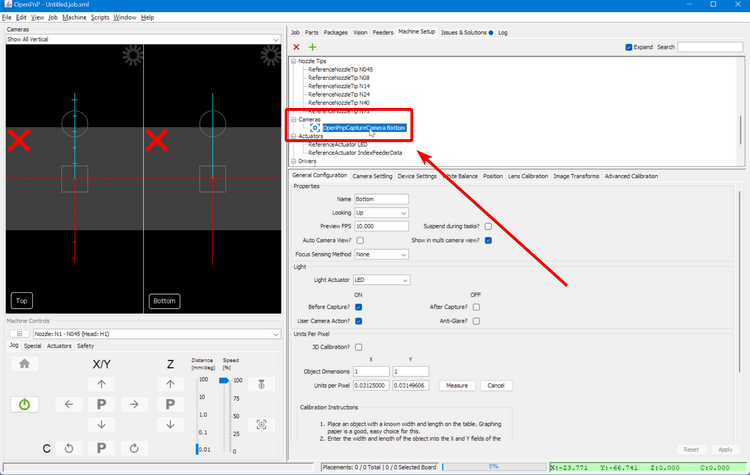
-
In the lower detail pane, switch to the
Device Settingstab.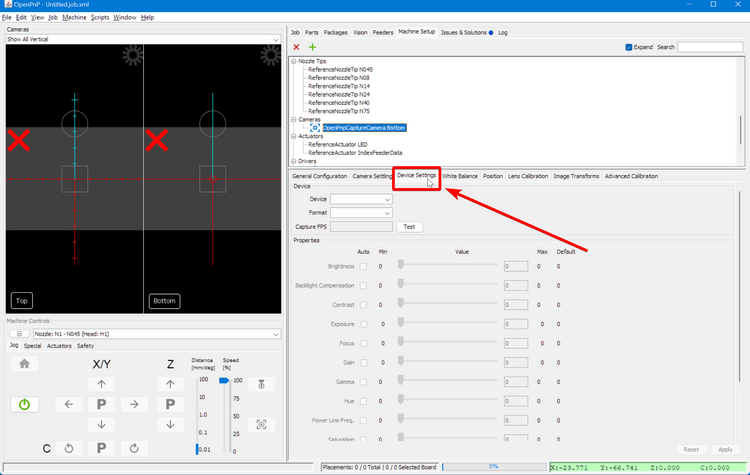
-
In the
Devicedrop-down, choosePnP Bottom Camera.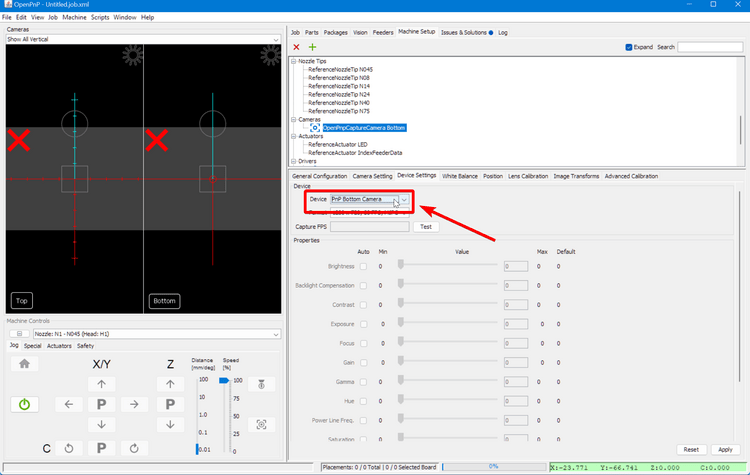
Duplicate Camera Names
Due to a bug in OpenPnP, it's possible that you'll see two of the same camera name in this drop down menu. If the first one you pick is incorrect, use the other option of the same name.
-
In the
Formatdrop-down, choose the setting with the highest resolution and the lowest frame rate. In this image, it's1280x720 10fps.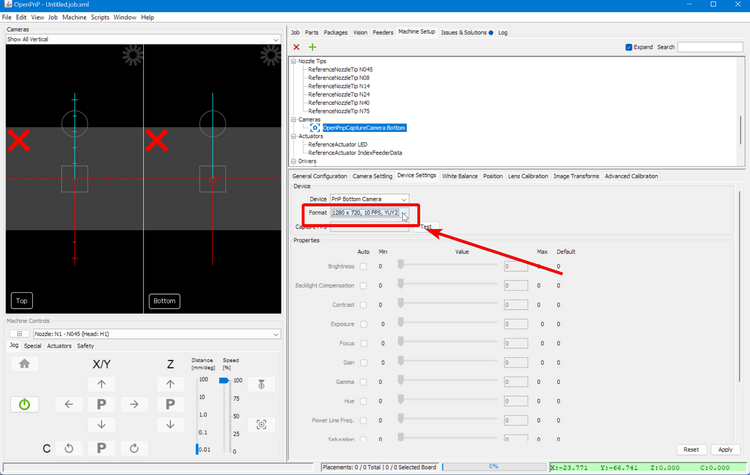
-
Click the
Applybutton in the bottom right. You should see the red "X" disappear from the bottom camera feed. The image might be entirely black.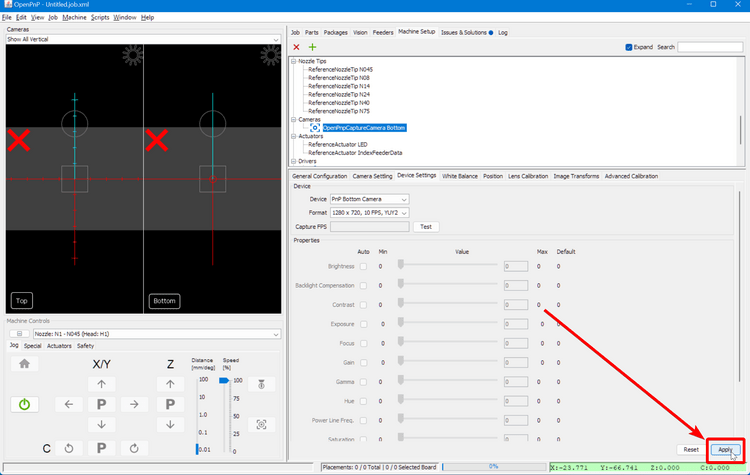
-
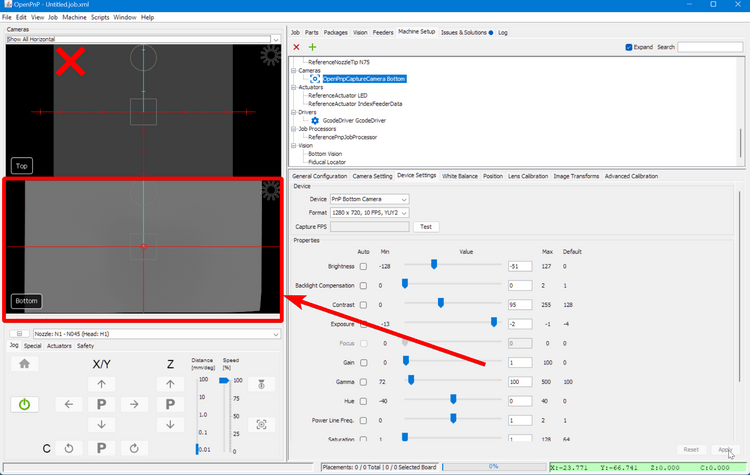
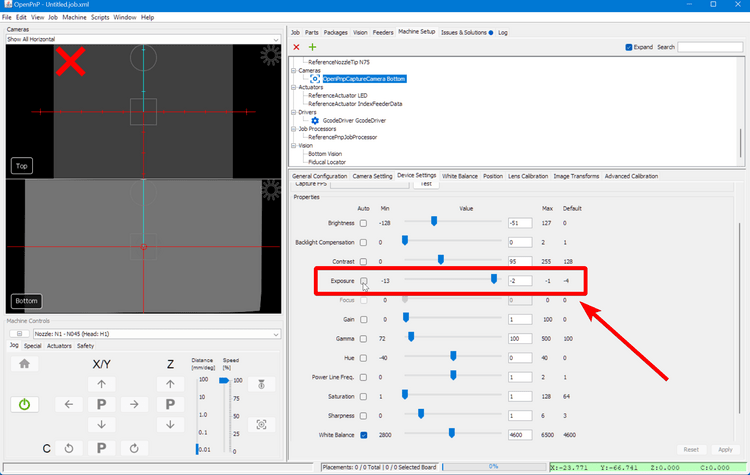
Adjust the exposure to make the image visible. To ensure the camera has auto exposure disabled, toggle the "Auto" checkbox next to "Exposure" on and then off again. Do not keep auto exposure turned on. Slide the slider until you see a clearer picture. You'll set the exposure more accurately in a later step.
Other Camera Settings
We highly recommend not adjusting any of the other sliders for your camera's settings. Exposure is the only slider you should adjust from the default values the camera boots up with.
For Mac Users
Due to an issue with the camera driver in OpenPnP, some Mac users might notice that the image settings are greyed out for you. There's a fantastic open-source application called CameraController that can be used to edit these settings.
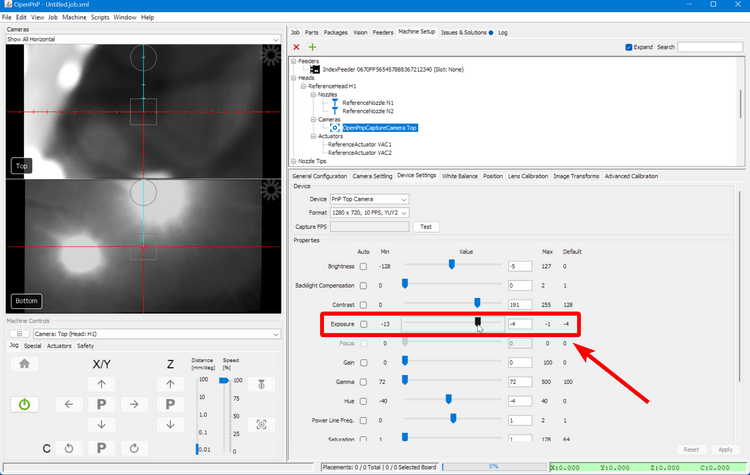
Top Camera Configuration
-
Under the
Machine Setuptab, click onHeads > ReferenceHead H1 > Cameras > OpenPnpCaptureCamera Top.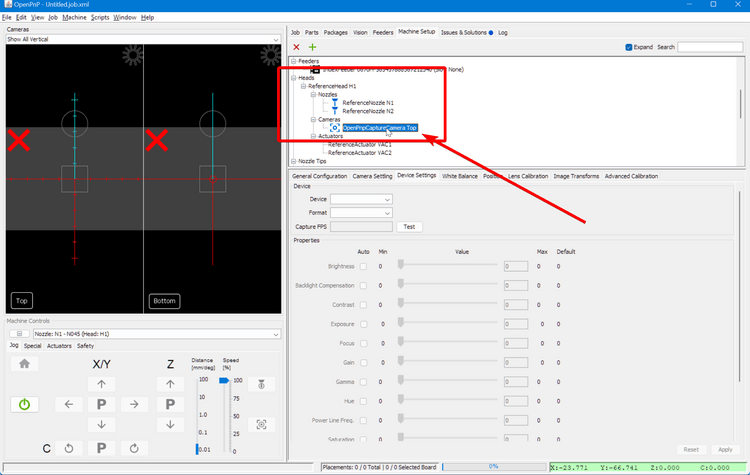
-
In the lower detail pane, switch to the
Device Settingstab.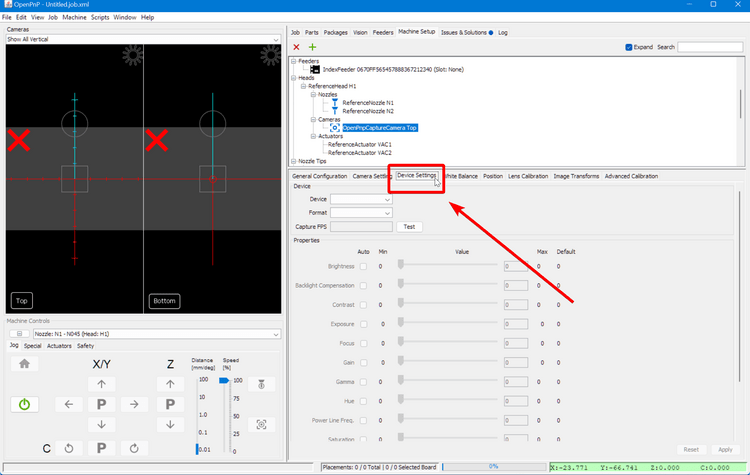
-
In the
Devicedrop-down, choosePnP Top Camera.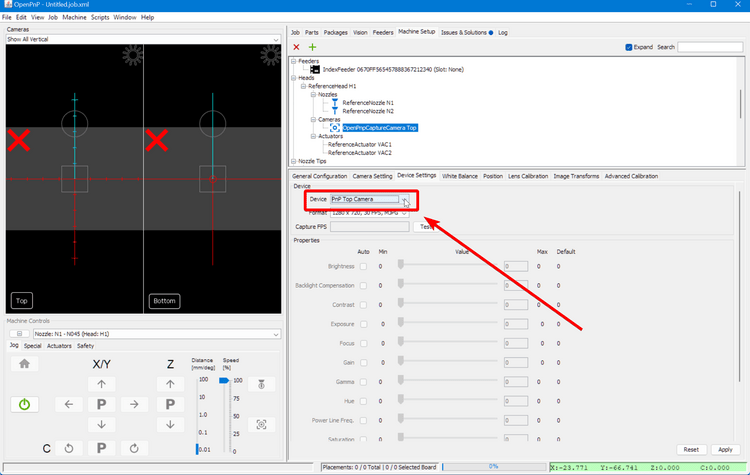
-
In the
Formatdrop-down, choose the setting with the highest resolution and the lowest frame rate. In this image, it's1280x720 10fps.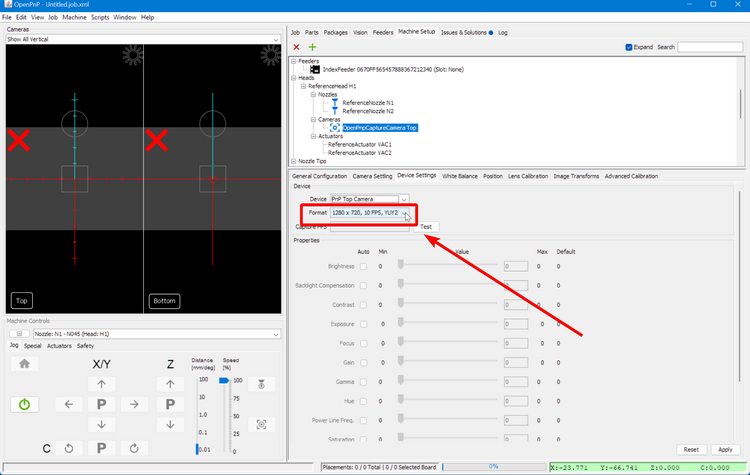
-
Click the
Applybutton in the bottom right. You should then see the camera display start showing the feed from the camera, or at least see the red X disappear.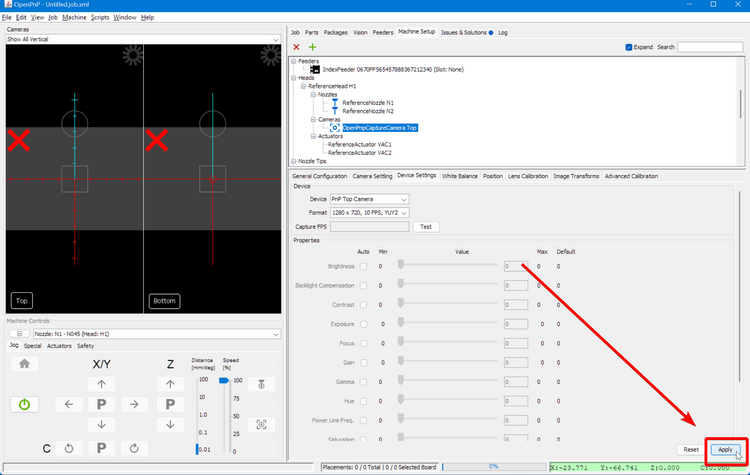
-
Adjust the exposure to make the image visible. To ensure the camera has auto exposure disabled, toggle the "Auto" checkbox next to "Exposure" on and then off again. Do not keep auto exposure turned on. Slide the slider until you see a clearer picture. You'll set the exposure more accurately in a later step.
Next Steps
Next, we'll set up the machine's the homing fiducial.