Software Update
Any LumenPnP model from v3.1 to the current version is ready to work with the Photon feeders. If you have an older LumenPnP that has its original firmware, it is possible you'll need to update both your LumenPnP's firmware and OpenPnP.
Update OpenPnP
Please update to the latest version of OpenPnP 2.6
Update Feeder Firmware (Optional)
All feeders come with firmware pre-programmed. These instructions are for updating to a new version of firmware, or putting custom firmware on the feeder.
Set Jumper to 3.3v
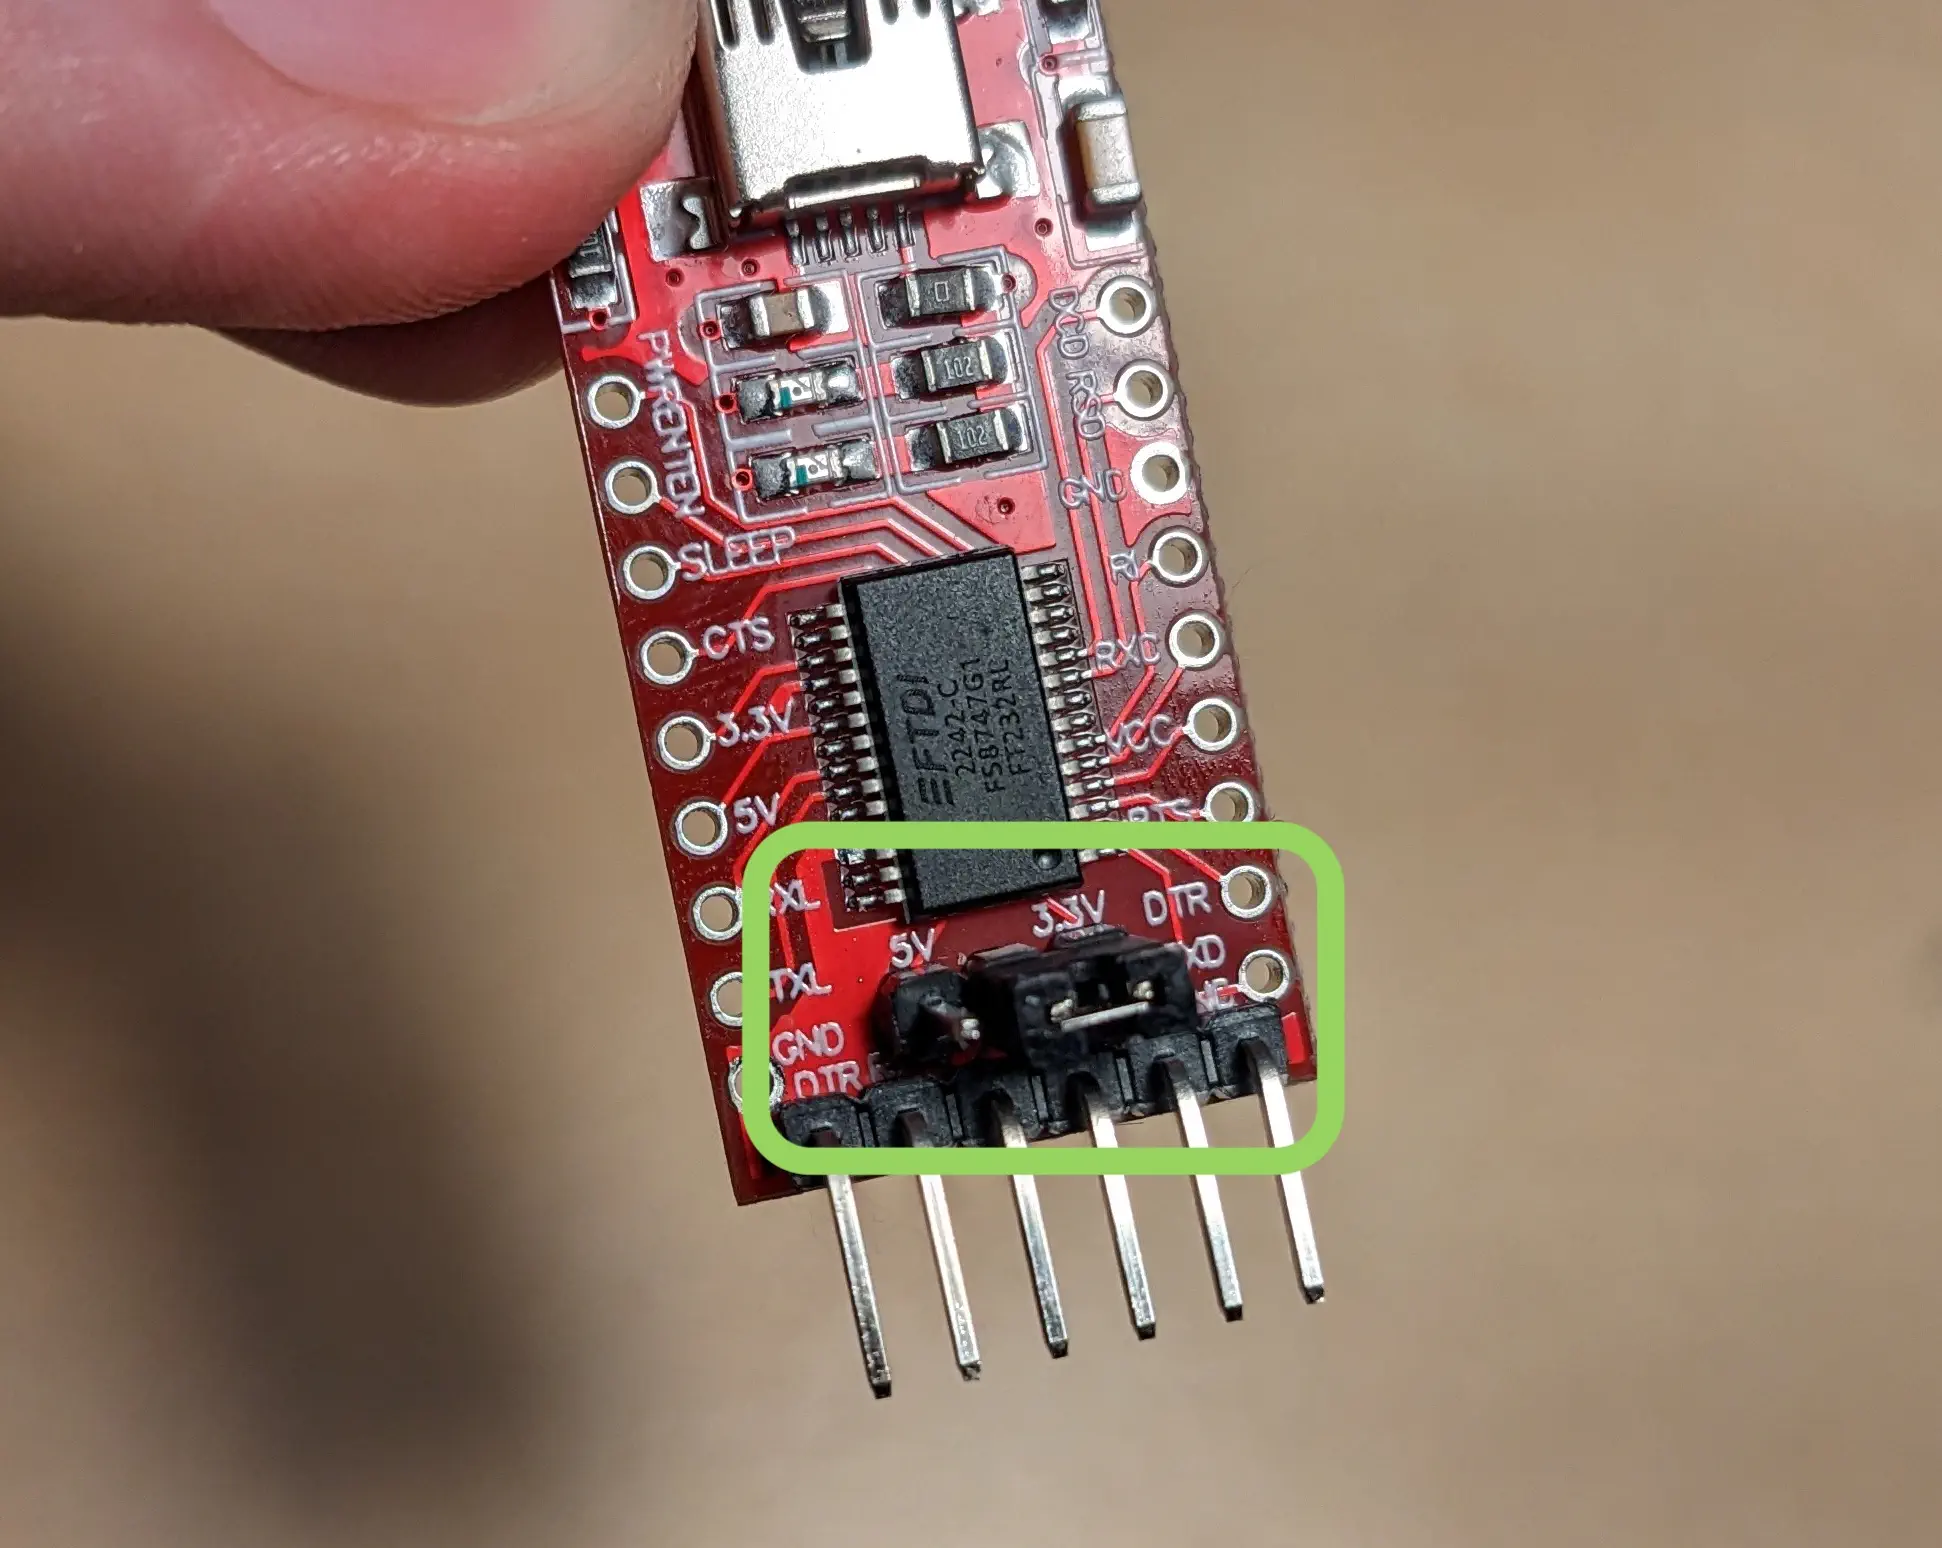
Make sure that the jumper on your programmer is set to 3.3v. On the 3 pin header, make sure the jumper is connecting the center pin to the pin labeled "3.3v". The feeder logic operates at 3.3v, so it should be set to this prior to use.
-
Connect the included programmer to your computer.
-
Download the most recent firmware here, a specific version from the Photon releases page, or compile it yourself.
- Download and install the STM32CubeProgrammer application.
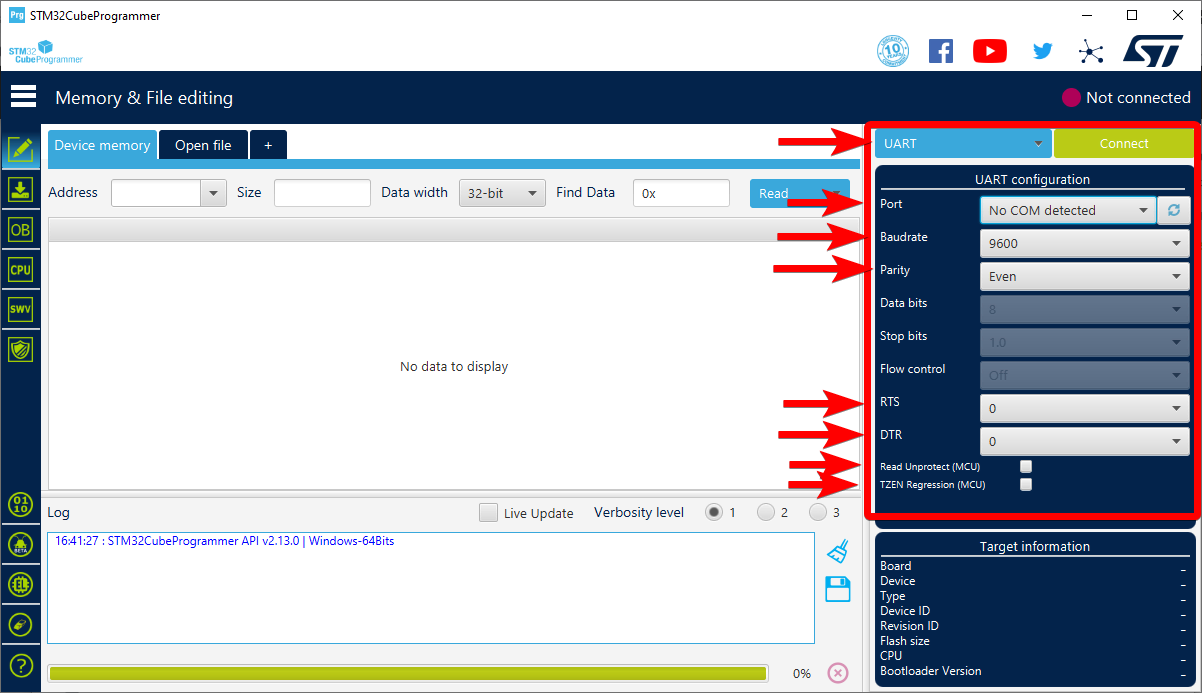
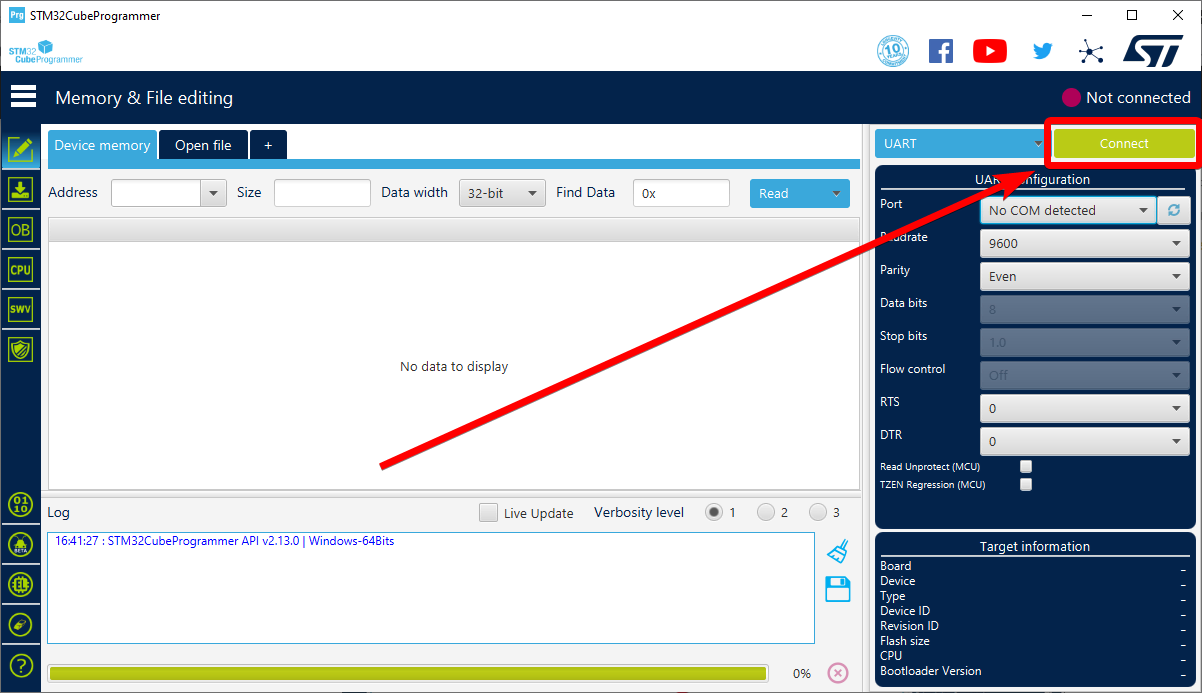
- Open the STM32CubeProgrammer application
-
On the Blue dropdown next to the connect button, select
UART.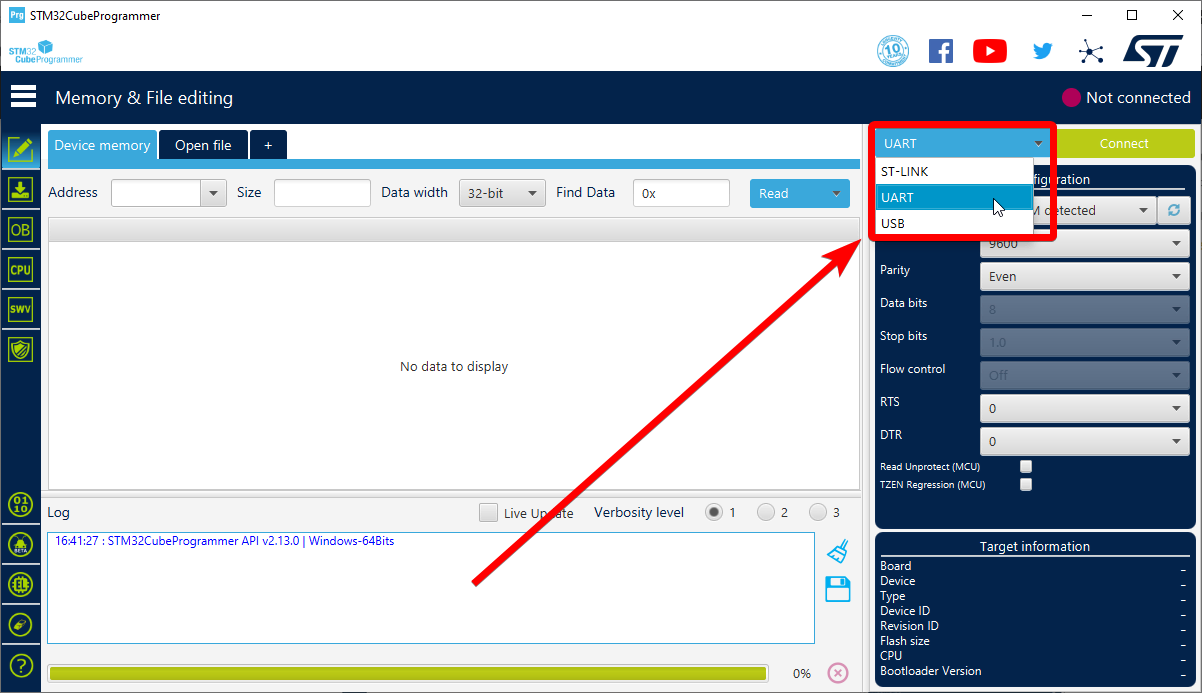
-
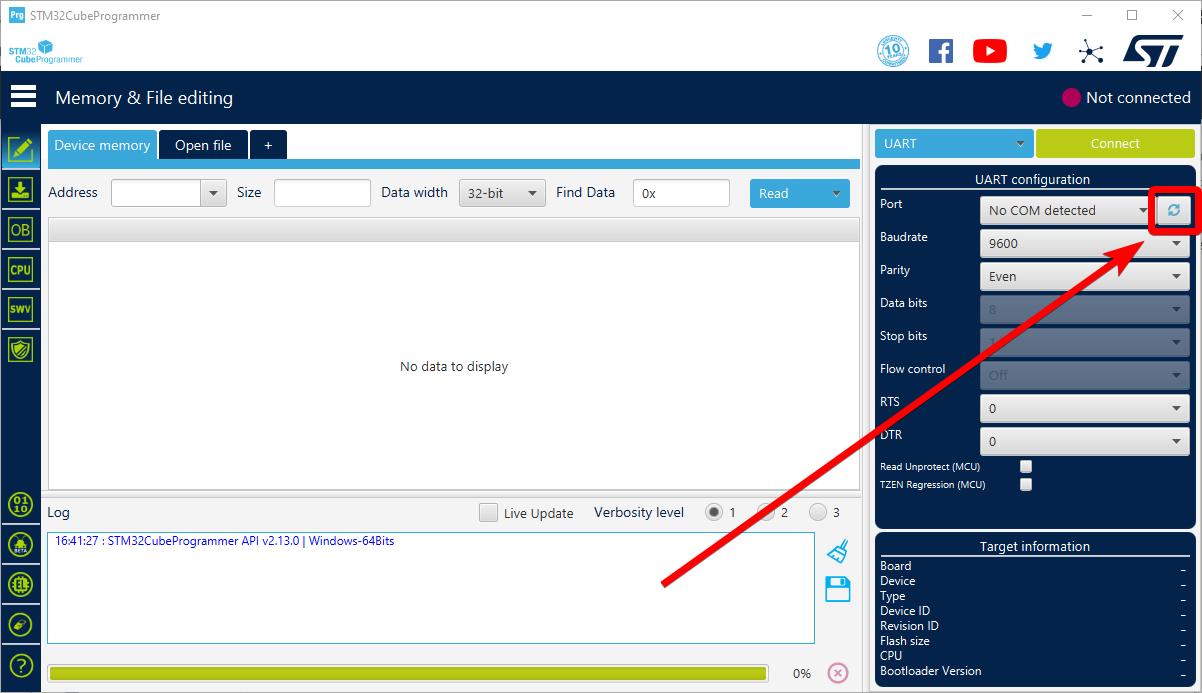
Click the circular arrow icon to scan for new devices.
-
Click the
Portdrop down and select the new port that appears. On Mac, this port should start withcu.usbmodem.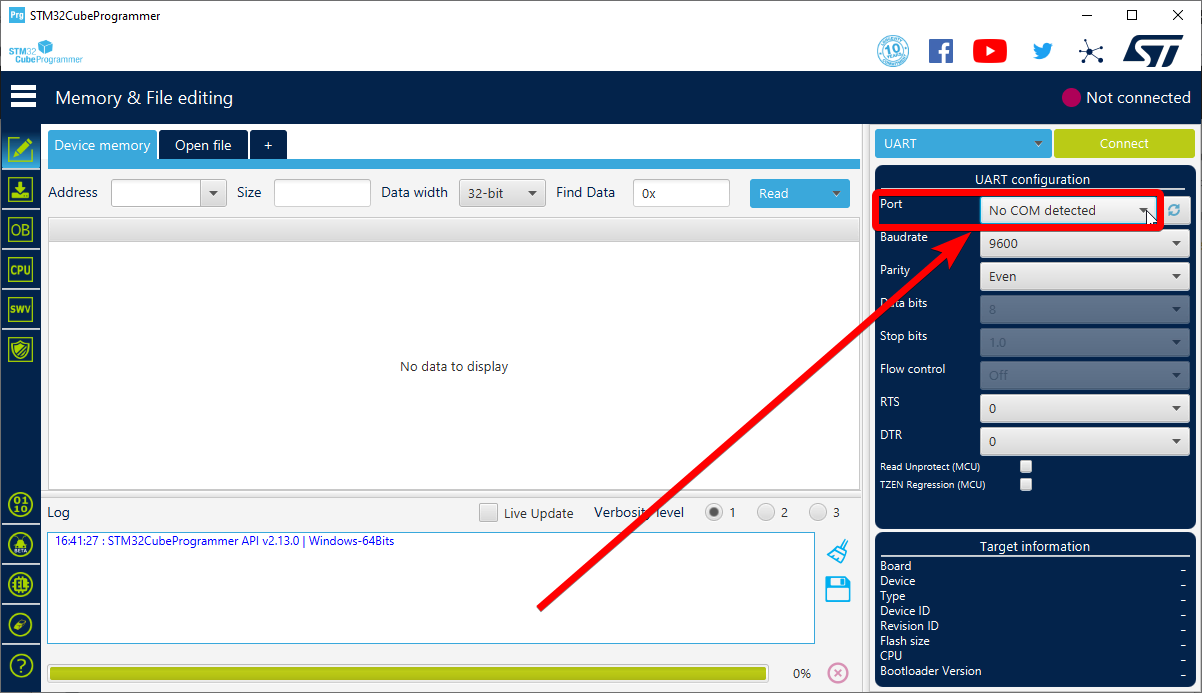
-
Set the following settings:
Baudrate: 9600Parity: EvenRead Unprotect (MCU): UncheckedTZEN Regression (MCU): Unchecked
-
Hold down the BOOT button located here on the feeder:
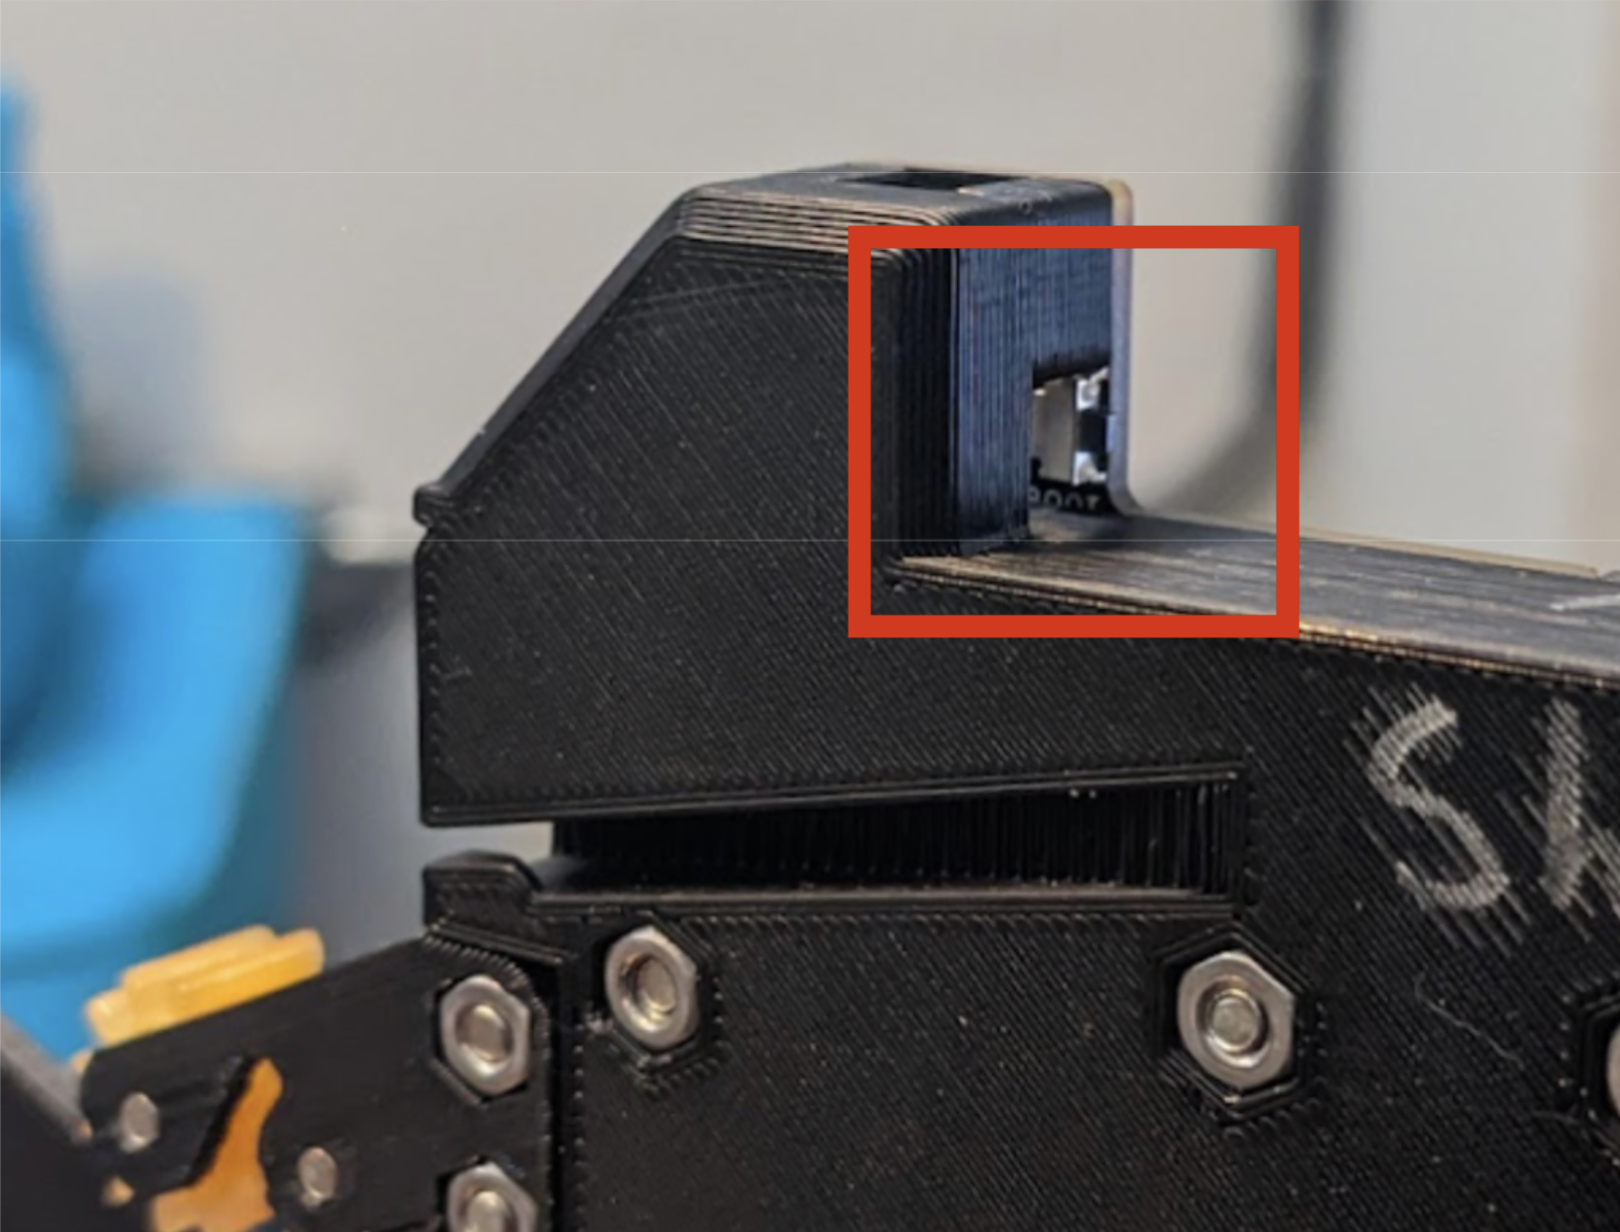
-
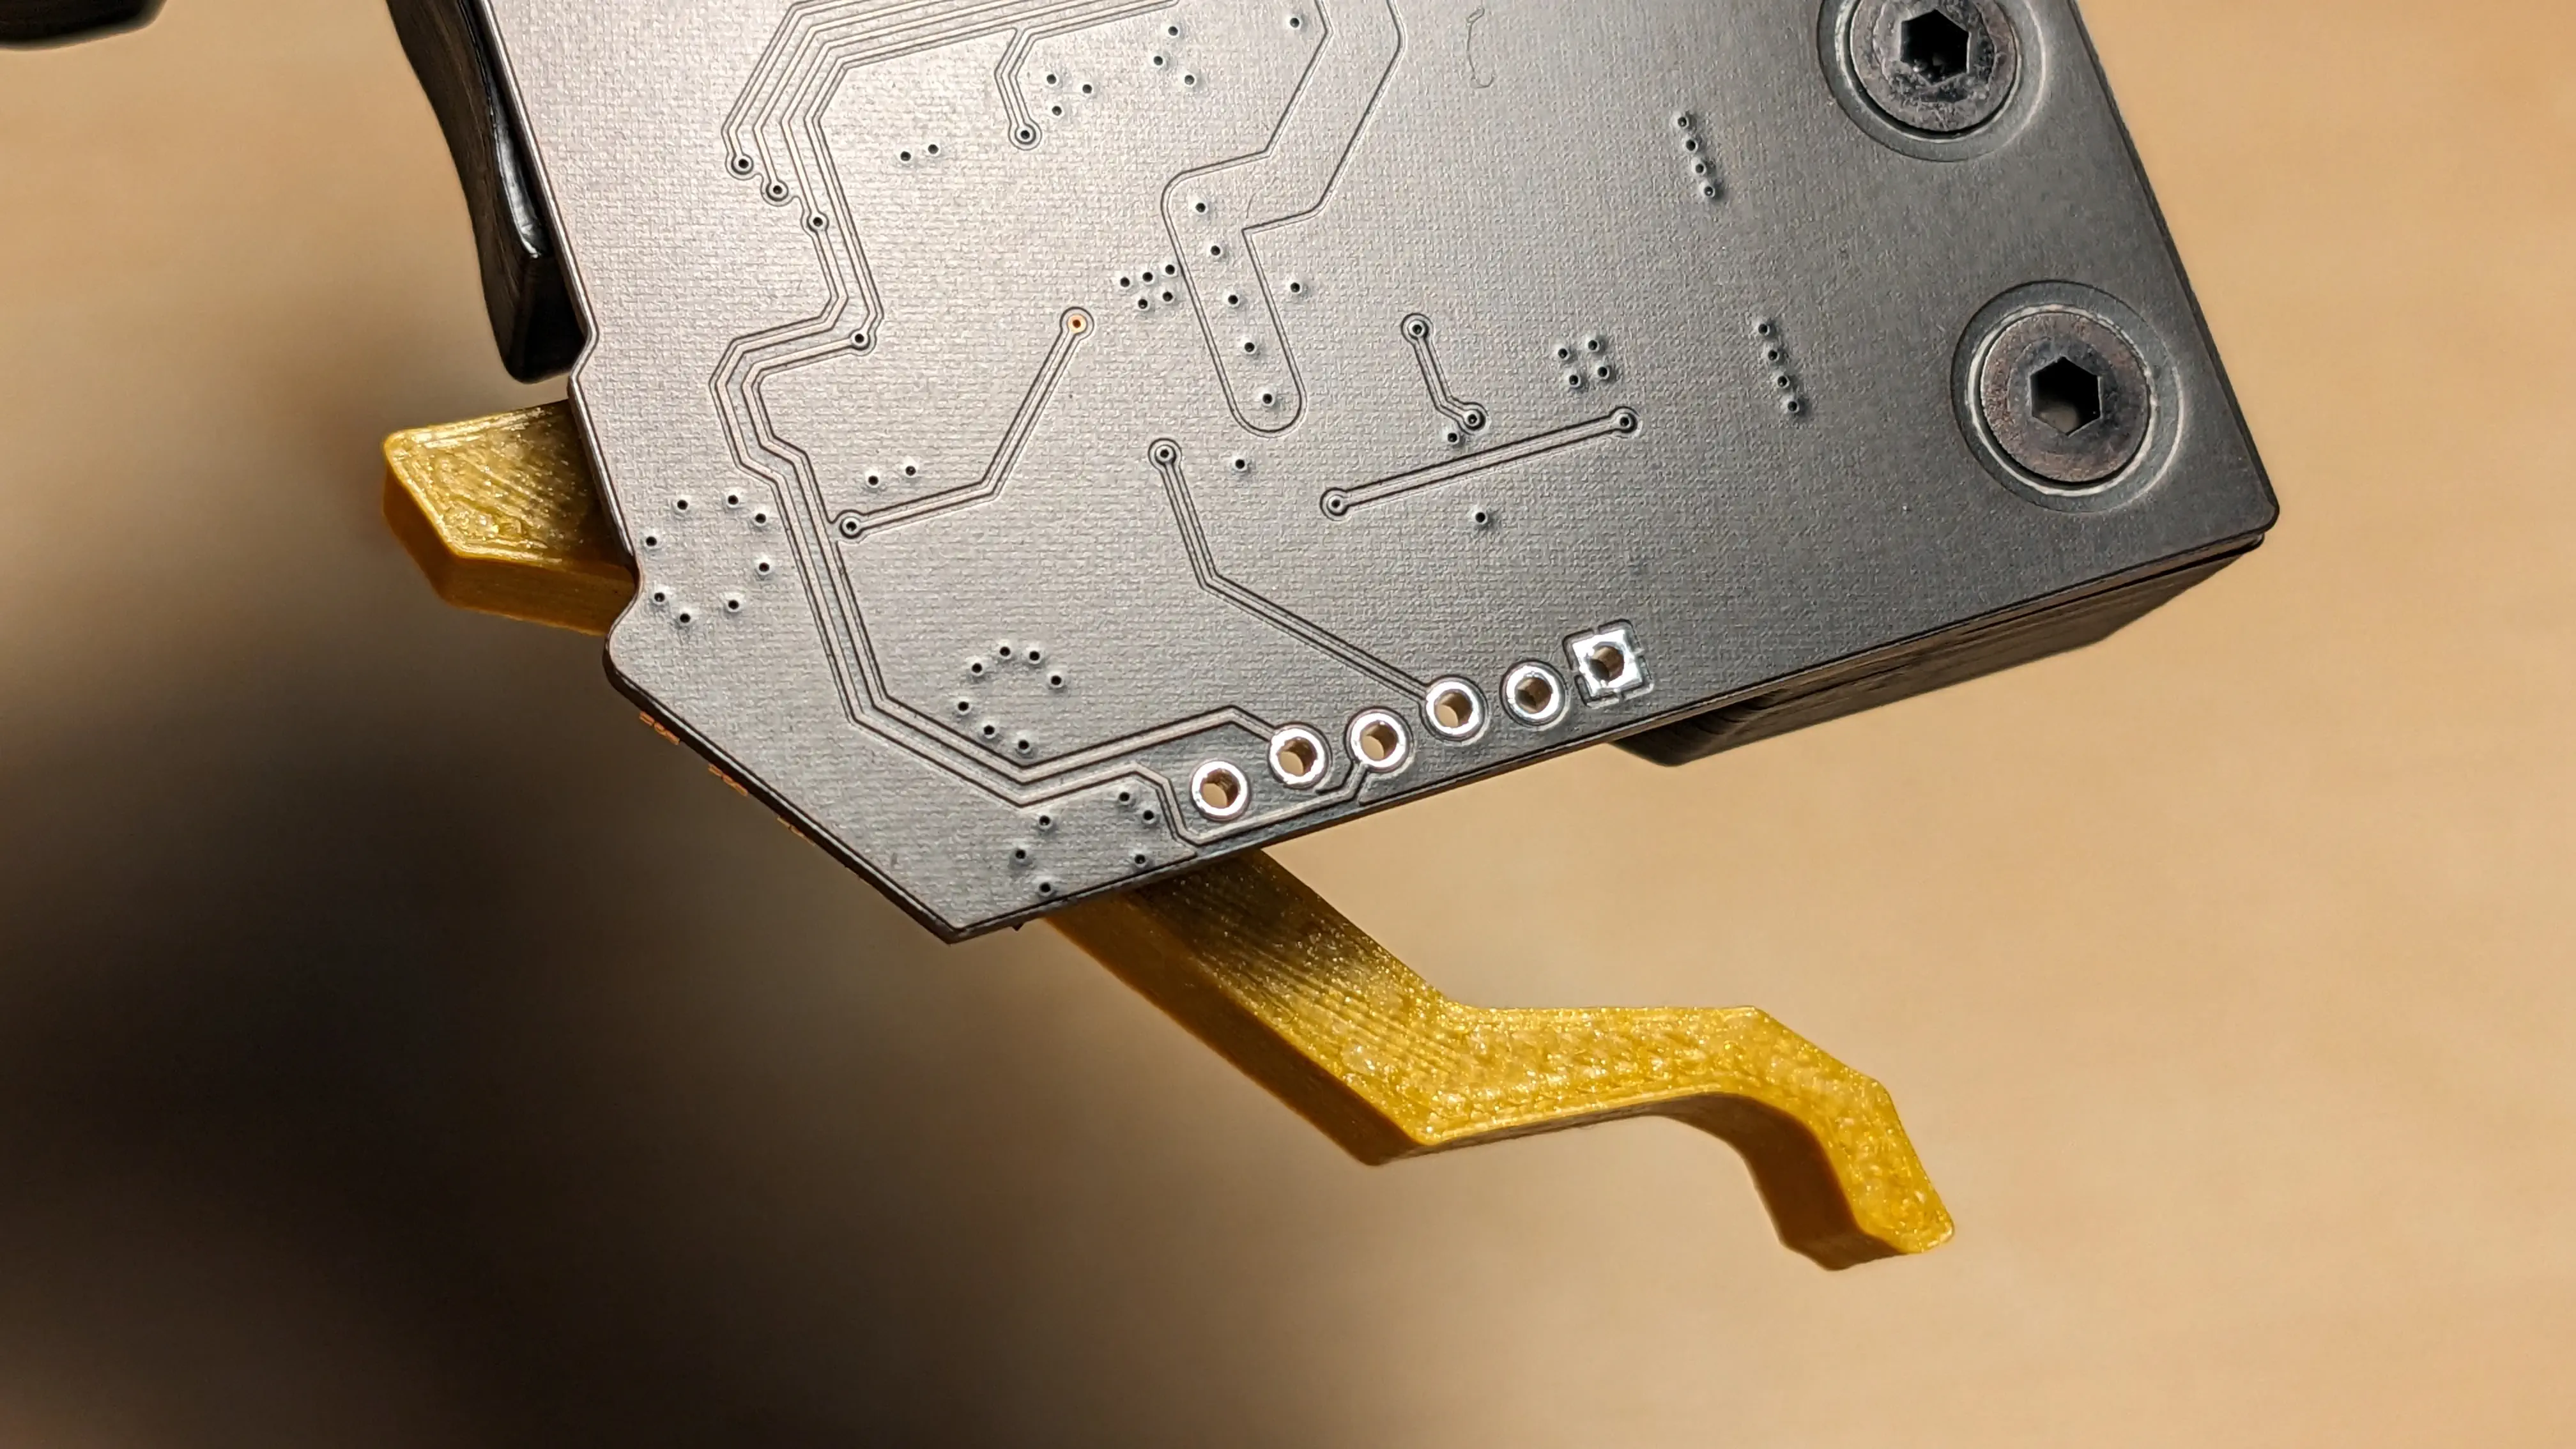
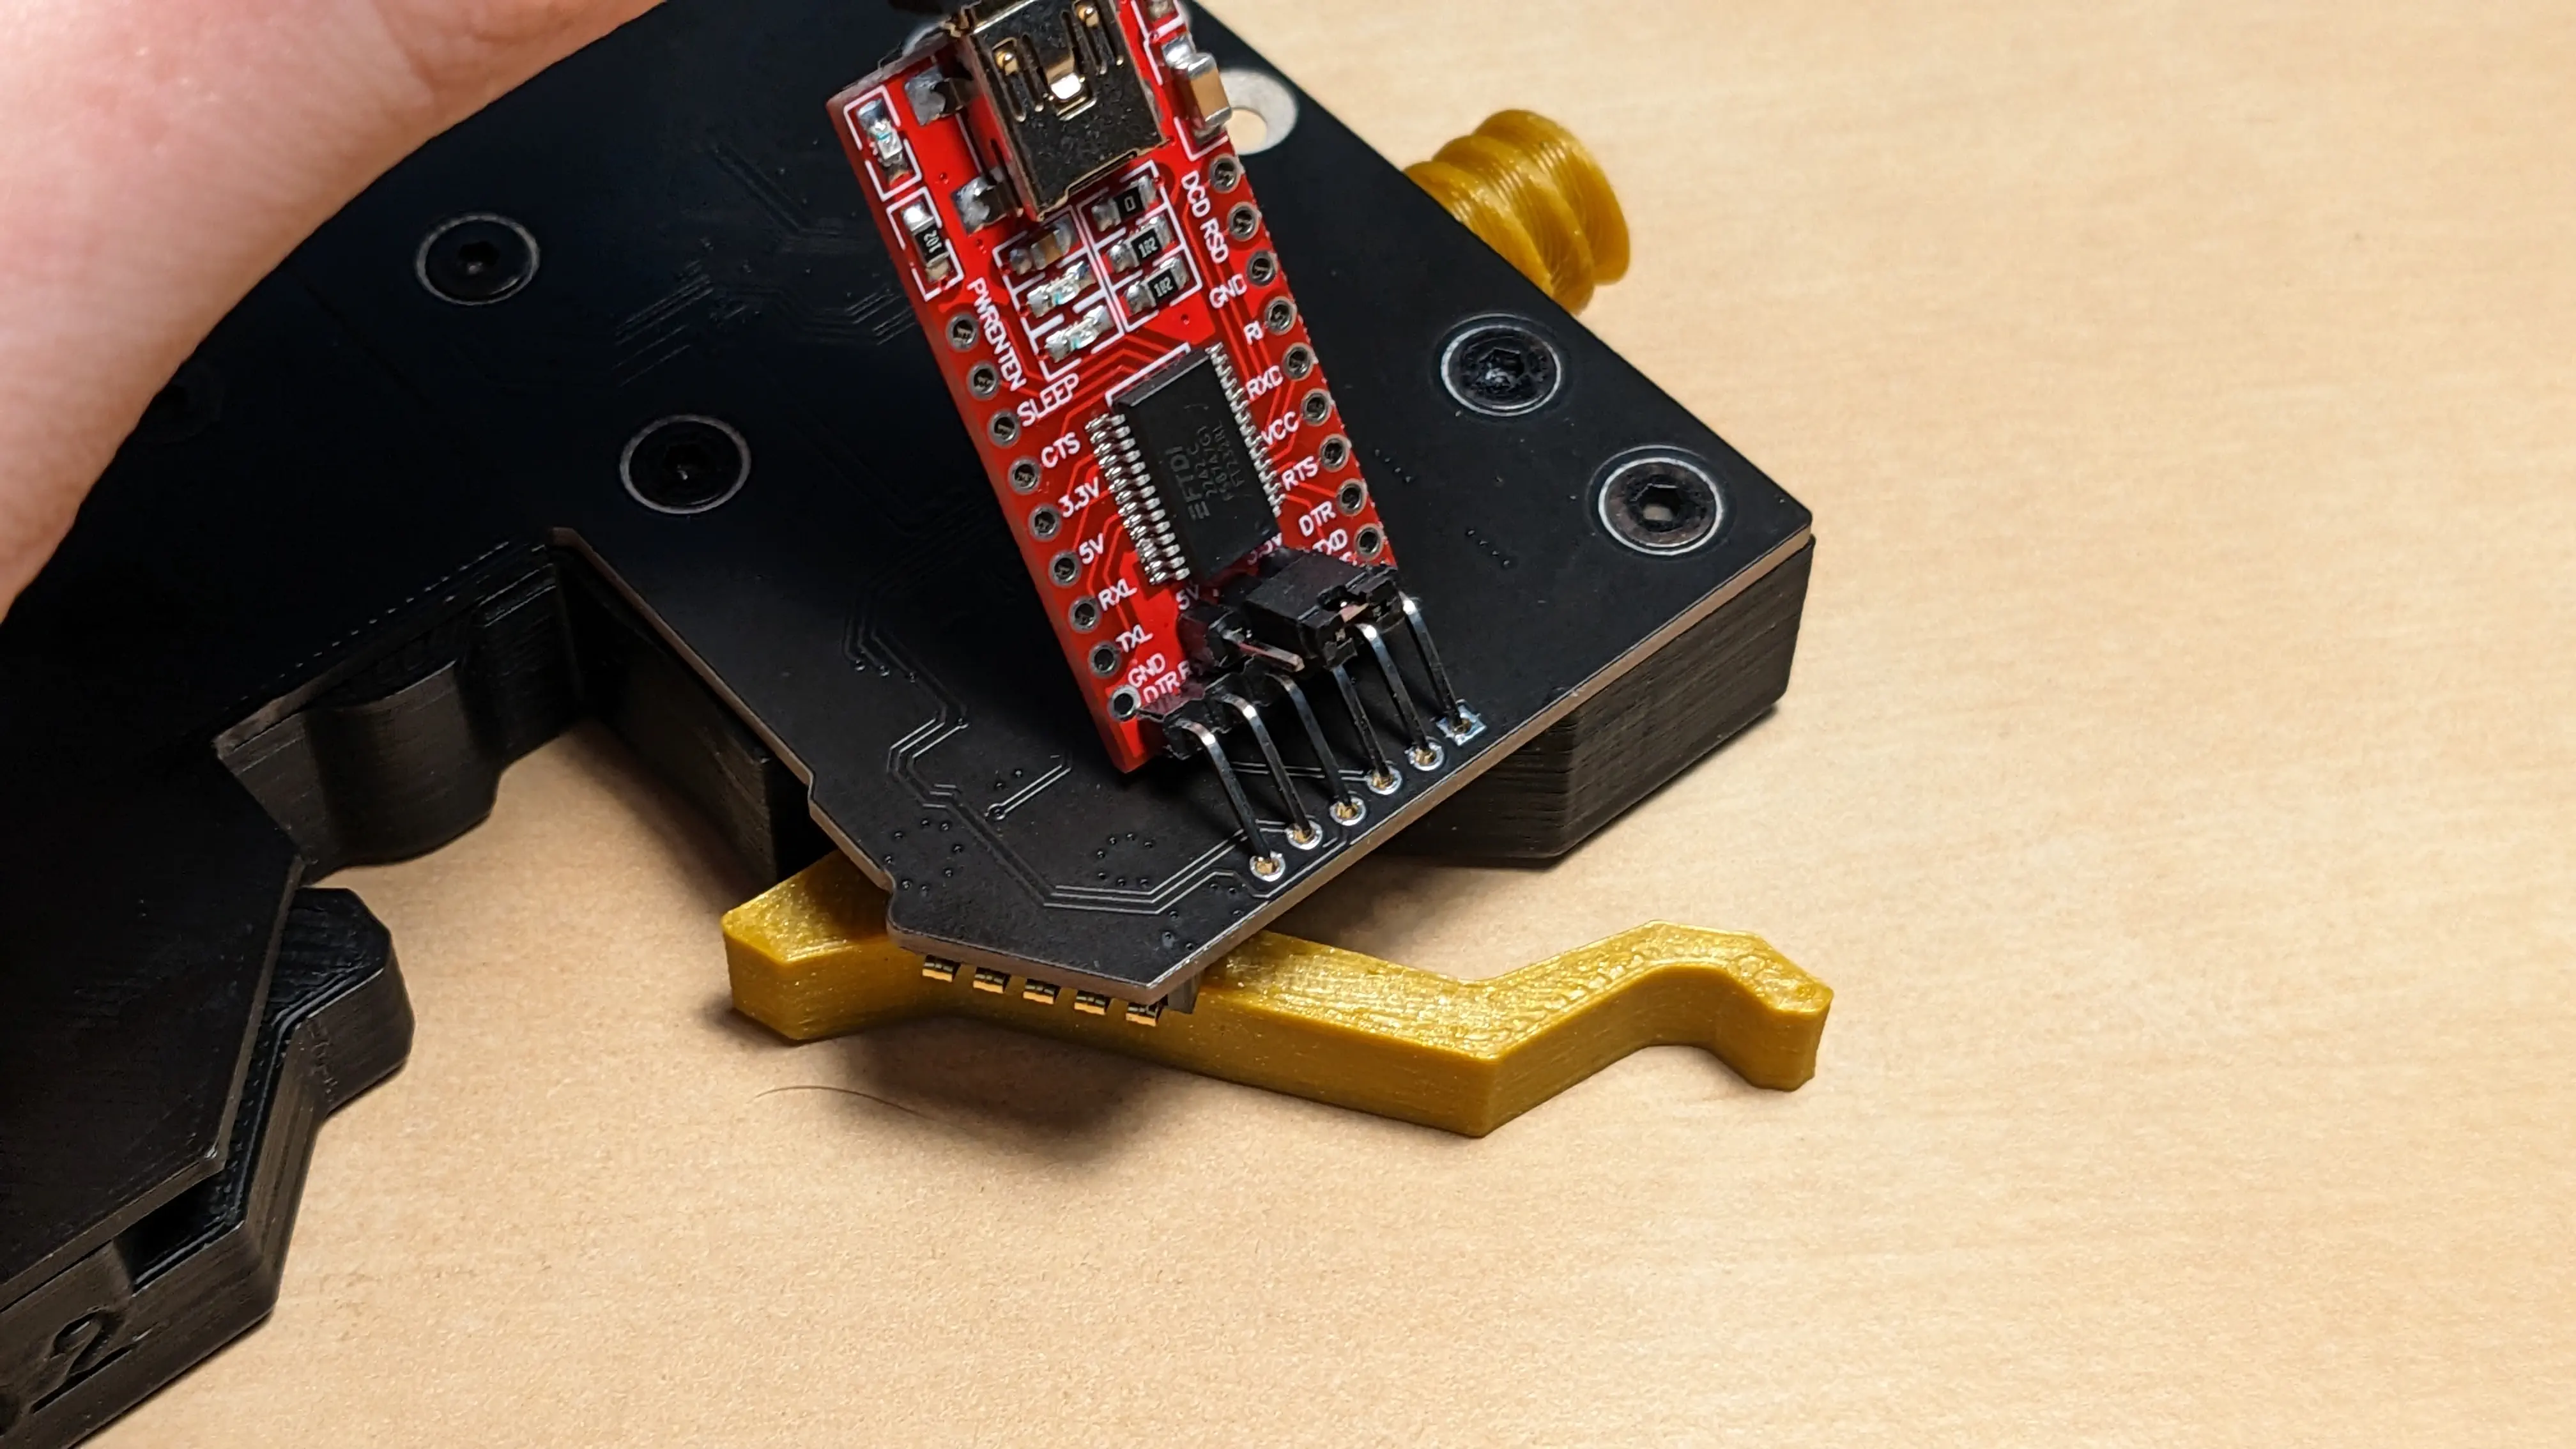
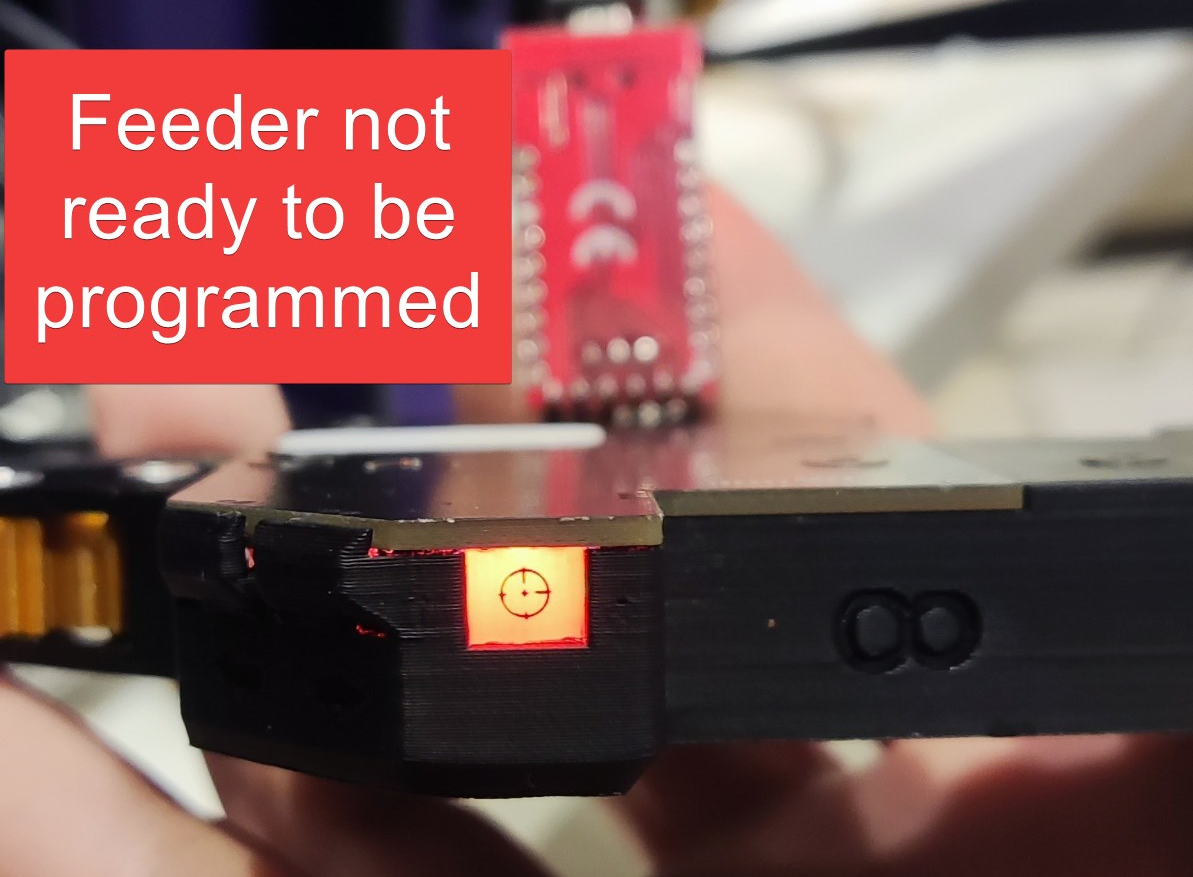
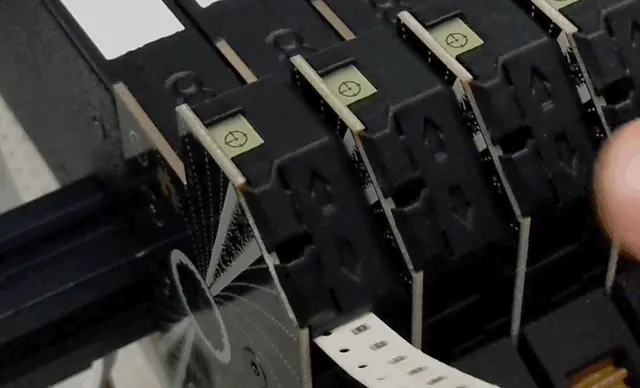
While holding the BOOT button, insert the pins of the programmer into the plated holes on the feeder as shown in the picture below. The holes are slightly offset, so the programmer pins will stay in contact with the through holes. Once connected, release the BOOT button. If the feeder's LED flashes and turns red, it is not ready to be programmed. Try again.
Note
The feeder does not need to be mounted on a rail for this step; it can be powered by the programmer.

-
Click the green connect button in STM32CubeProgrammer.
If You Can't Connect
If you can't connect to your feeder, check that the programmer is inserted into the pins in the correct orientation. Also, applying gentle pressure to the side of the programmer can help ensure that the pins are making good contact with the plated holes in the feeder PCB.
Try the Alternate Method
A small batch of feeders have a hard time entering the bootloader using the instructions above. If you cannot connect, try using the instructions below.
-
Insert the programmer into the programming port, but do NOT press the boot button. The Status light should turn red.
-
Press and hold both buttons. Some light patterns will display. Wait until you see red and blue lights flashing, then turn off. Release the buttons. Your feeder is now in the bootloader.
-
Reattempt connection.
- If you still have connection issues, please reach out to us, and check out this page.
-
-
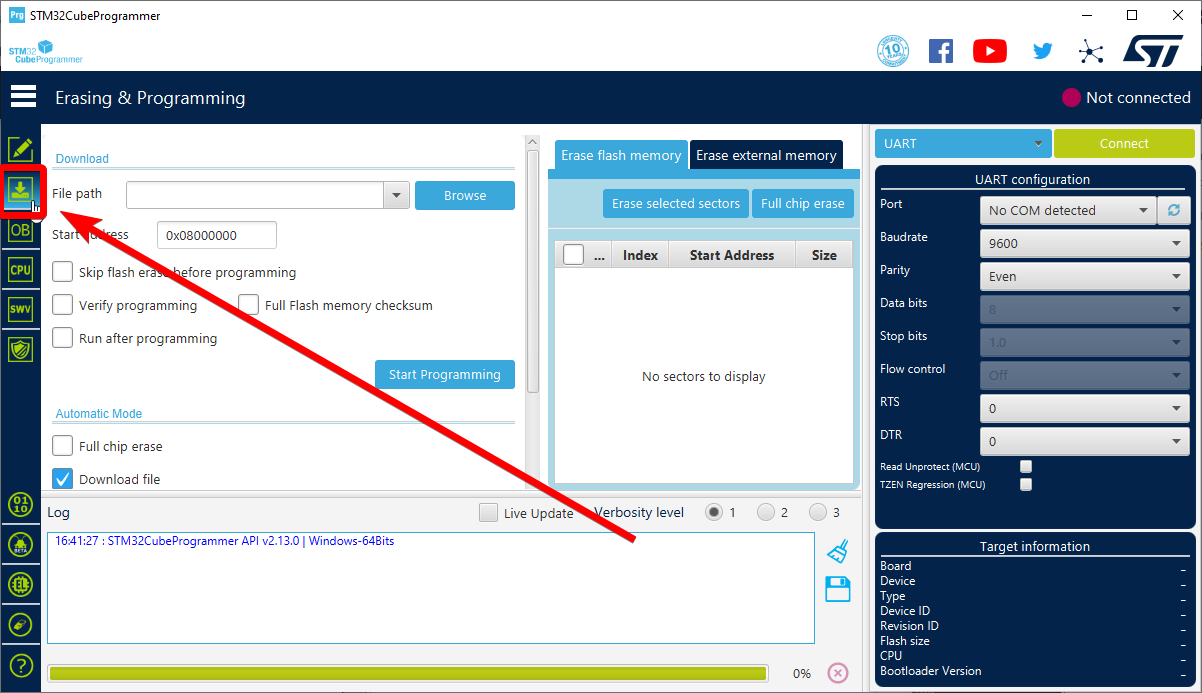
Once connected, Switch to the download tab on the left.
-
Click the "Browse" button and navigate to the provided
firmware.binfile.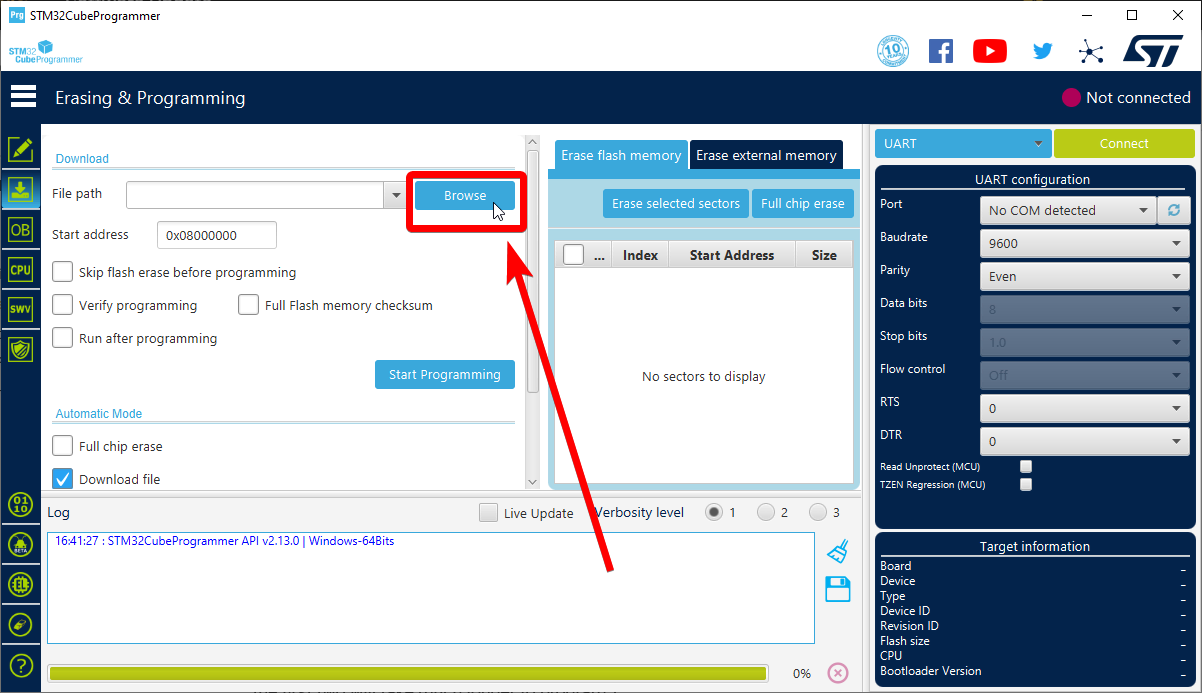
-
Ensure that the “Start address” is
0x08000000.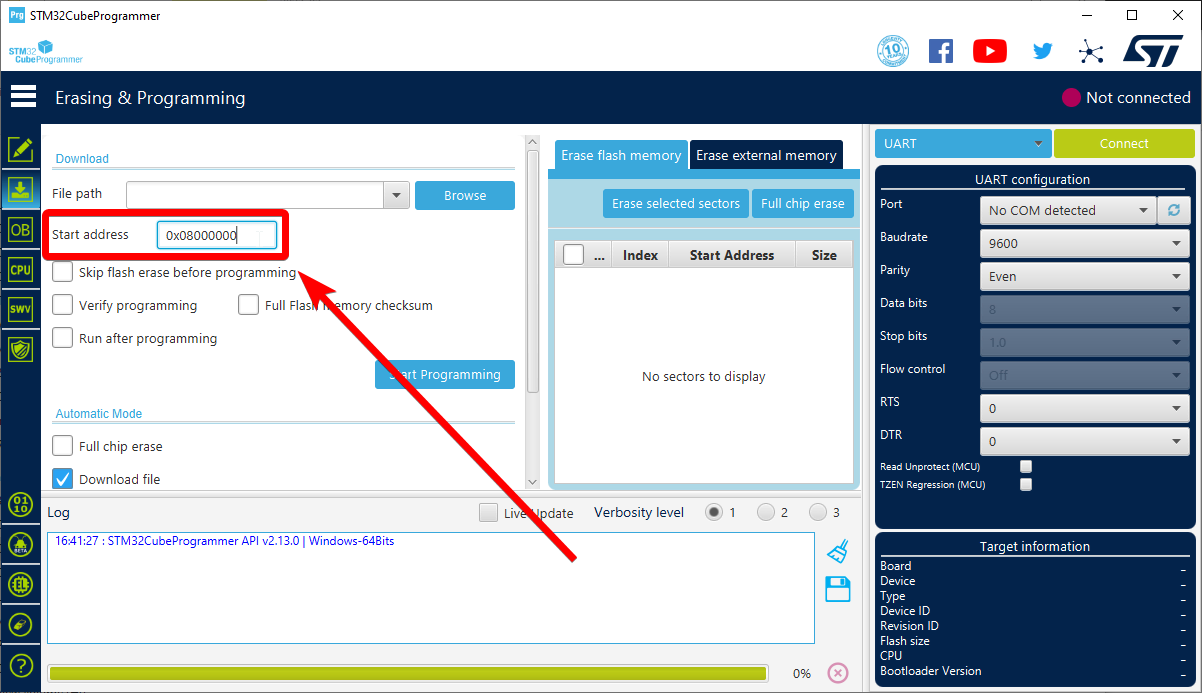
-
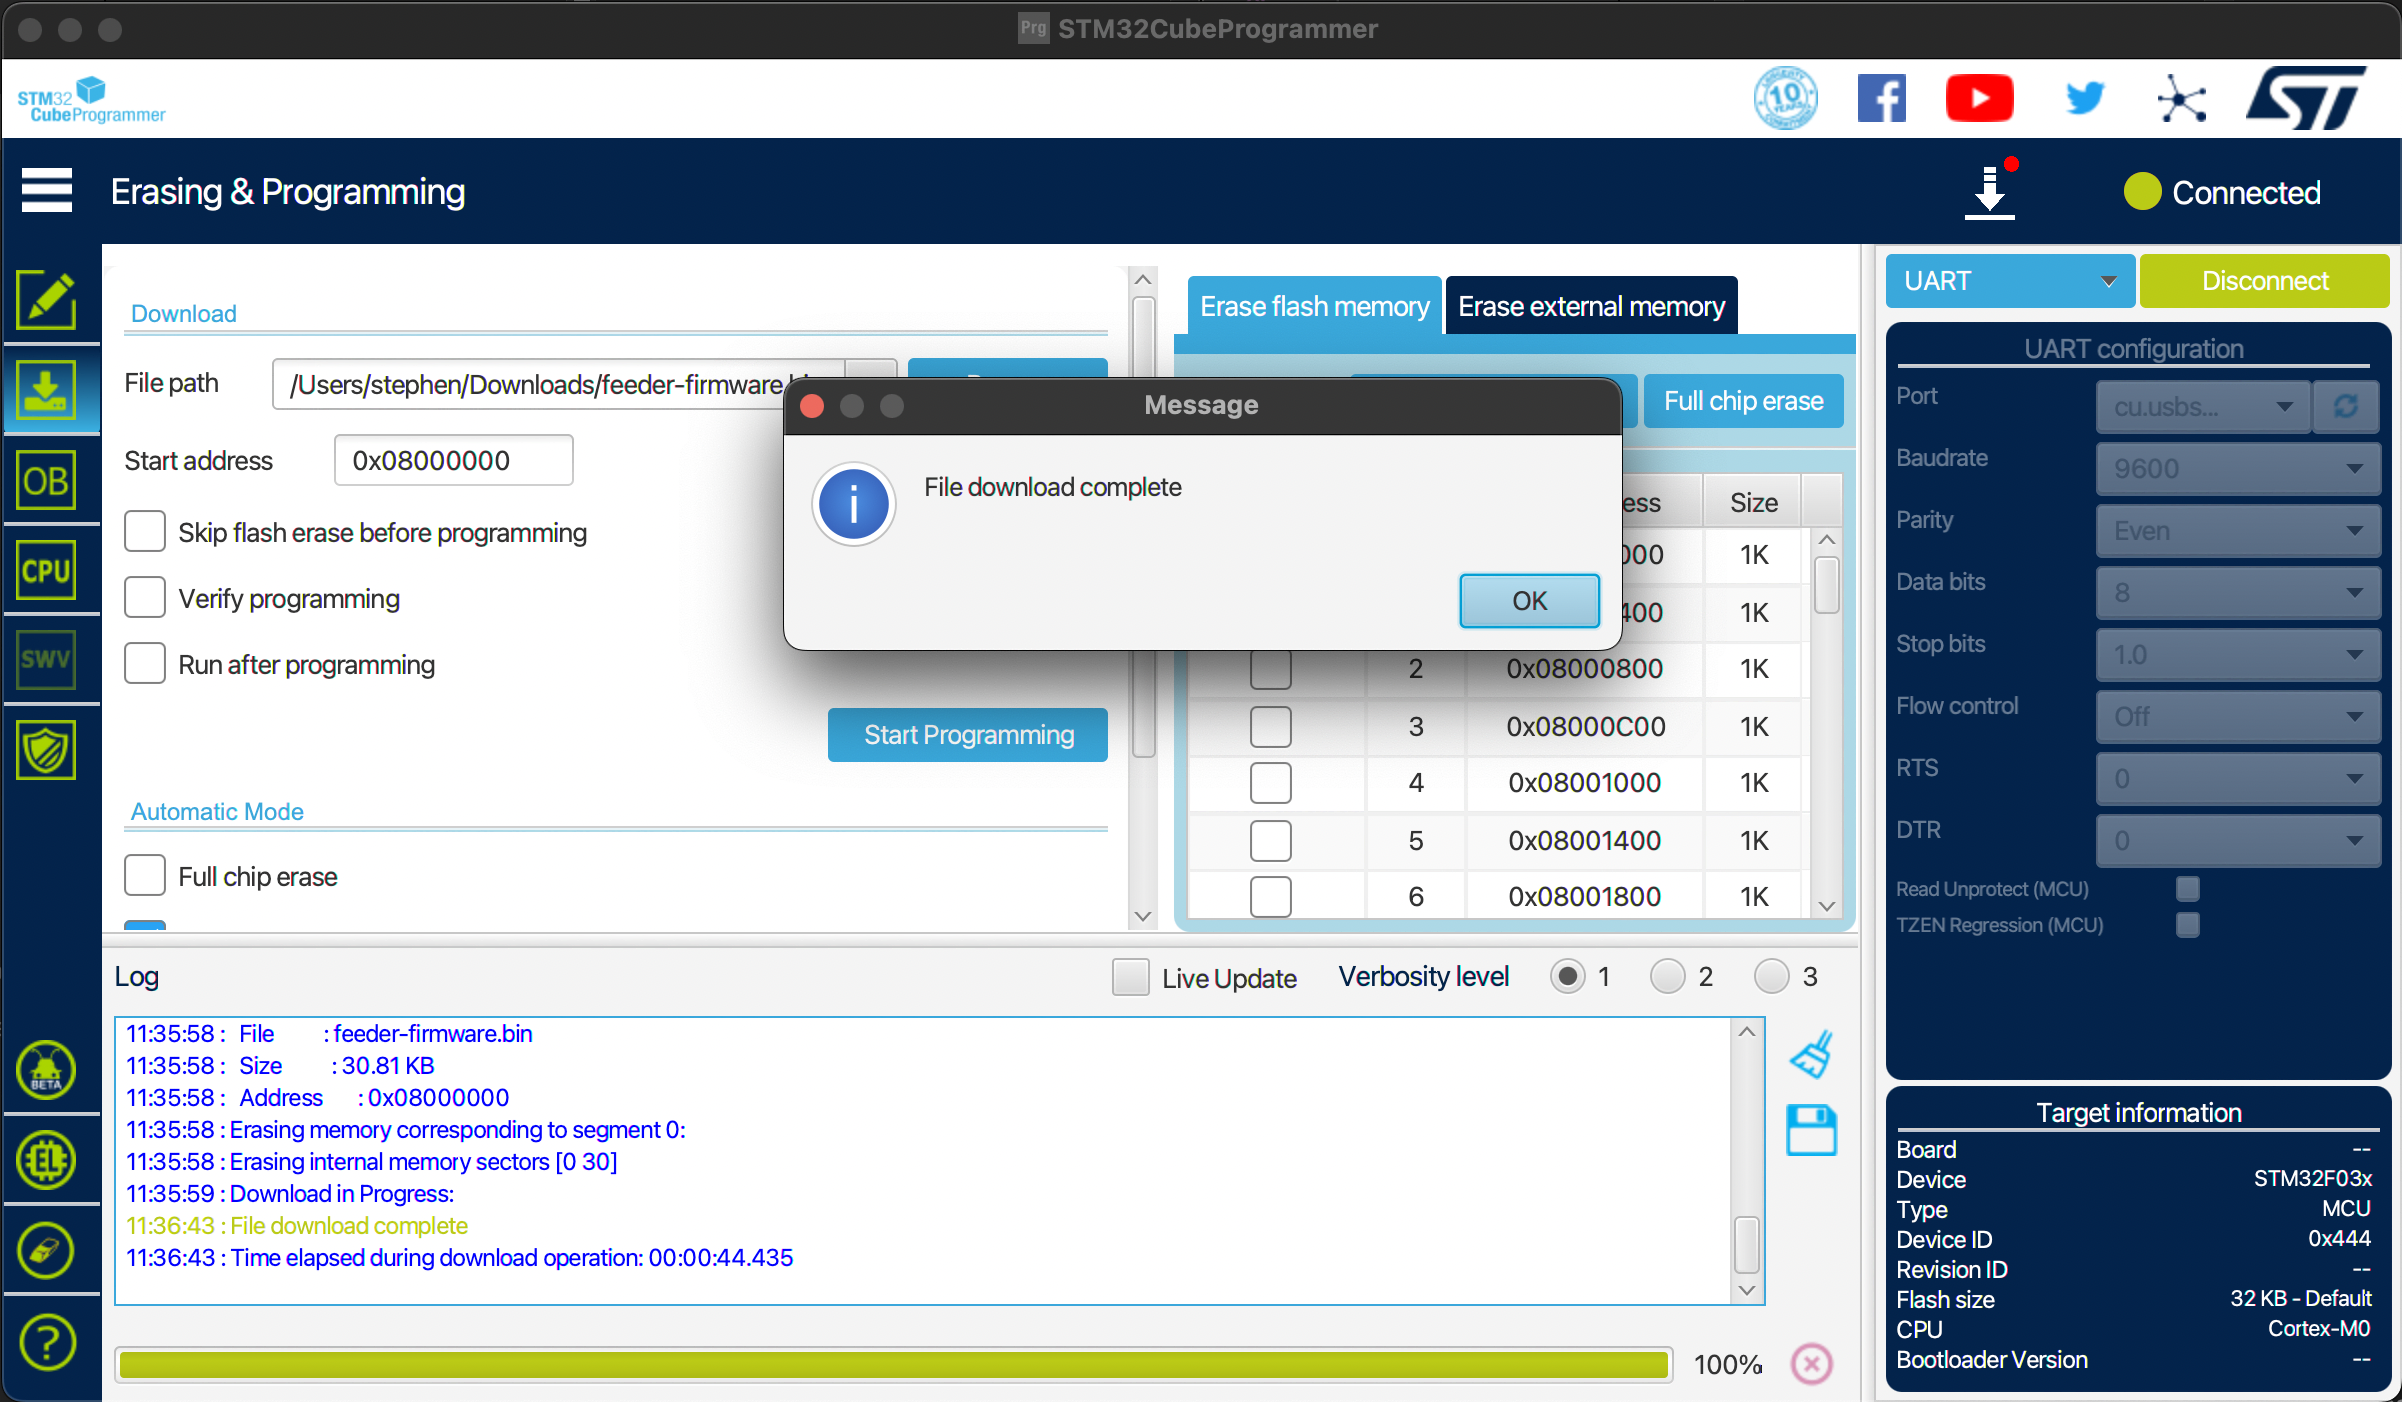
Click "Start Programming".

-
Wait until the software prompts that the firmware has been downloaded successfully. You may disconnect the programmer from the feeder.
Checking Current Firmware Version
- Press and hold both buttons on the feeder.
- Wait until the light comes on, indicating that you've switched modes.
-
Keep the buttons held until the light goes off.
Firmware versions v1.0.2 and before
Earlier versions of firmware will never turn off the light. If the light stays on, you're running v1.0.2 or earlier. Update your firmware to get the latest features and bugfixes.
-
Watch the indicator light and take note of its color, and how many times it flashes.
The gif above shows the version being checked for a feeder running v1.0.3. Both buttons are held and the mode light comes on. The mode light goes off, and the indicator light flashes green once. -
Once the indicator light is done flashing, release the buttons.
- Use the table below to identify the firmware version loaded on your feeder.
| Firmware Version | Flashes | |
|---|---|---|
| Any Beta Firmware | One Red Flash | 🟥 |
| v1.0.2 or previous | No Flash | |
| v1.0.3 or higher | One Green Flash | 🟩 |
Next Steps
Next, you'll mount your feeders.