Connecting the Pneumatics
Now that we've got everything wired up, it's time to get all the tubing plumbed.
| Qty | Part |
|---|---|
| 65 mm | 6mm Tubing (Clear) |
| 230 mm | 6mm Tubing (Clear) |
| 235 mm | 4mm Tubing (Black) |
| Remaining | 4mm Tubing (Black) |
Plumbing the staging plate
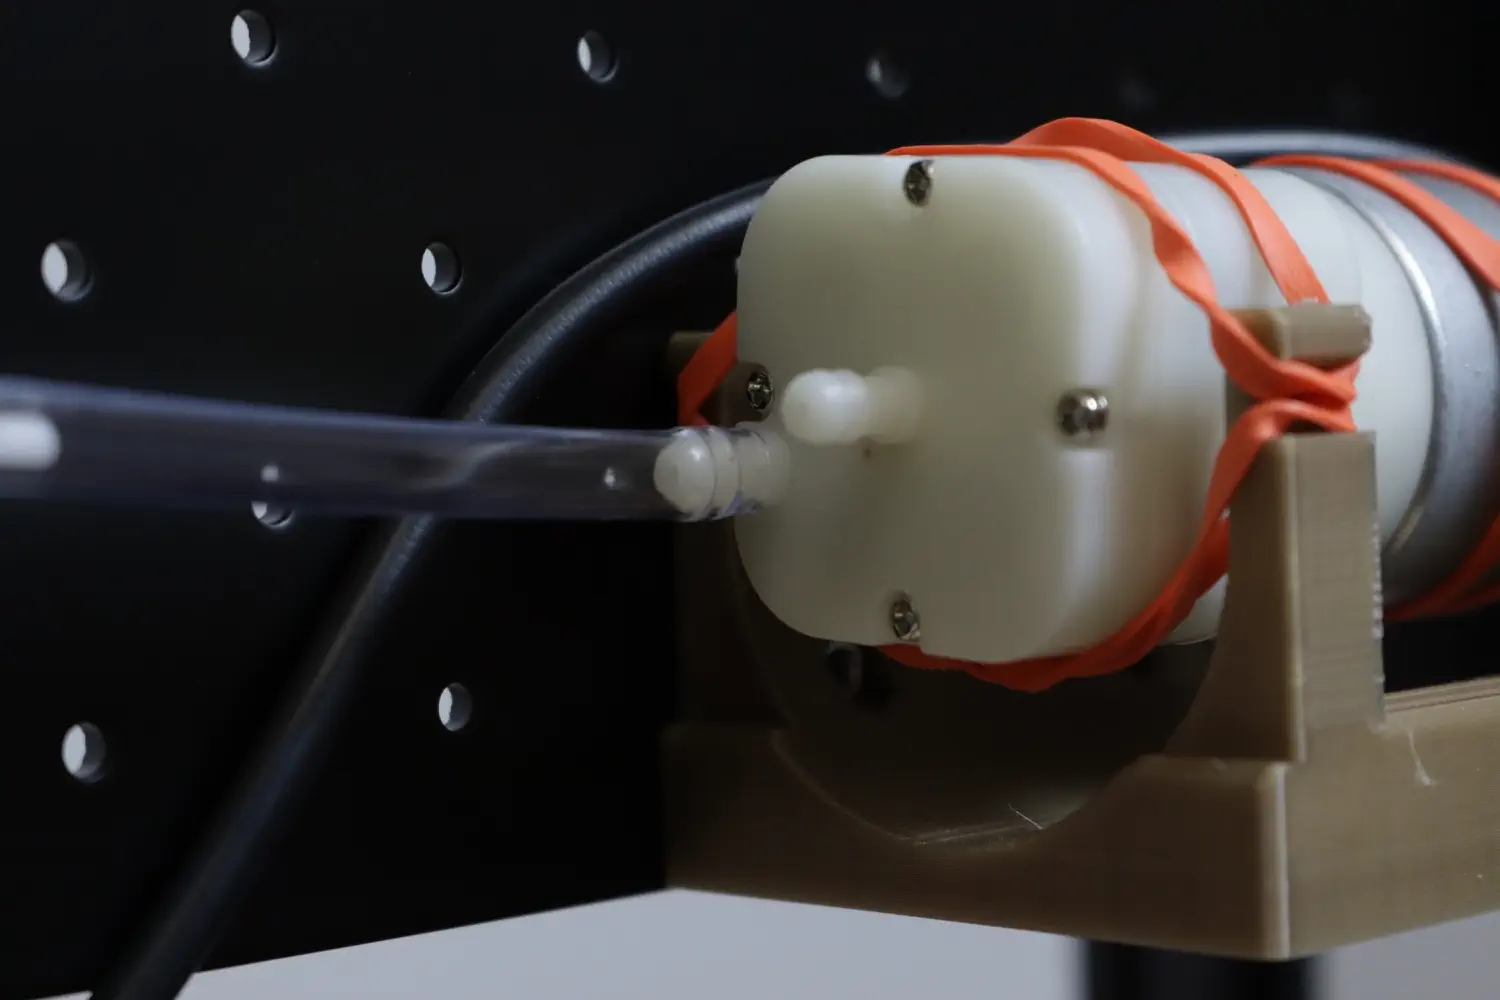
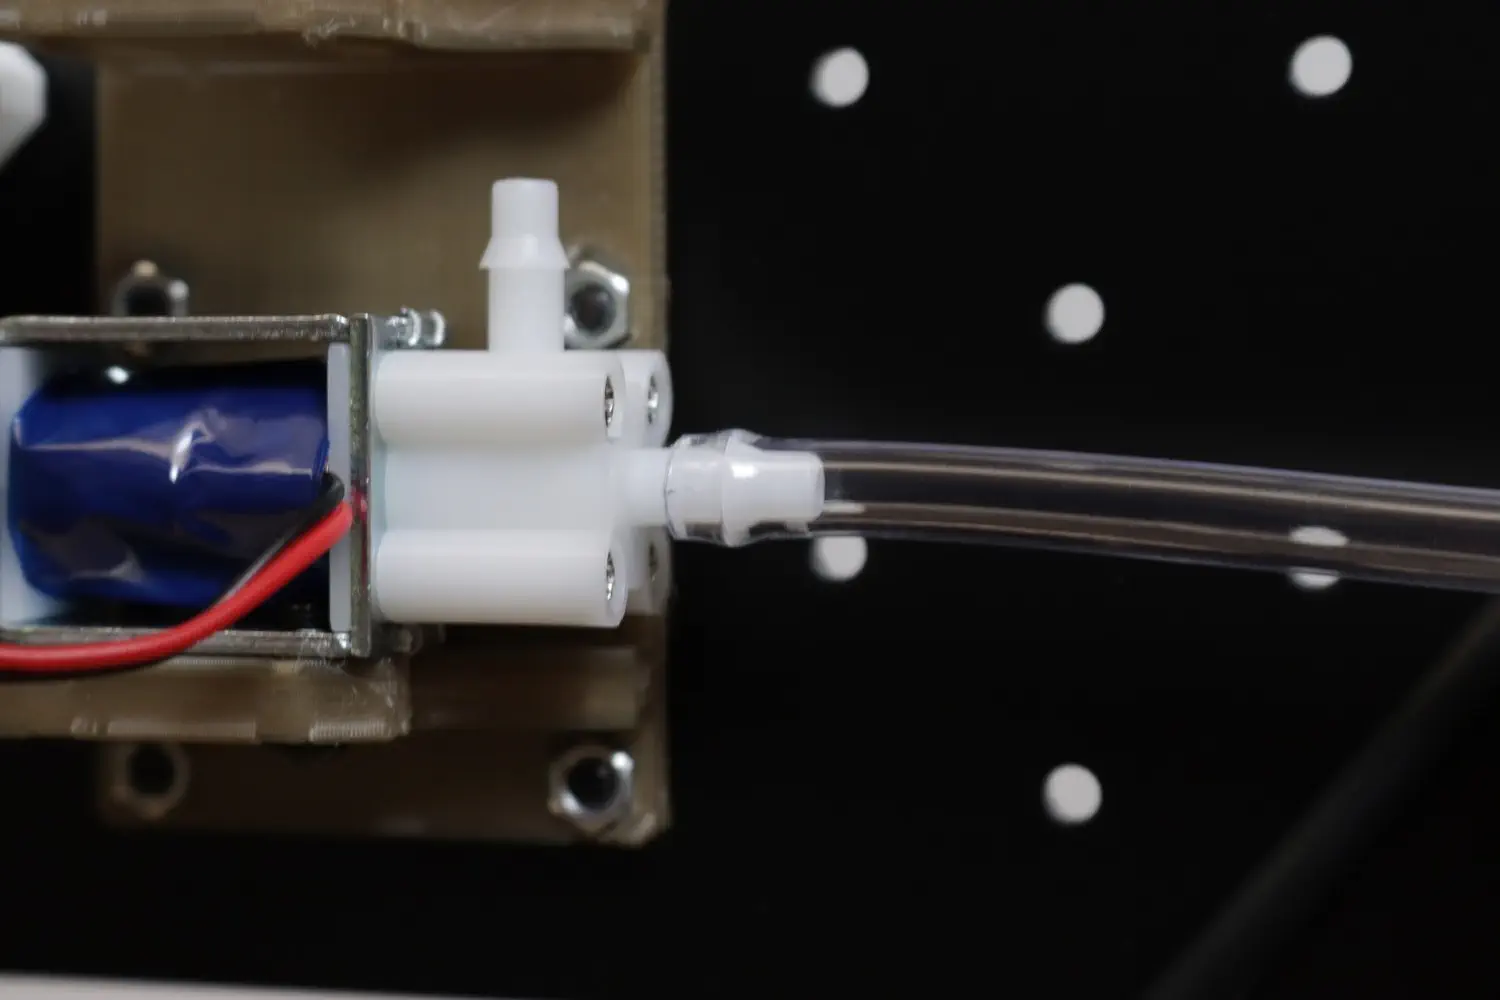
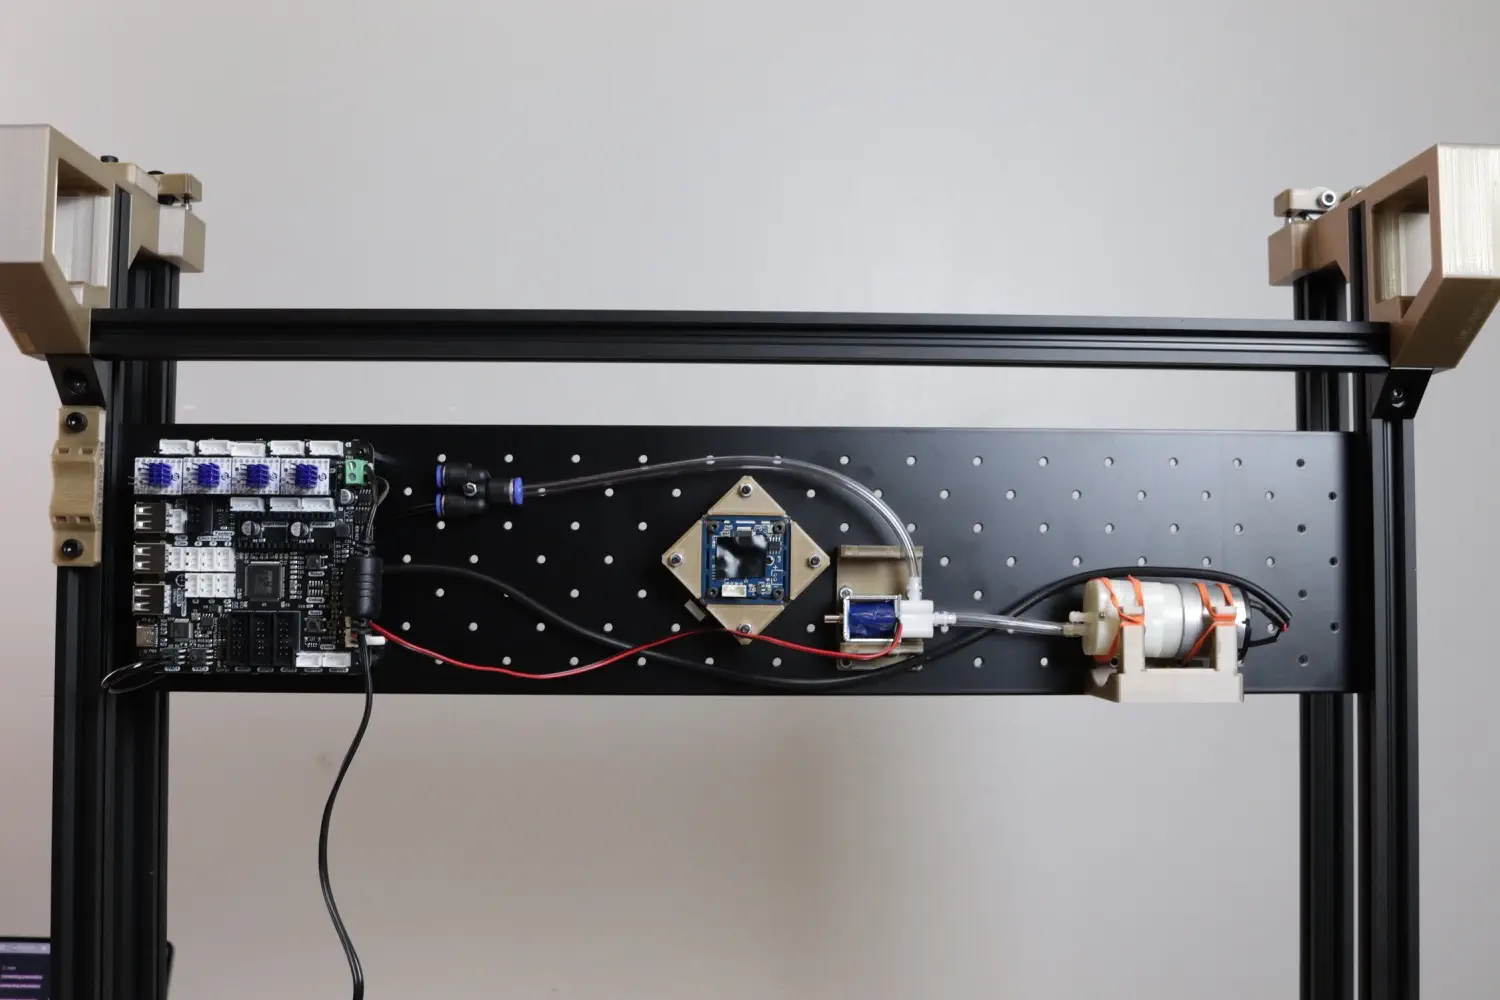
- The origin of vacuum in the machine is our vacuum pump. The off-center port is the one that provides vacuum. Start by cutting a 65mm section of the 6mm clear tubing and pushing it onto the off-center port on the vacuum pump. Push the other end onto the inline plastic port of the valve as shown below.
-
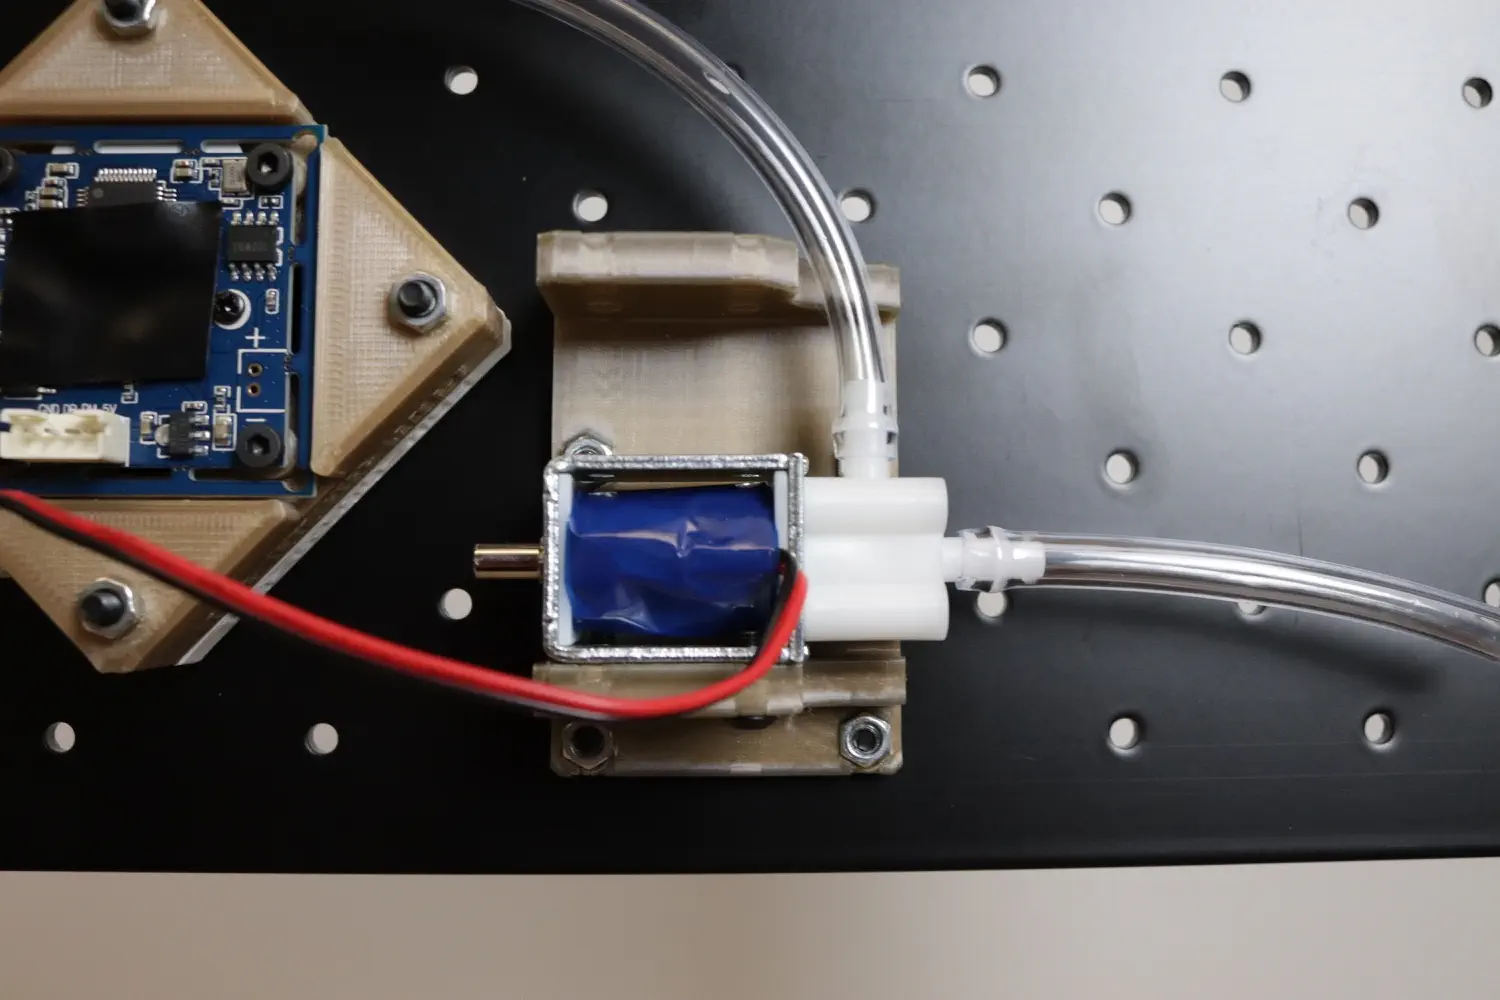
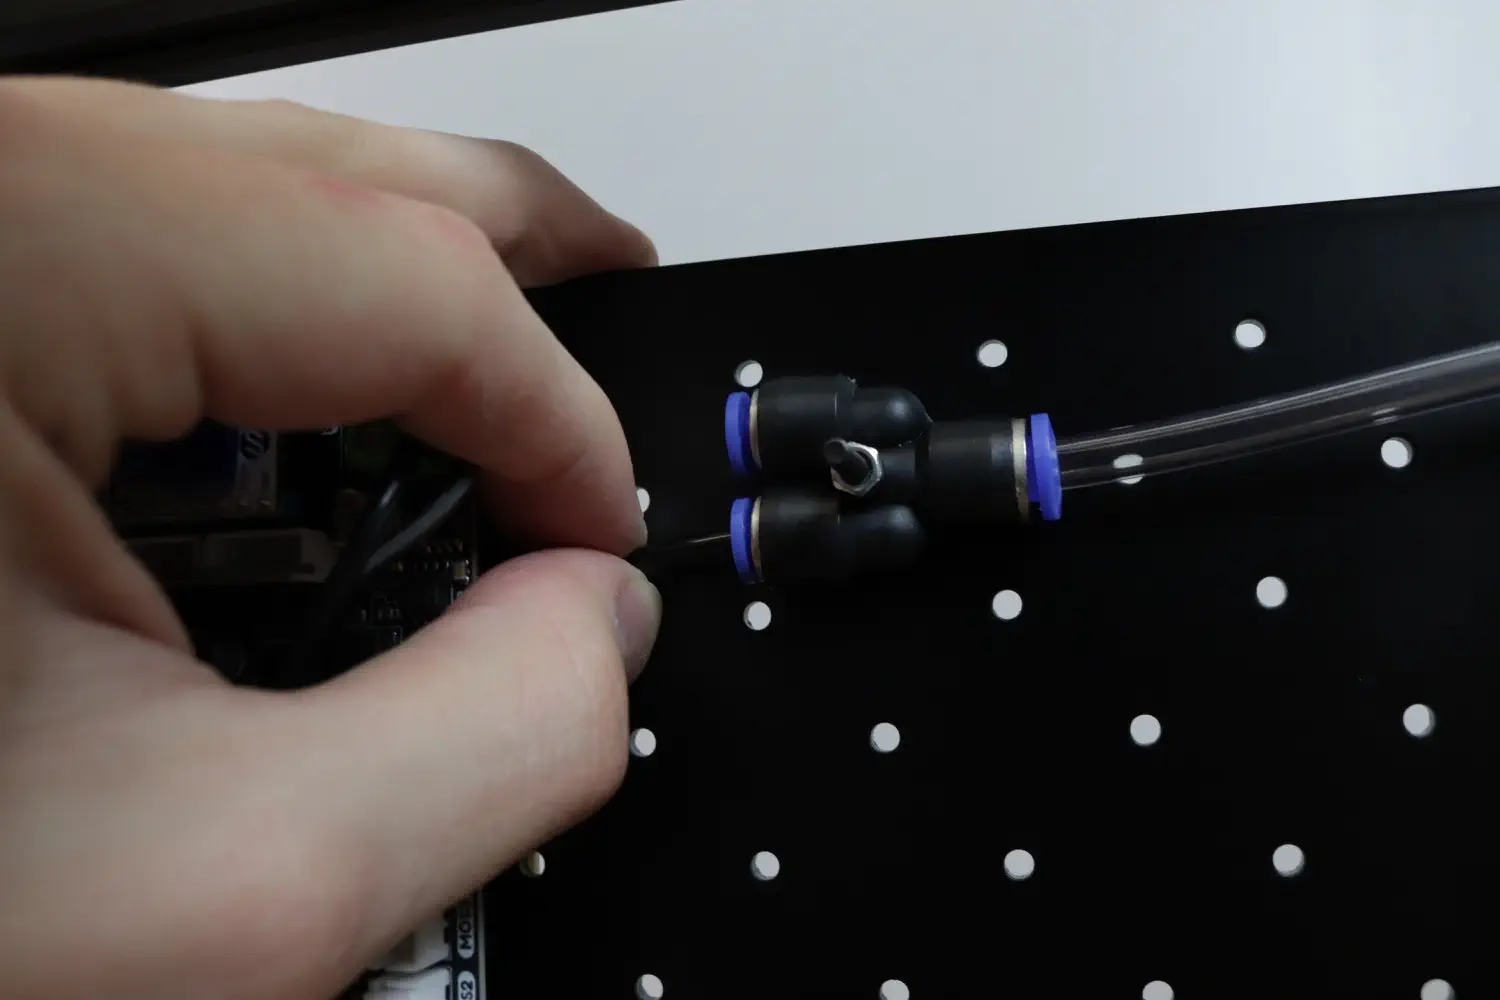
Cut a 230mm section of the 6mm clear tubing and push it onto the right-angle plastic port of the valve, and push the other side into the single, larger port of the Y splitter.
-
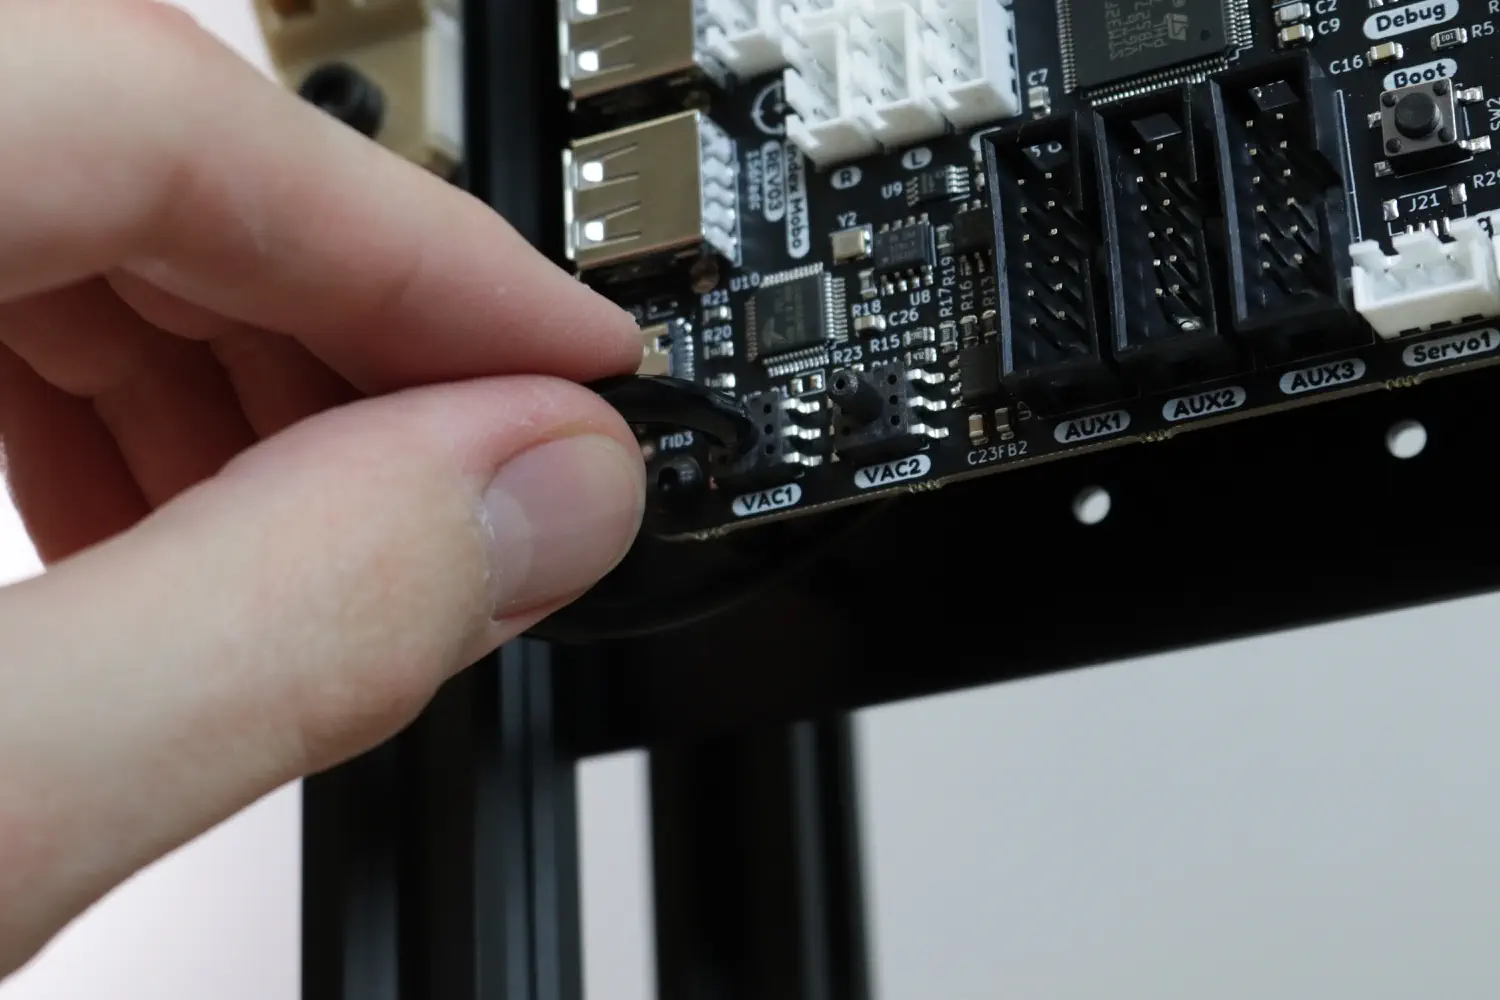
Switch to using the smaller, 4mm black tubing. Cut a 235mm length of 4mm OD tubing and push one side into a fork of the Y splitter, and route the other end underneath the motherboard and onto the
VAC1sensor port.Keep In Mind
This sensor is only attached to the motherboard with six solder joints. Be gentle when pushing the tubing onto it. Twisting the tubing back and forth as you push it down can help get it on without too much force.
Plumbing the X gantry
-
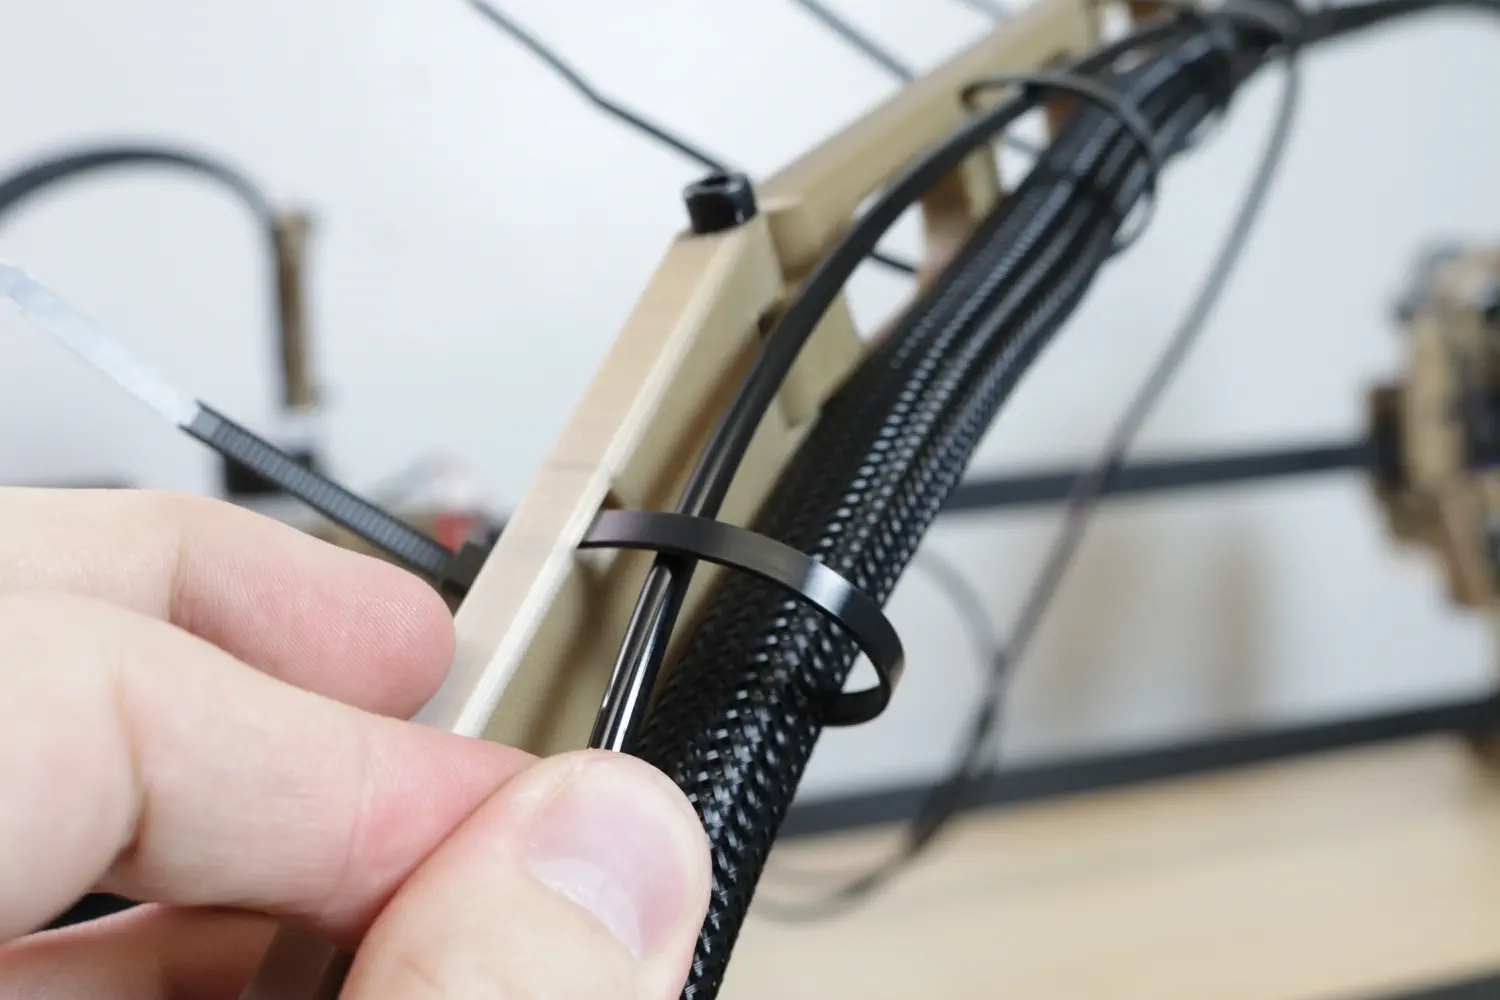
Now take the remaining length of 4mm black tubing and push it into the other fork of the Y splitter. Take the loose end, and route it underneath the motherboard, then up through all the zip ties that are holding the X umbilical in place, including those along the swivel arm.
-
Now that the pneumatics are also routed, we can finally tighten the zip ties on the umbilical cable guide. While your machine is still back on its haunches, tighten the zip tie on the umbilical guide to secure the wires and tubing to the frame.
-
Bring your LumenPnP down onto its four legs, and tighten the zip ties, ensuring to keep a bit of slack between sections. You can move up the umbilical swivel and tighten all the zip ties along the whole thing.
-
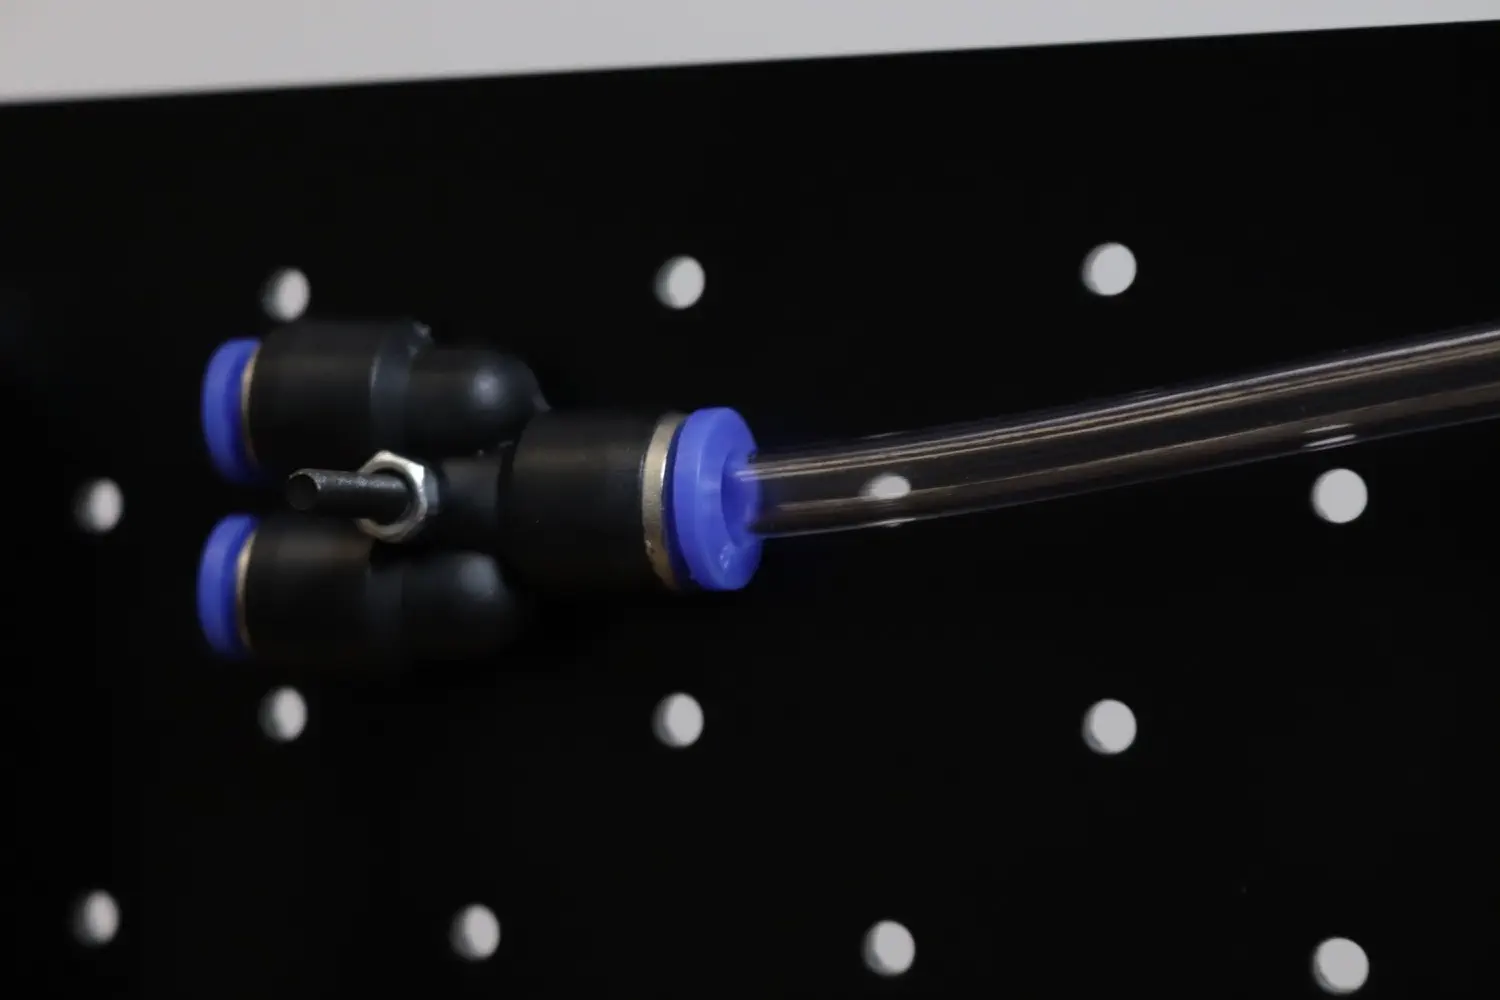
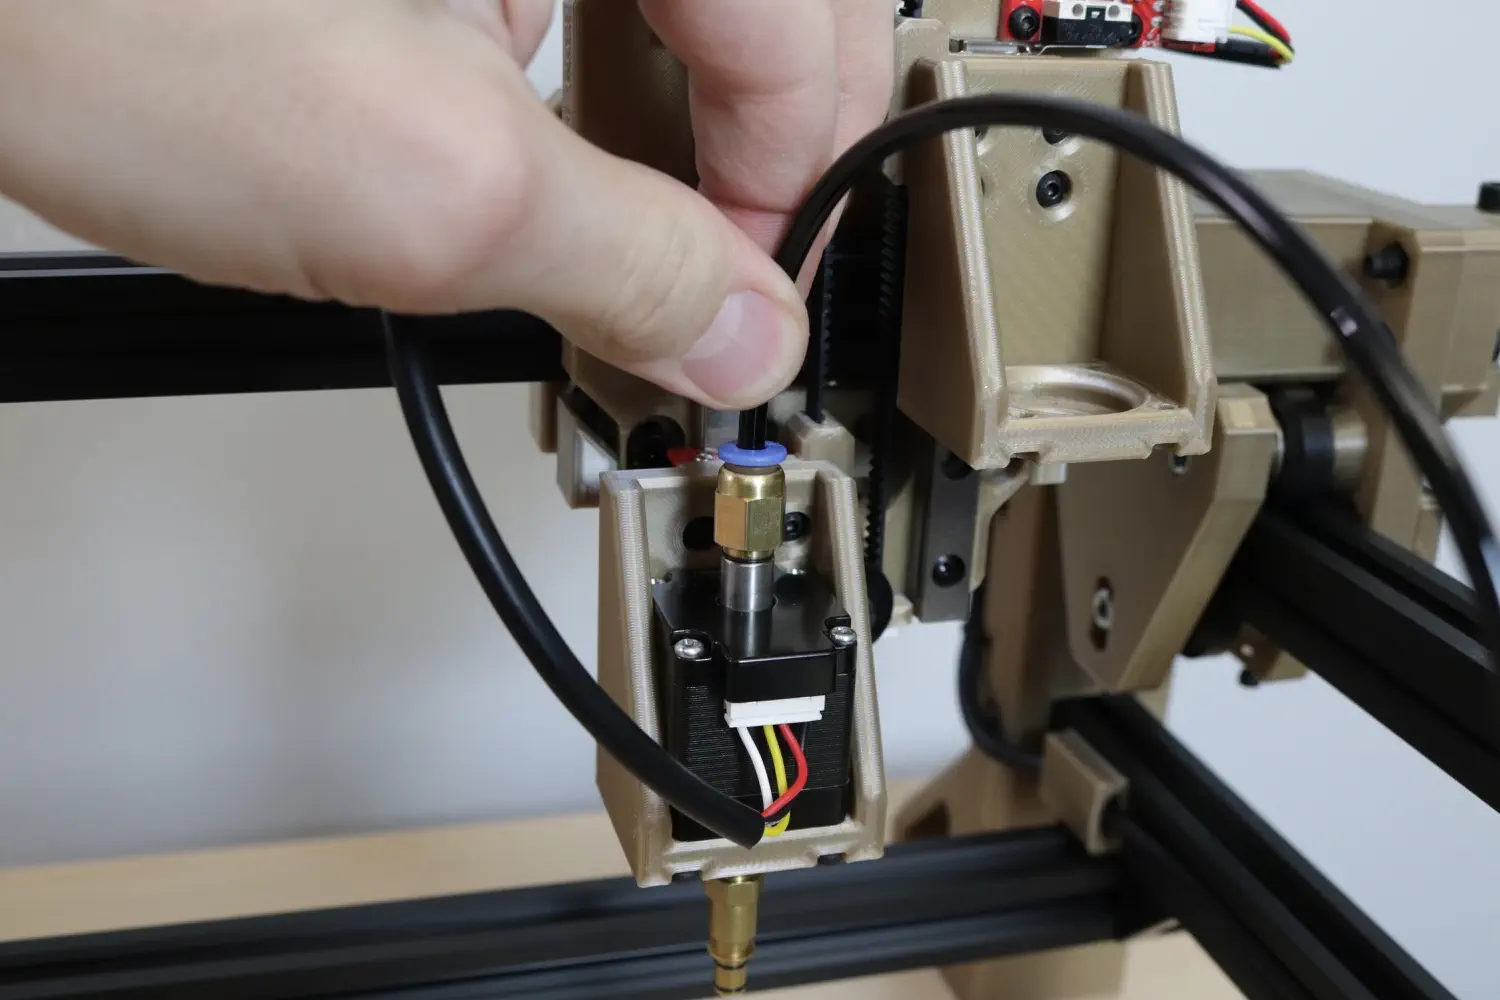
With the pneumatic tubing dangling loose past the end of the swivel arm, cut any excess tubing (still allowing some slack for motor rotation) push the other end into the pneumatic coupling on the back side of the rotation stepper motor. Extra slack will allow the motor to rotate freely 180 degrees in each direction, so err on the side of leaving more than less. If the tubing falls away from the umbilical, use one or two small zip ties to secure them together.
 The bottom of the staging plate should look like the image below:
Congratulations, you're all wired and plumbed up! It's time to give it a test!
Next steps
Continue to testing your machine.