Connecting to the Motherboard
Take your LumenPnP and flip it up onto its haunches. You should see lots of cables loosely attached to the Frame Umbilical Mount, all looking for a home. We're about to give them one!
Plugging in
-
We'll first start by plugging in the Y motors you routed behind the motherboard in Wiring the Y Motors. Plug the cable labeled
Y1into the left Y motor port on the motherboard, and plug theY2cable into the right one.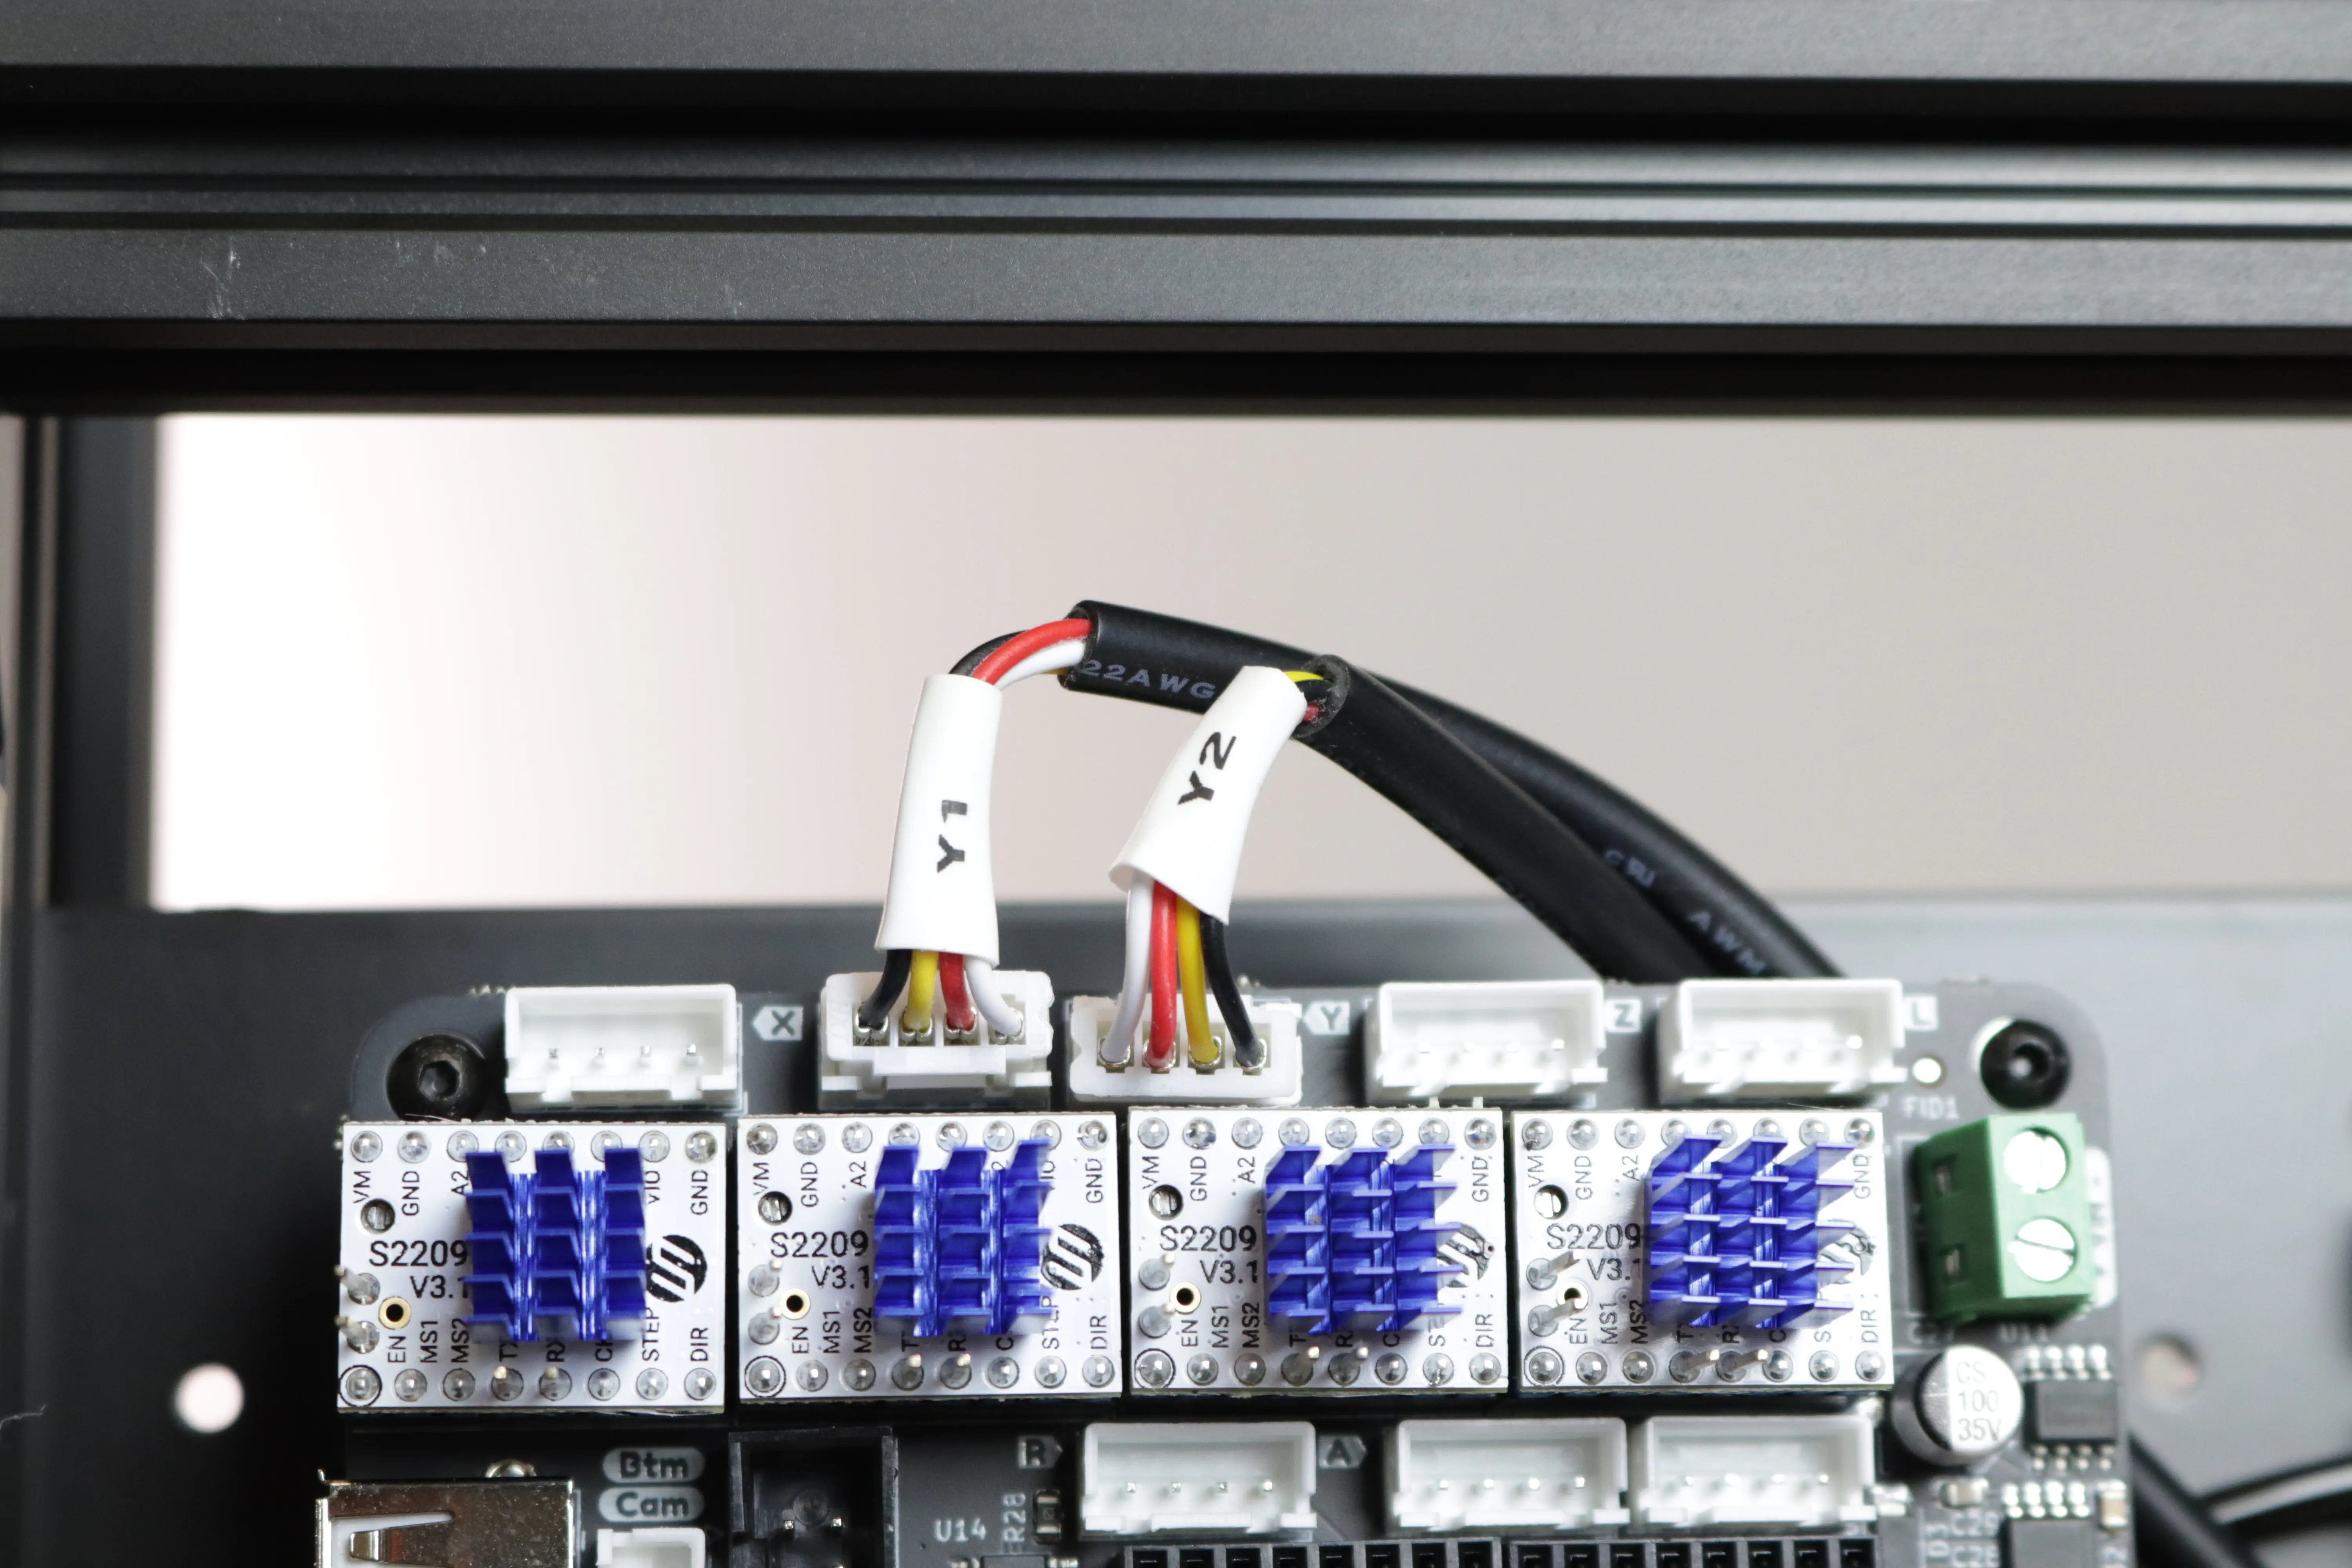
-
Take the Bottom Camera USB cable and run it to the left across the staging plate, under the motherboard, and out the other side. Plug it into the USB port by the label
Btm Cam. Store the excess cable underneath the motherboard. -
Now we'll do the same thing, but with the Top Camera cable. Guide it from the top left of the staging plate, underneath the motherboard from the top side, then out the side like the other USB cable. Plug it into the USB port by the label
Top Camand Store the excess cable underneath the motherboard. -
The rest of the cables can be routed without being tucked underneath the motherboard. Plug in the listed labeled cables into their respective ports, shown below:
| Cable Label | Mobo Label |
|---|---|
XM |
X |
Y1 |
Y (Left Port) |
Y2 |
Y (Right Port) |
ZM |
Z |
LM |
L |
XL |
X (Under Limit Switches) |
ZL |
Z (Under Limit Switches) |
YL |
Y (Under Limit Switches) |
UL |
Btm Cam |
DL |
Top Cam |
P1 |
MOS1 |
| Valve 1 (No Label) | MOS2 |
Strain Relief
-
Now that we have everything plugged in, it's time to attach all these loose cables to the frame. Use some
Cable Clampswith some M3x14mm screws and M3 nuts to hold down the cables across the staging plate.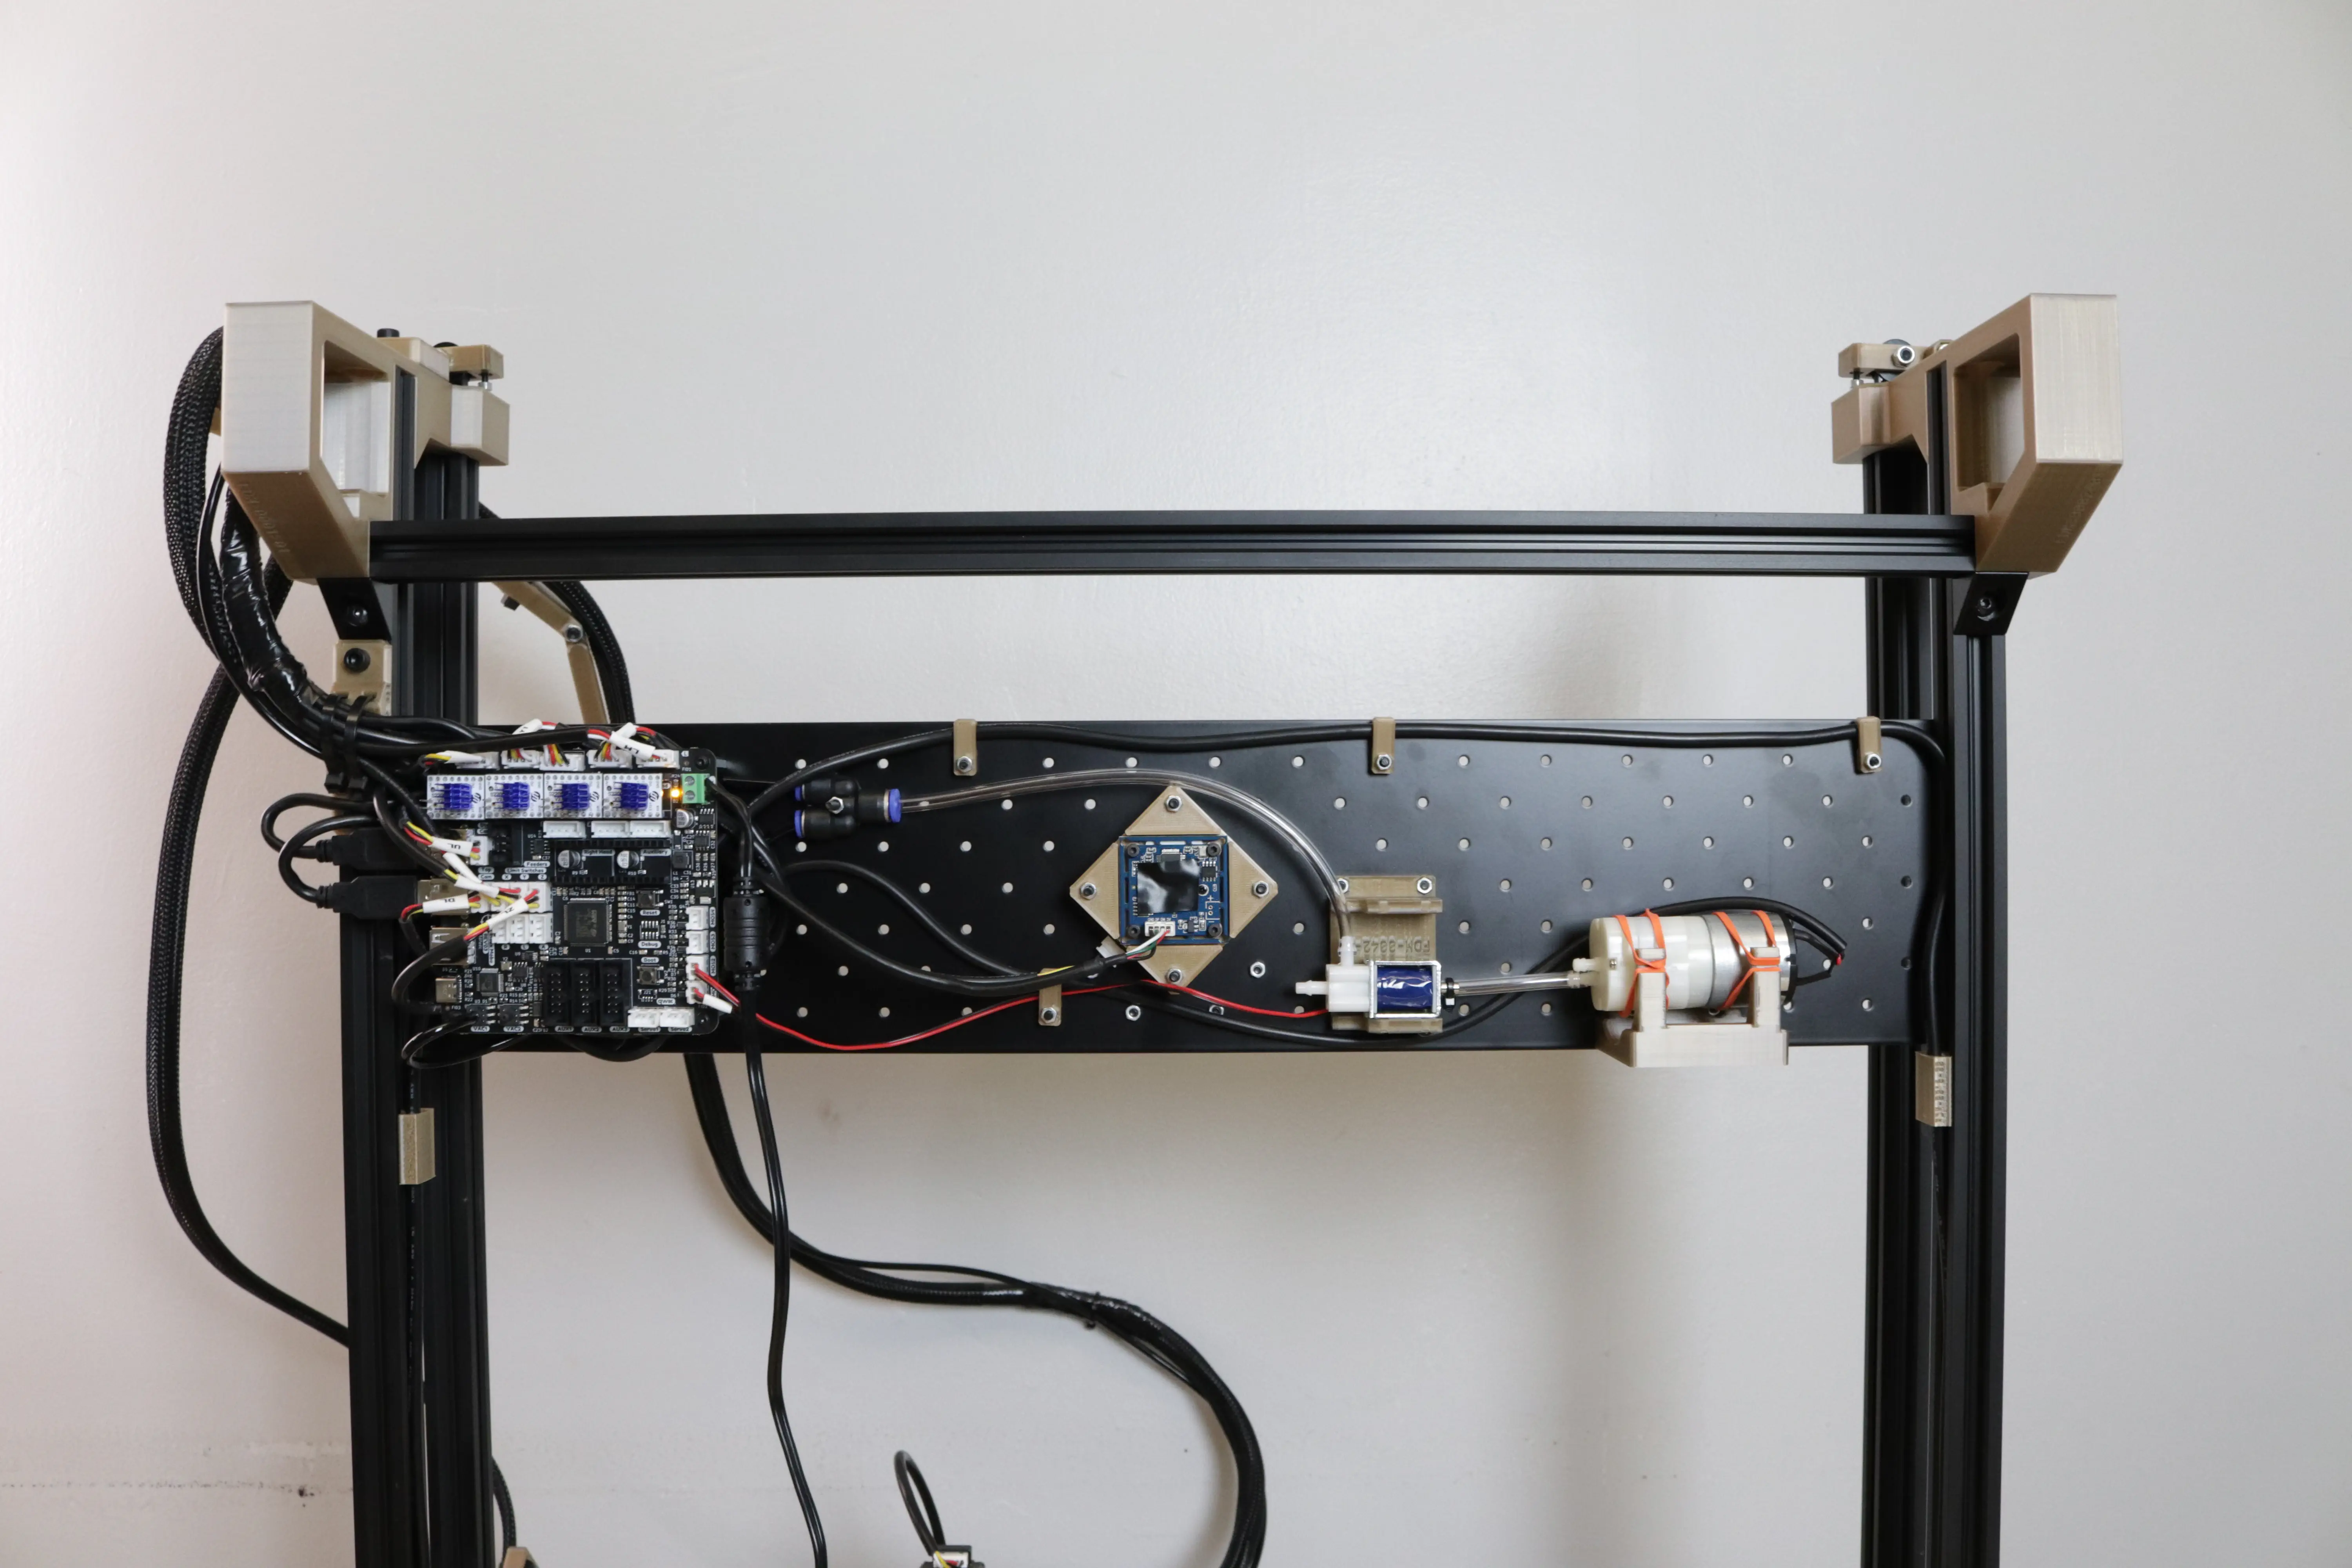
-
Take your umbilical cable bundles and loosely secure them in place on the
Umbilical Guideusing two big zip ties. Don't tighten all the way yet; we still need to route the pneumatics.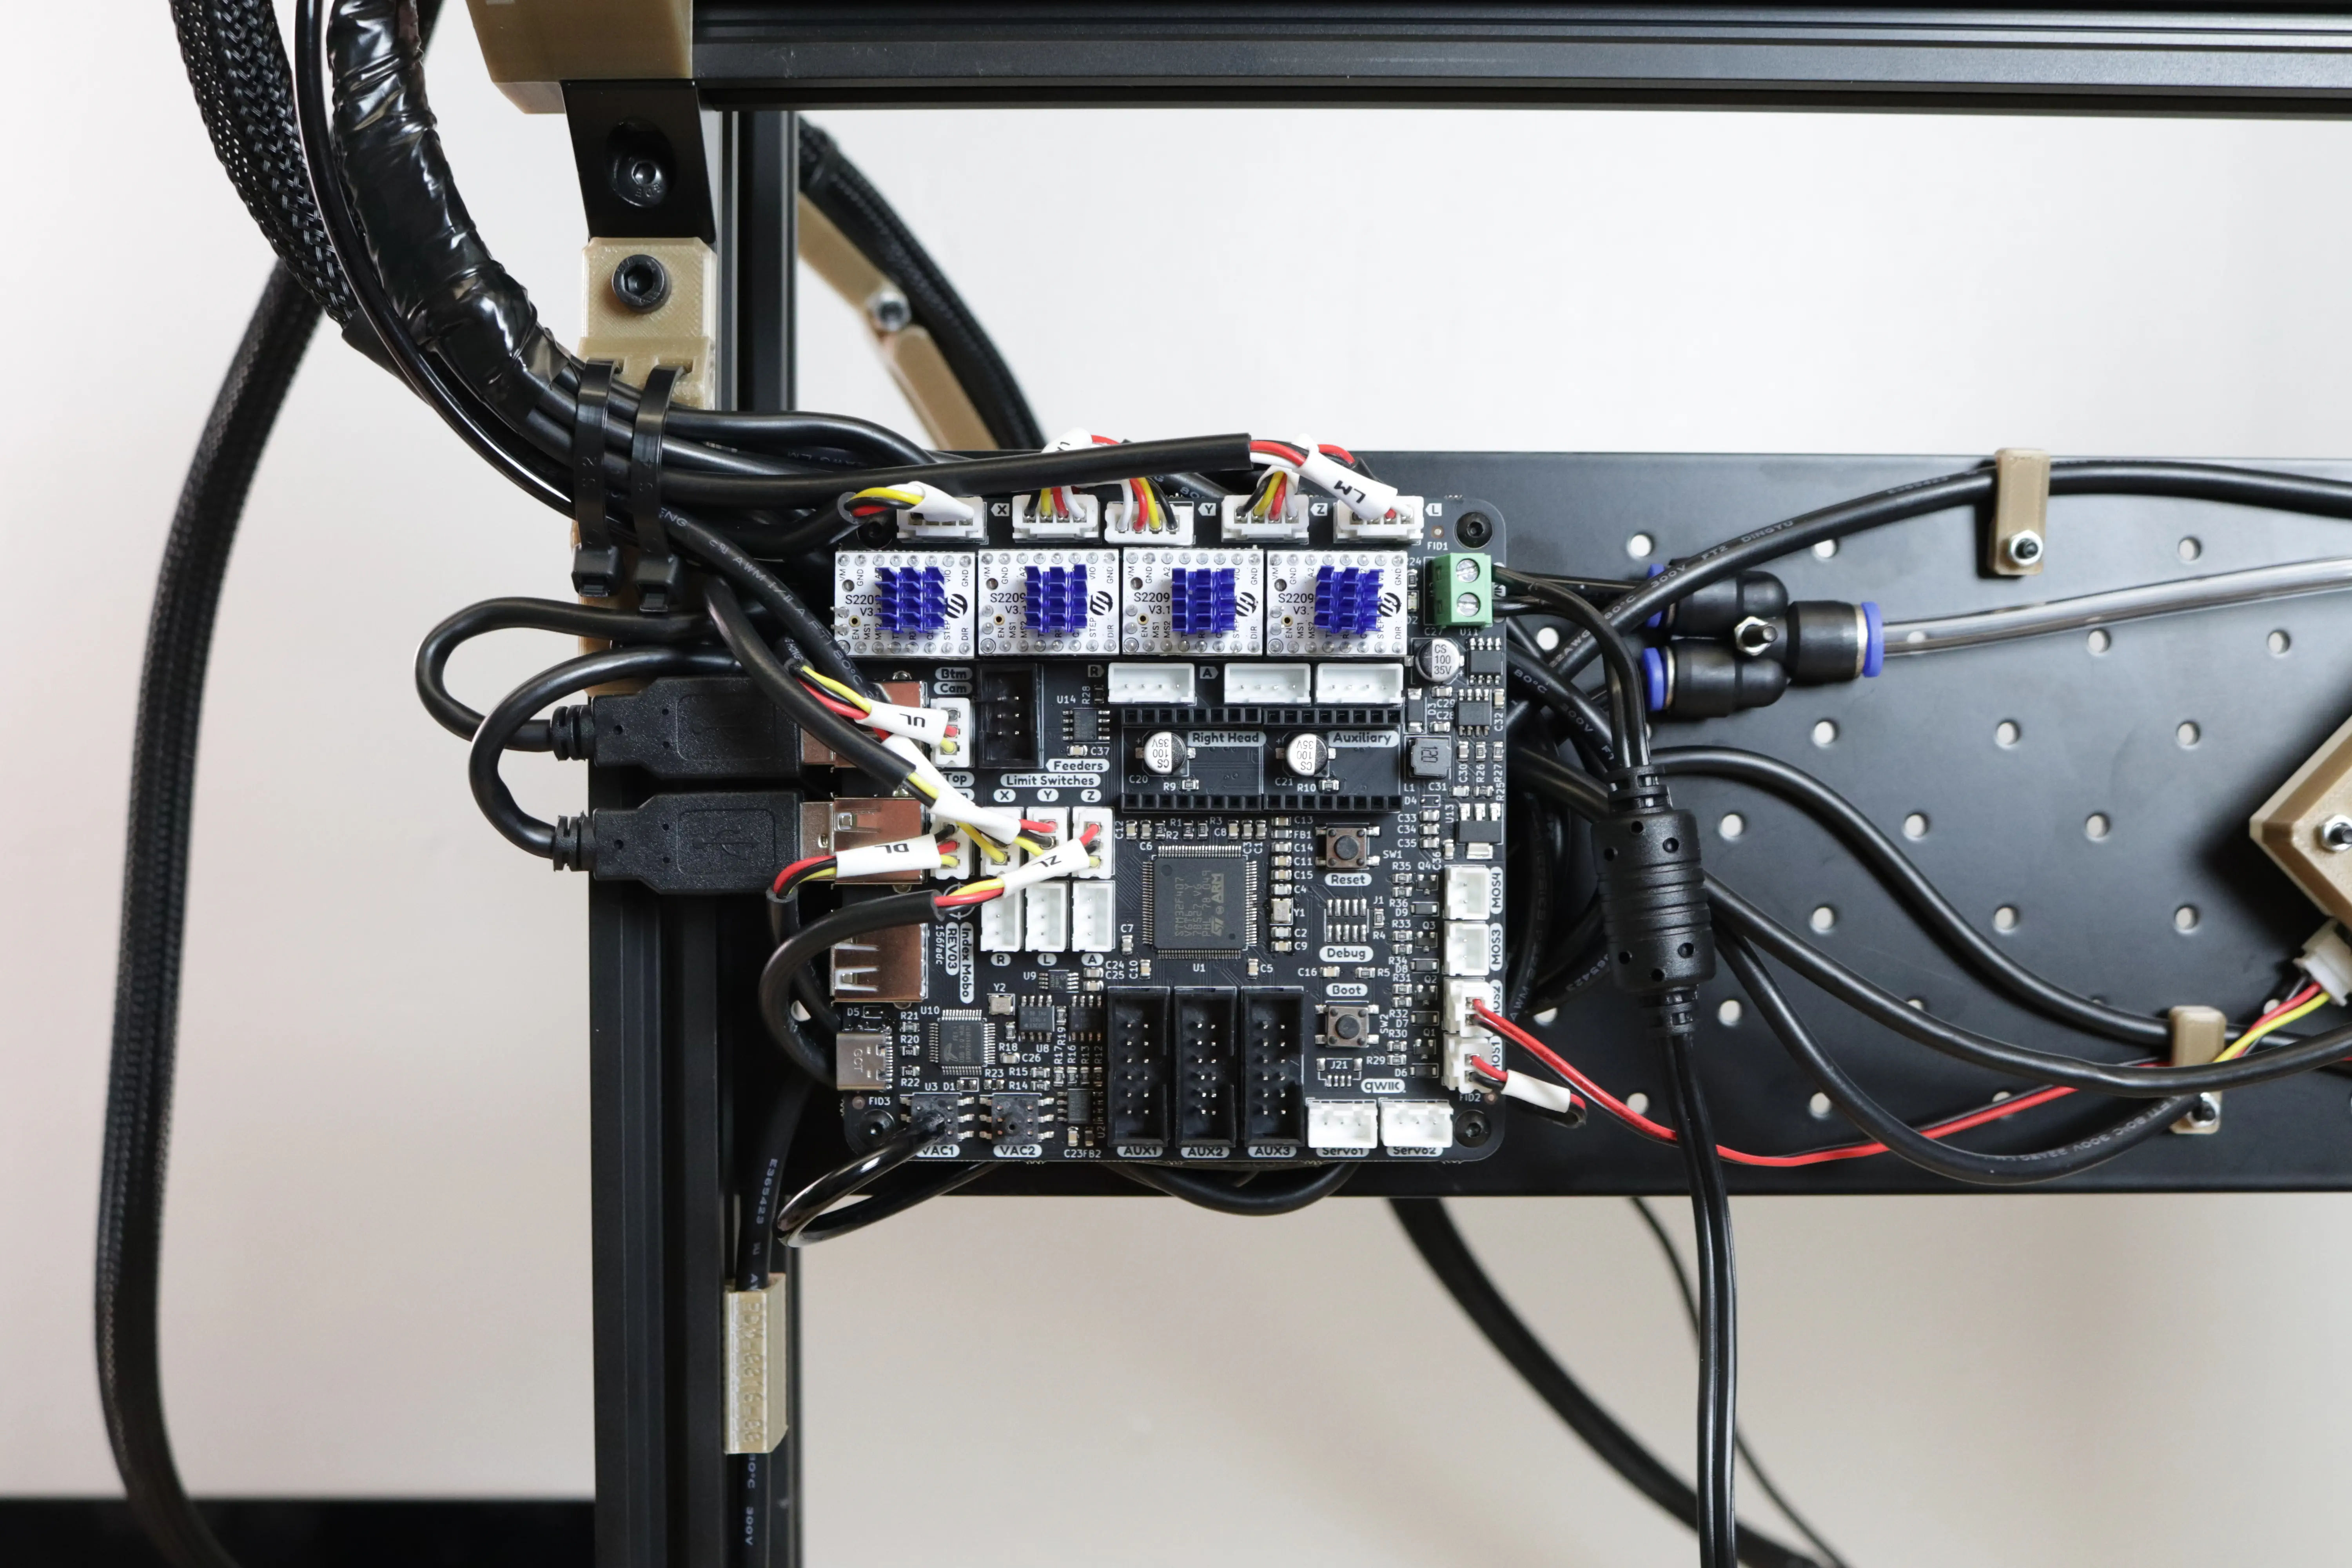
Next steps
Continue to connecting the pneumatics.