Nozzle Tip Runout Compensation
![]()
Nozzle Tip Runout Compensation measures how the nozzle tip's position shifts when the nozzle rotates. This shift is detected using the bottom camera. The compensation algorithm adjusts for any misalignment, ensuring more accurate placement. This process eliminates errors caused by runout, which can occur from either the nozzle tip or the nozzle itself. The calibration system automatically compensates for any combination of these factors. This section will be walking you through calibrating the N045 and N24 Nozzle Tips.
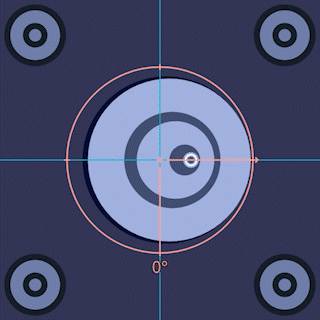
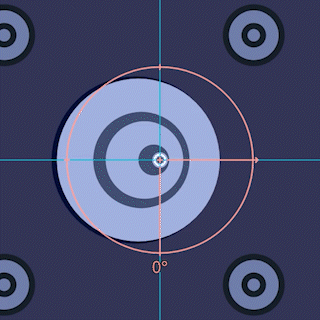
To better visualize what nozzle tip runout is and how the compensation helps, here is an example:
- Without Compensation:
- With Compensation:
Note
Runout can originate from either the nozzle tip or the nozzle it is attached to. The calibration system automatically handles both.
Nozzle Tip Runout Compensation for Nozzle: N1 (left toolhead)
🚨Important!🚨 Read this if you're continuing from the previous steps.
If you have just completed the previous steps, Nozzle: N1 should already be centered over the bottom camera, and you should be in the Bottom Camera Position tab.
Do not move the nozzle position.
Switch to the Device Settings tab.
Skip to Step 4 to continue.
-
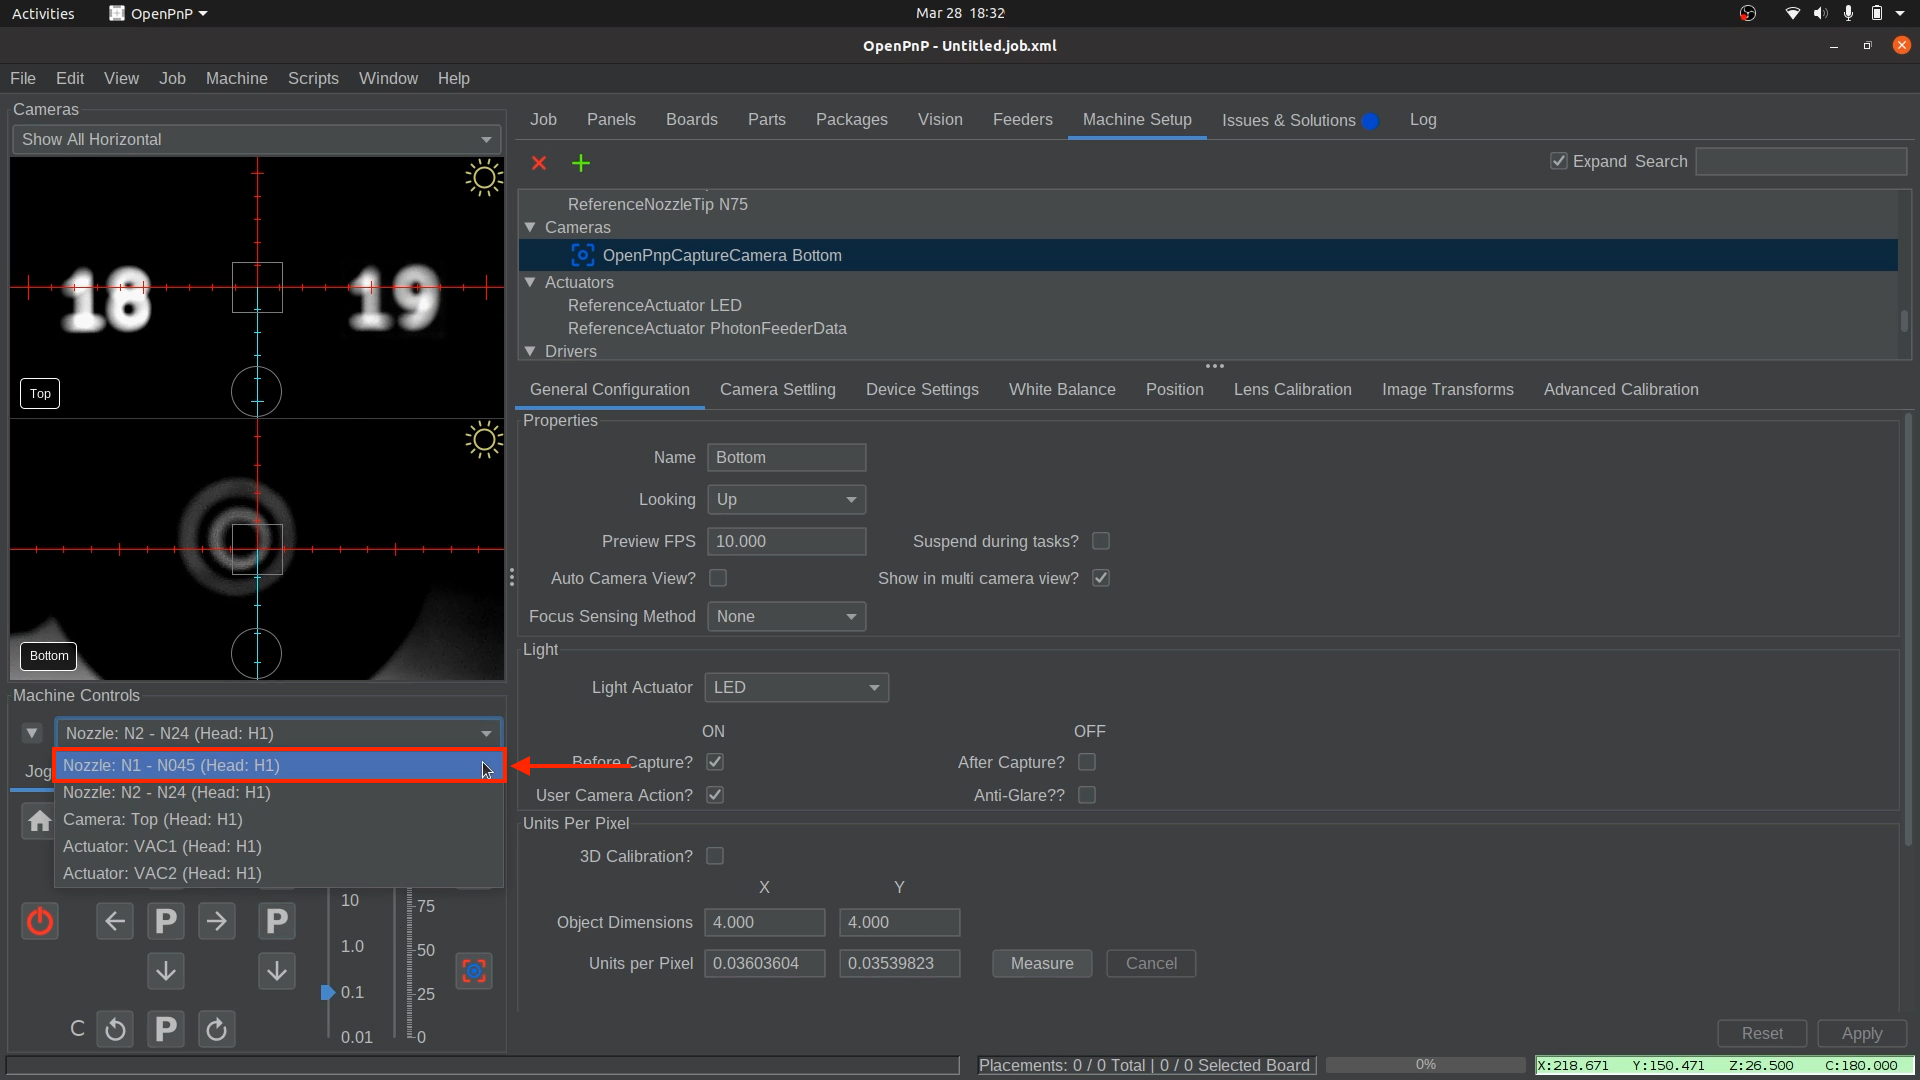
Select Nozzle: N1.
- If
Nozzle: N1is already centered over the bottom camera, switch to the bottom camera'sDevice Settingstab and skip toStep 4. - From the
Machine Controlsdropdown, selectNozzle: N1 - N045 (Head:H1).
- If
-
Open the bottom Camera Settings.
- Navigate to
Machine Setup > Cameras > OpenPnPCaptureCamera Bottom.
- Navigate to
-
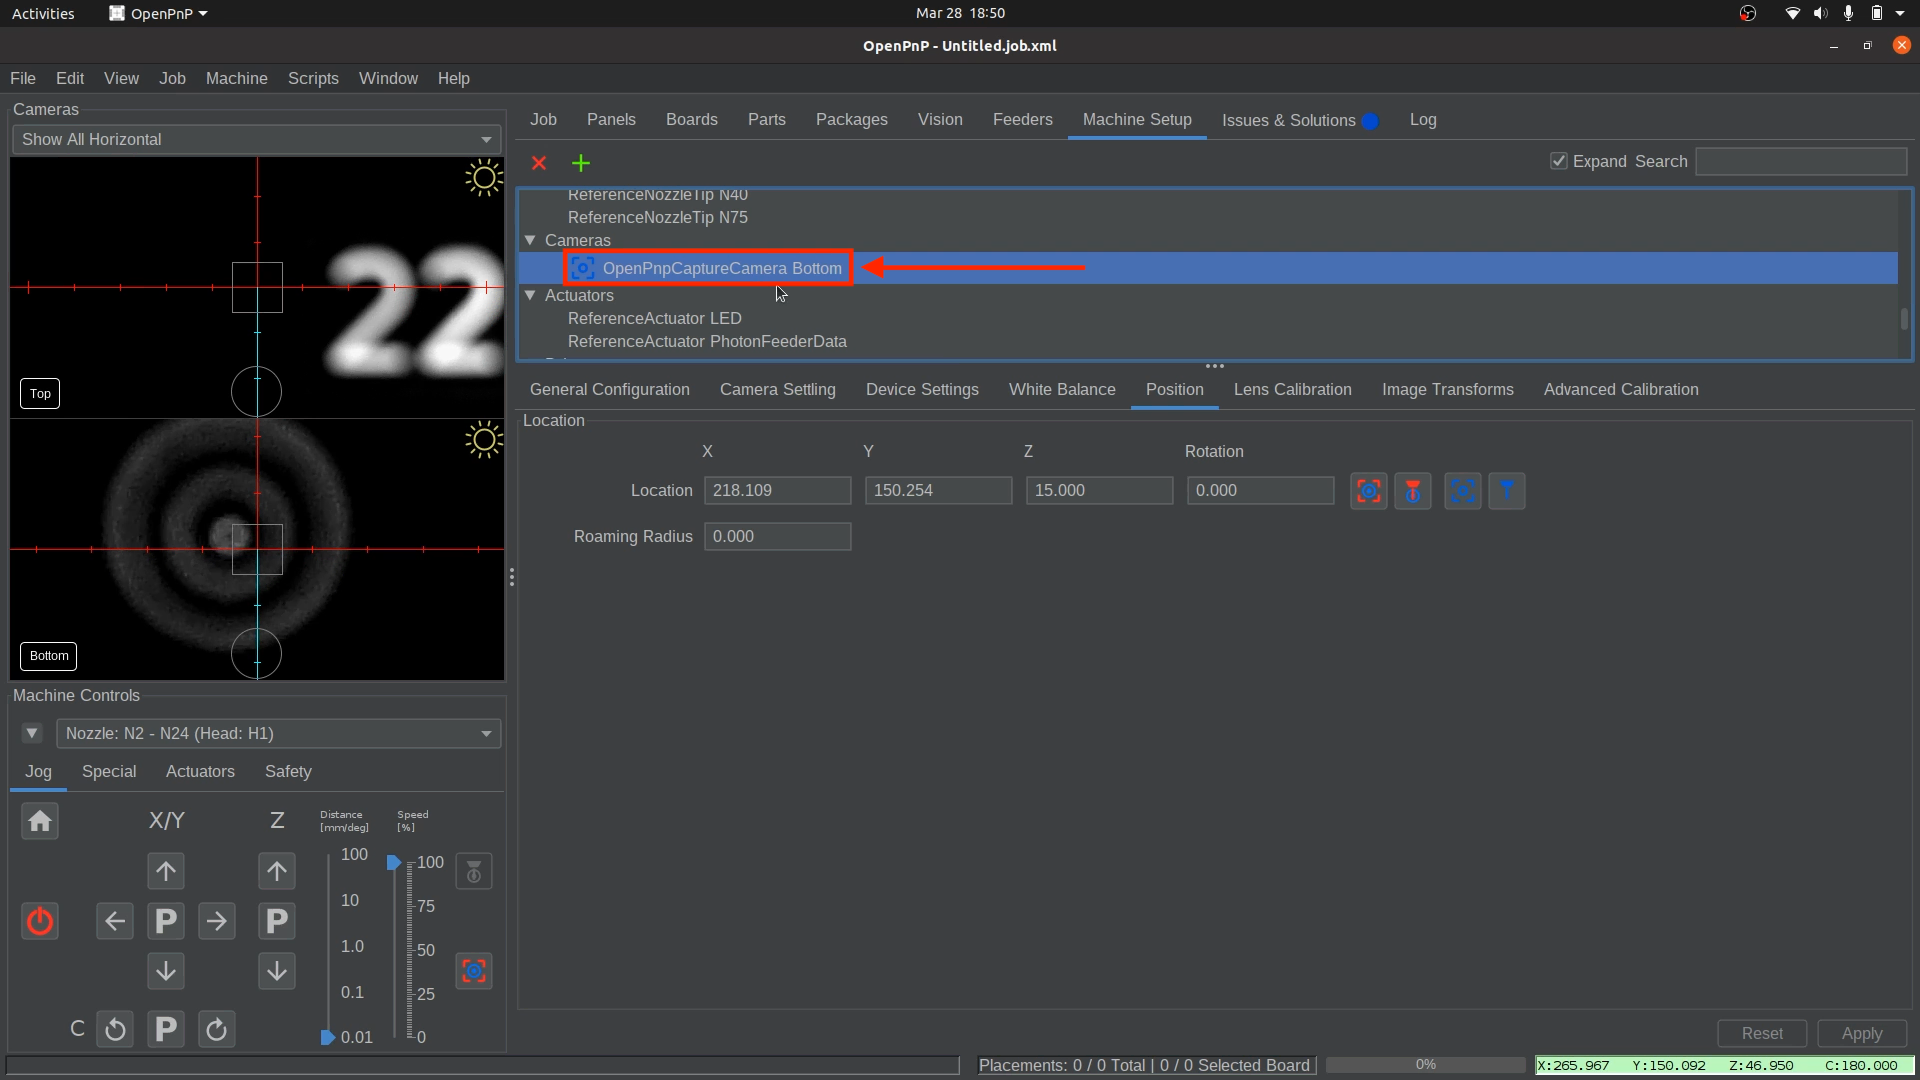
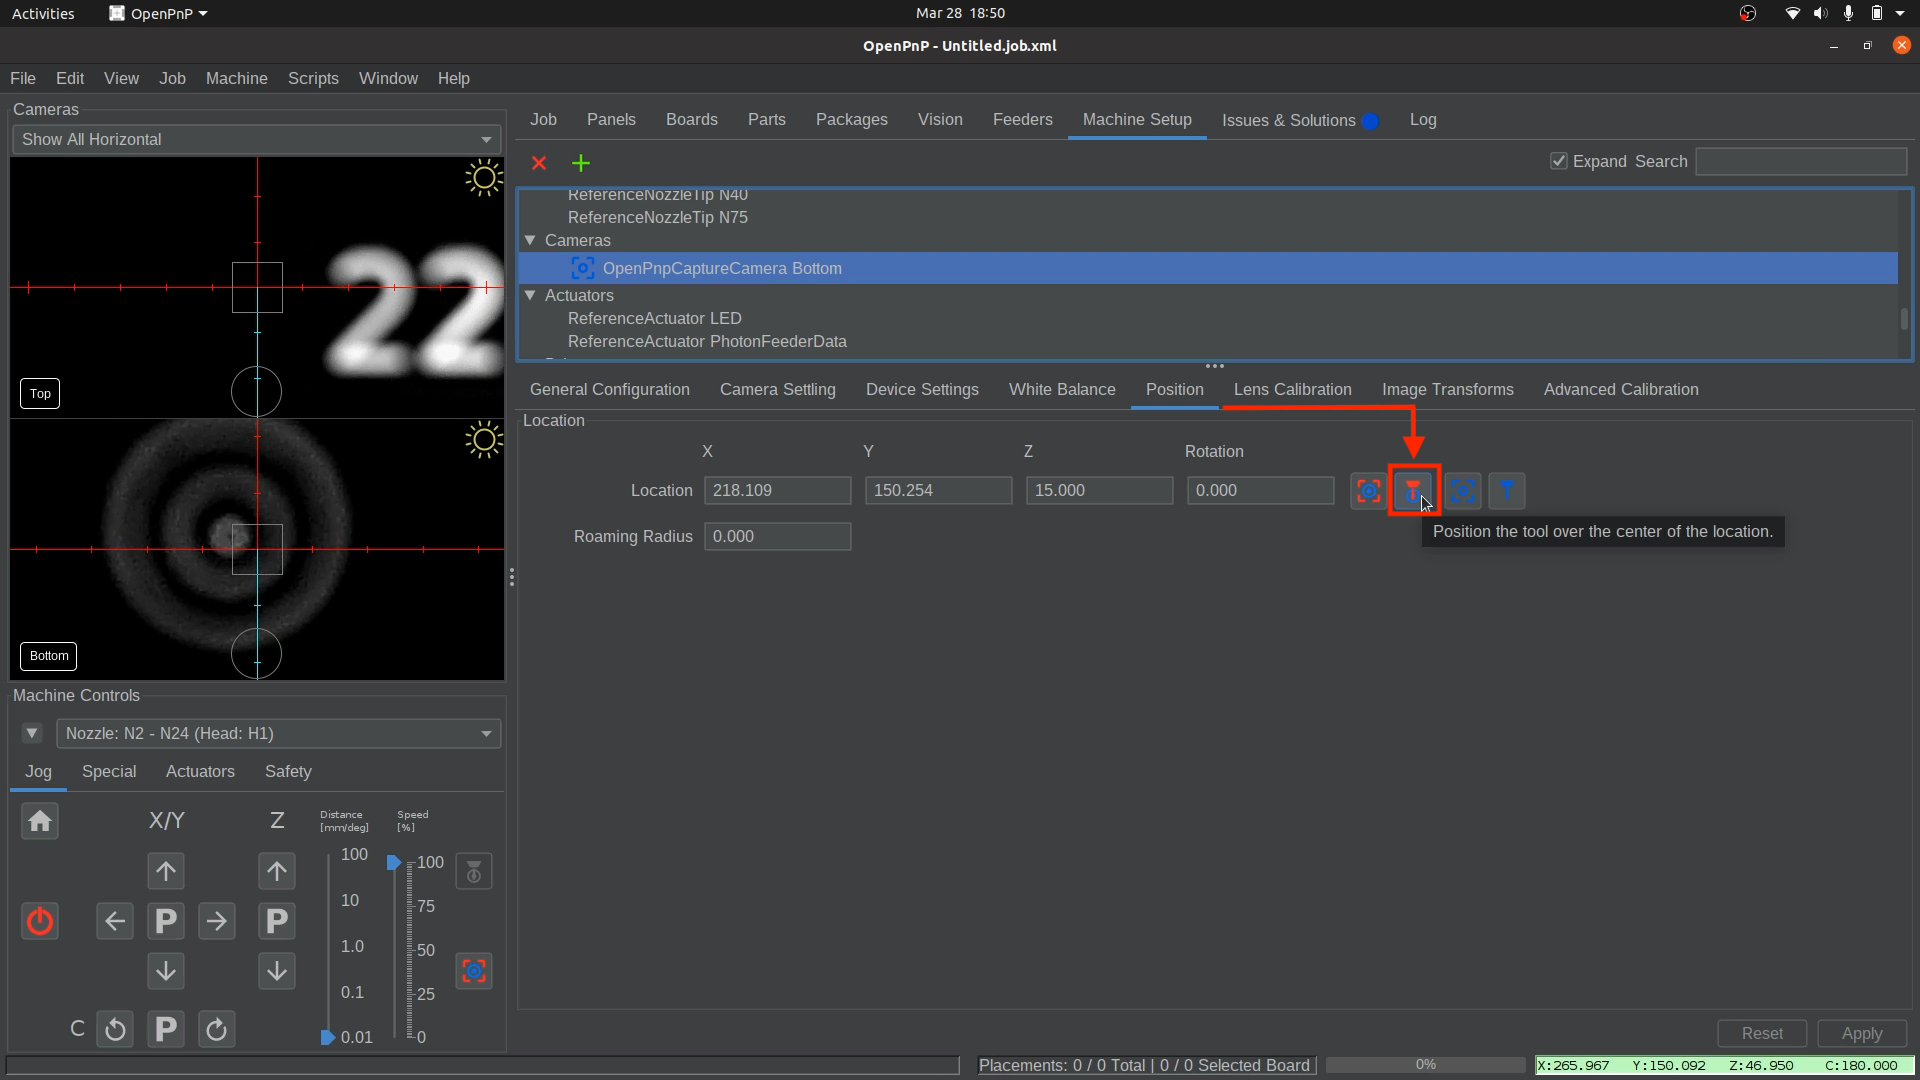
Position Nozzle: N1 over the Bottom Camera.
- Open the "Position" tab, then click the
Position the tool over the center of the locationbutton.
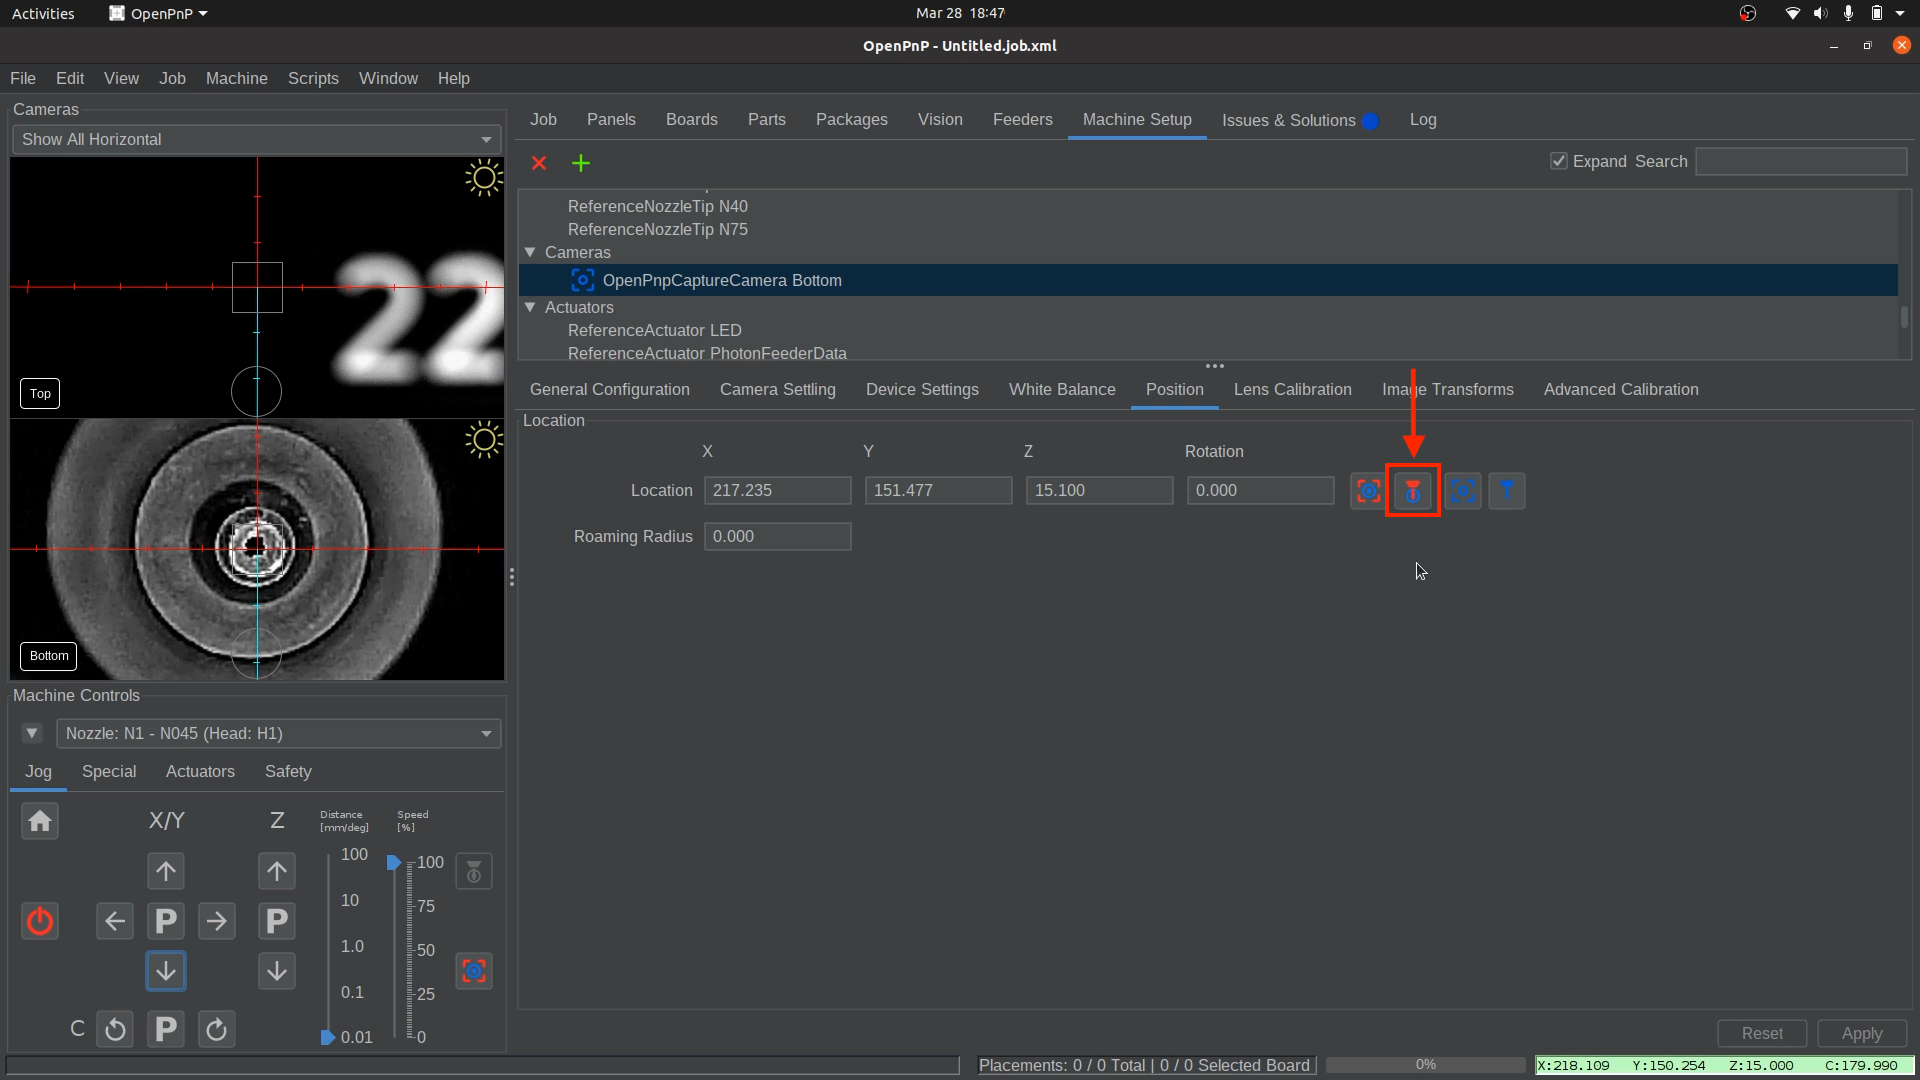
- Open the "Position" tab, then click the
-
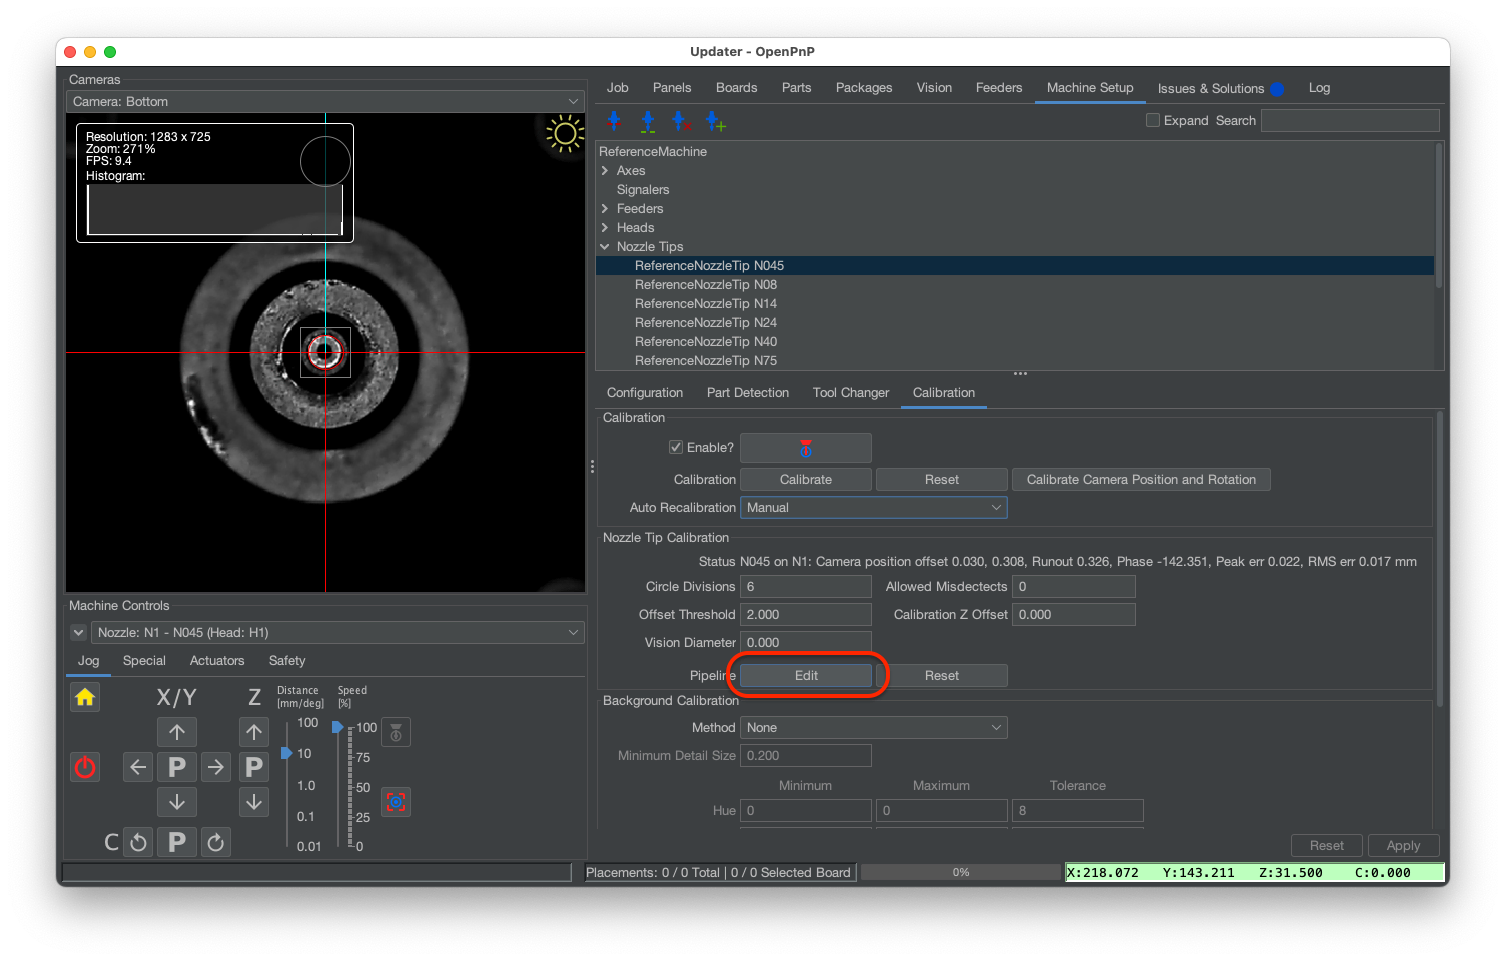
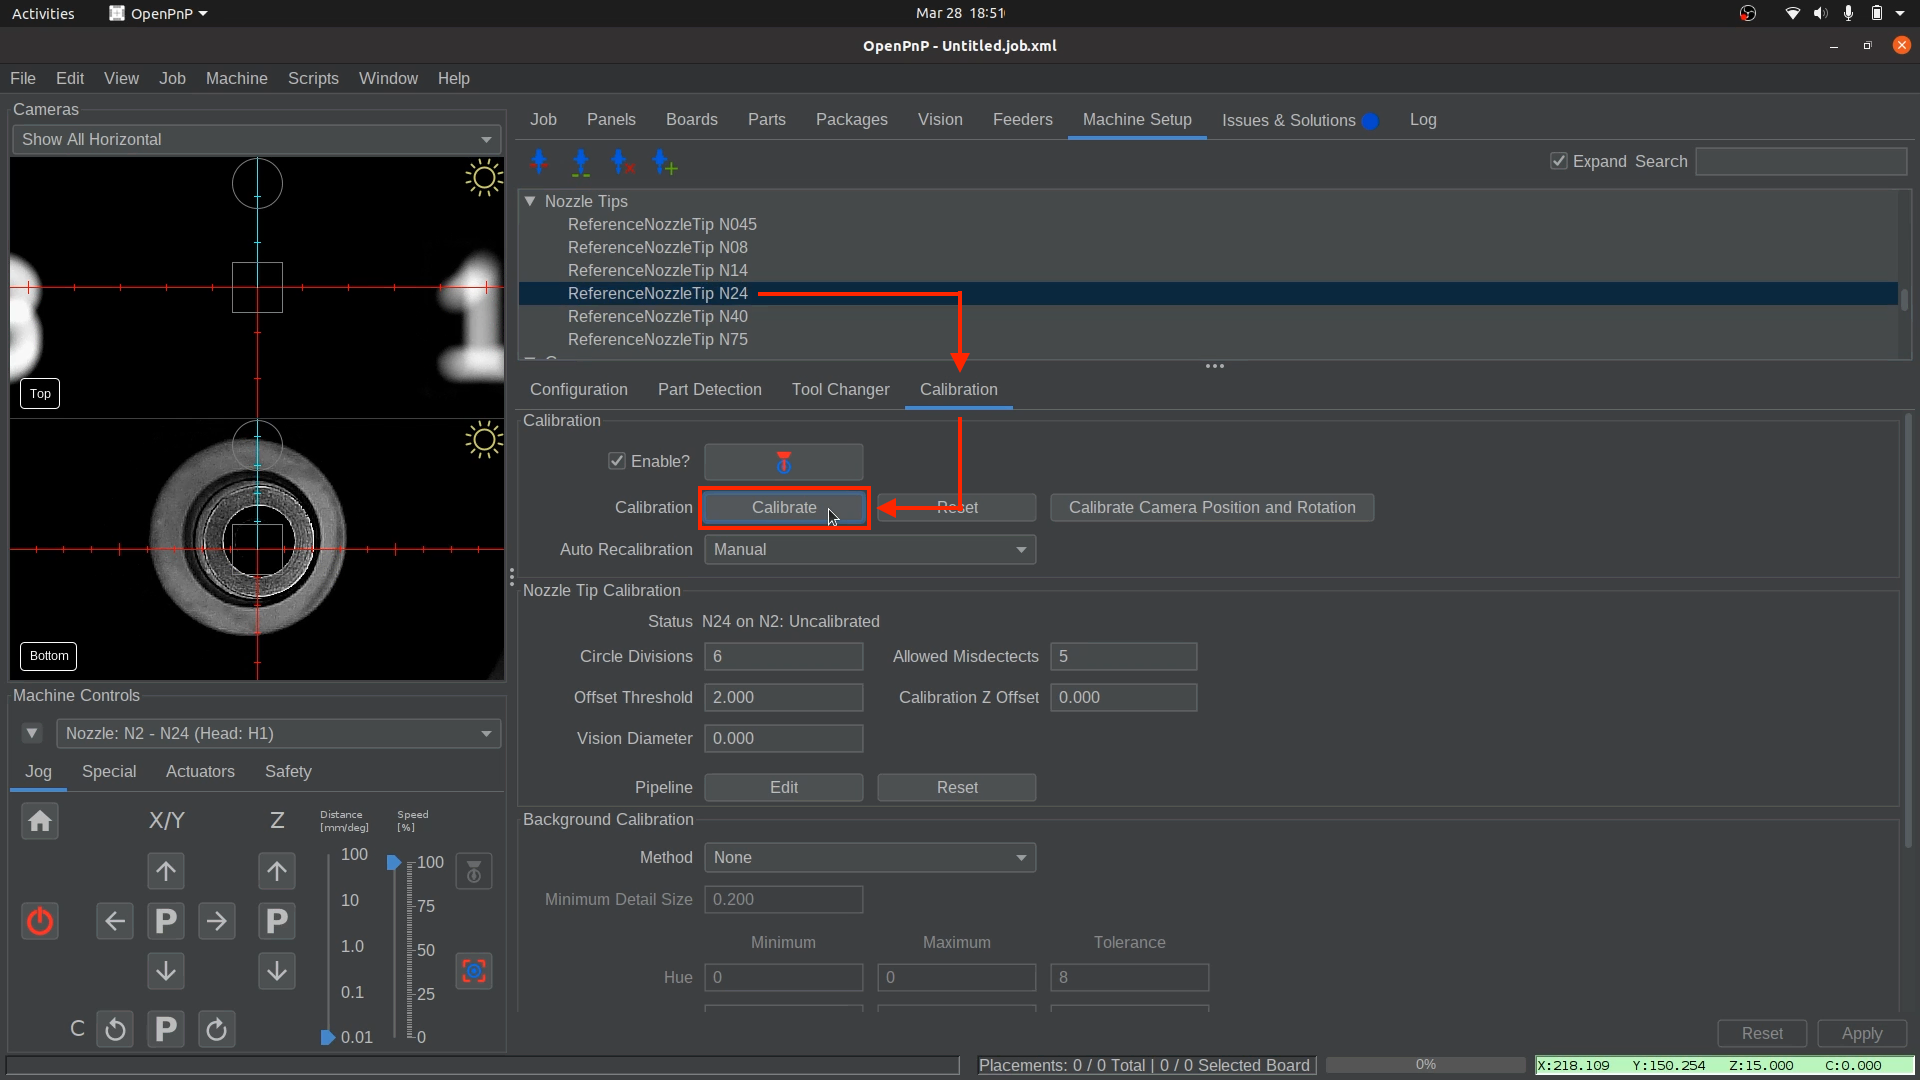
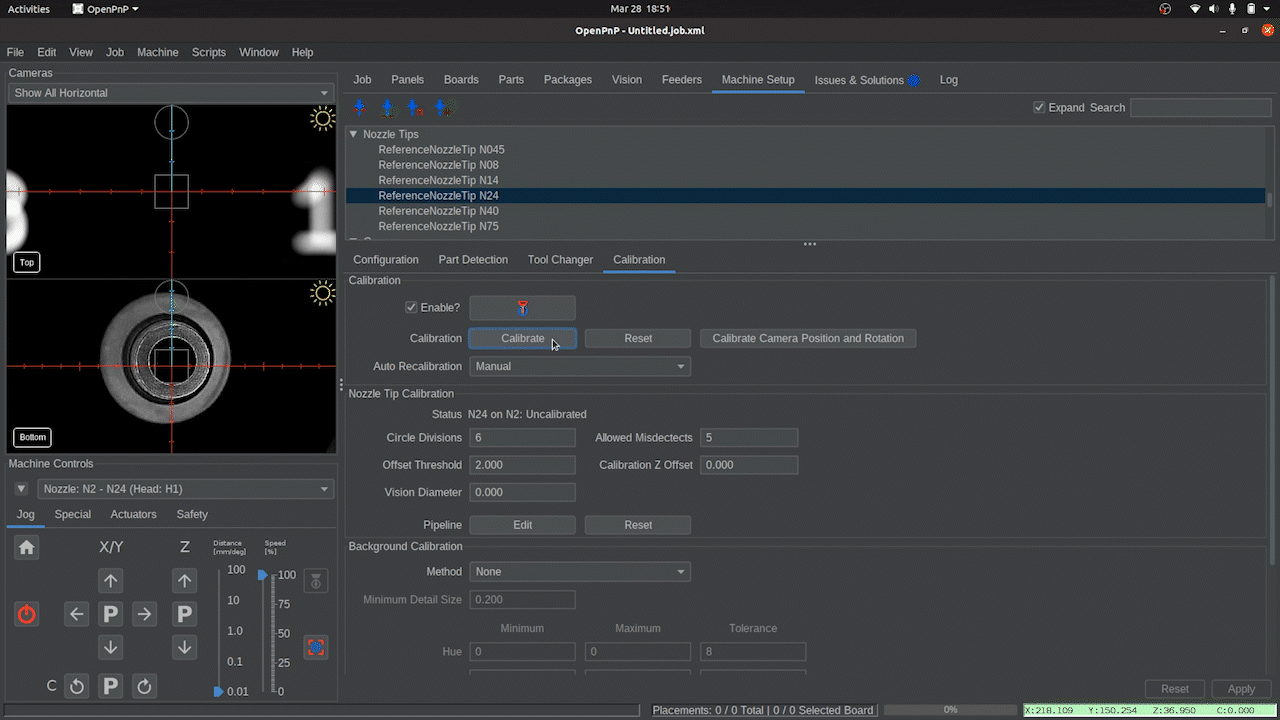
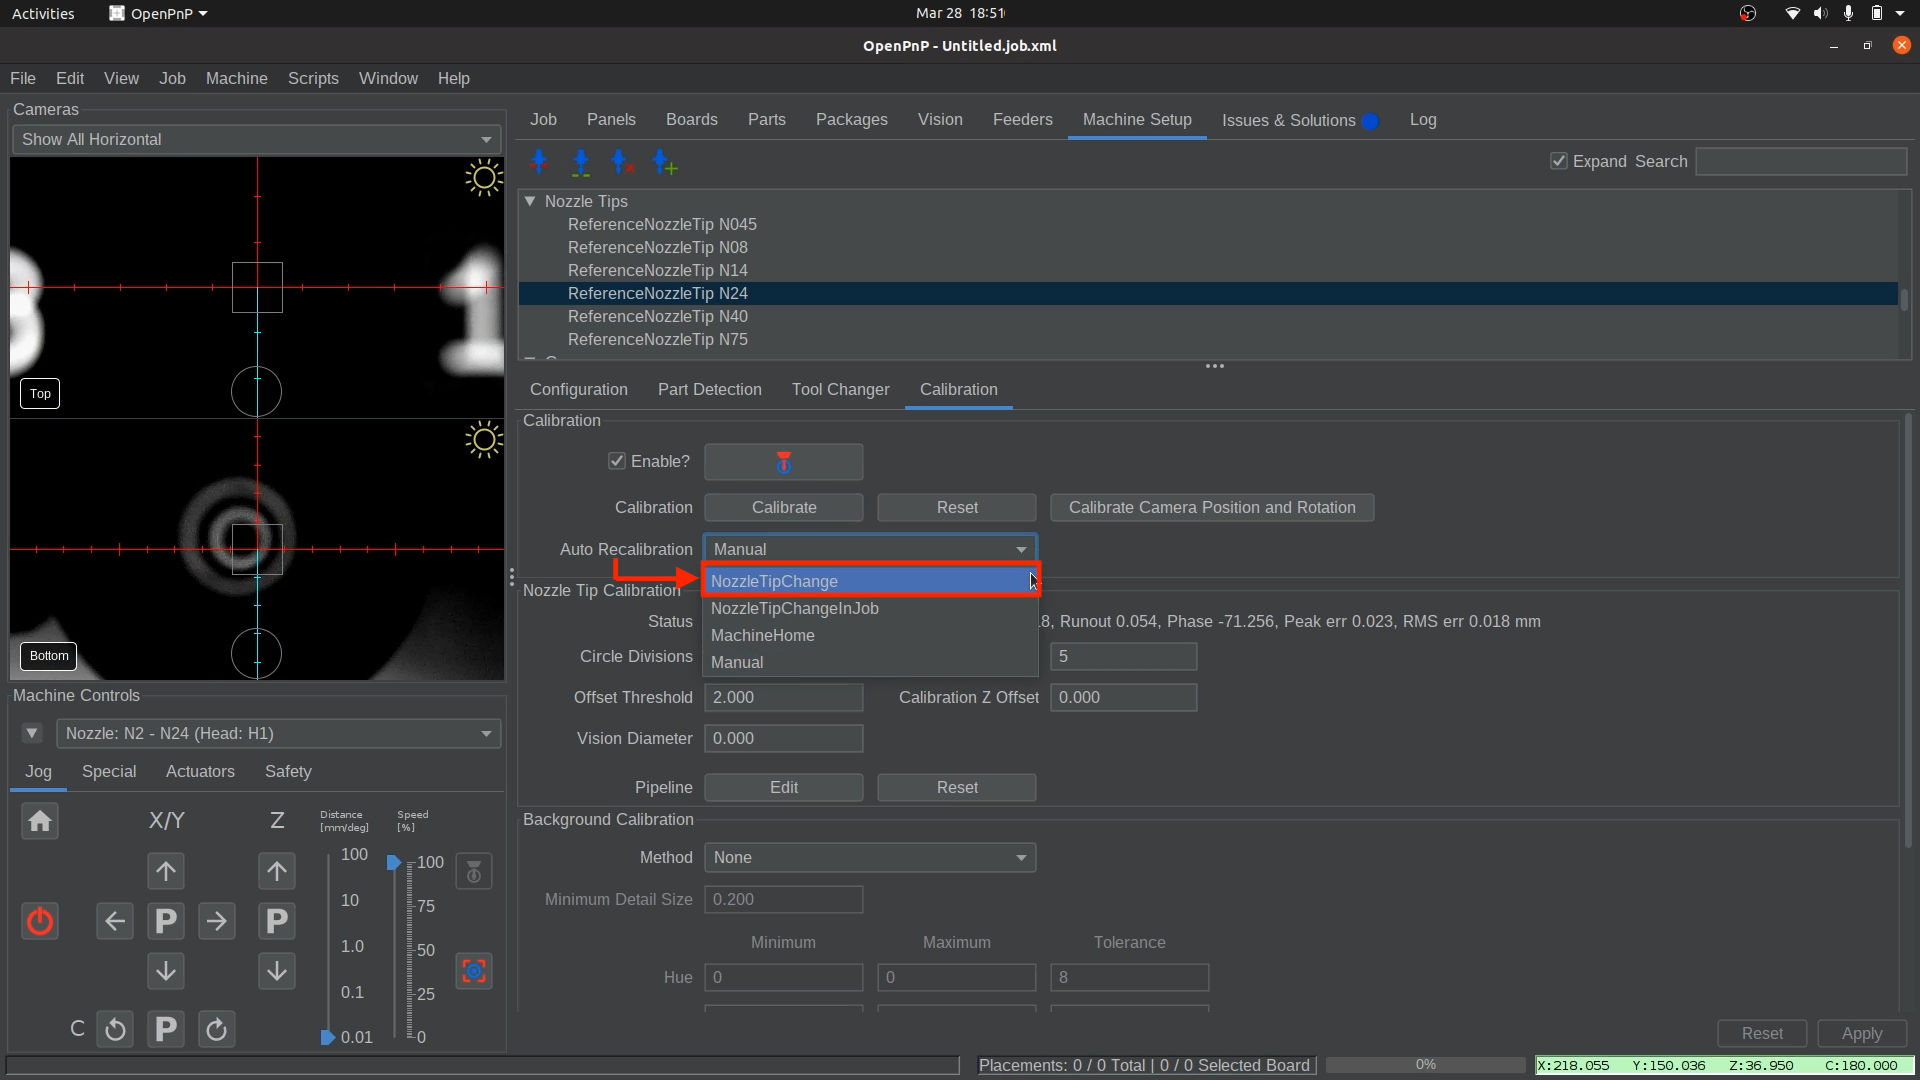
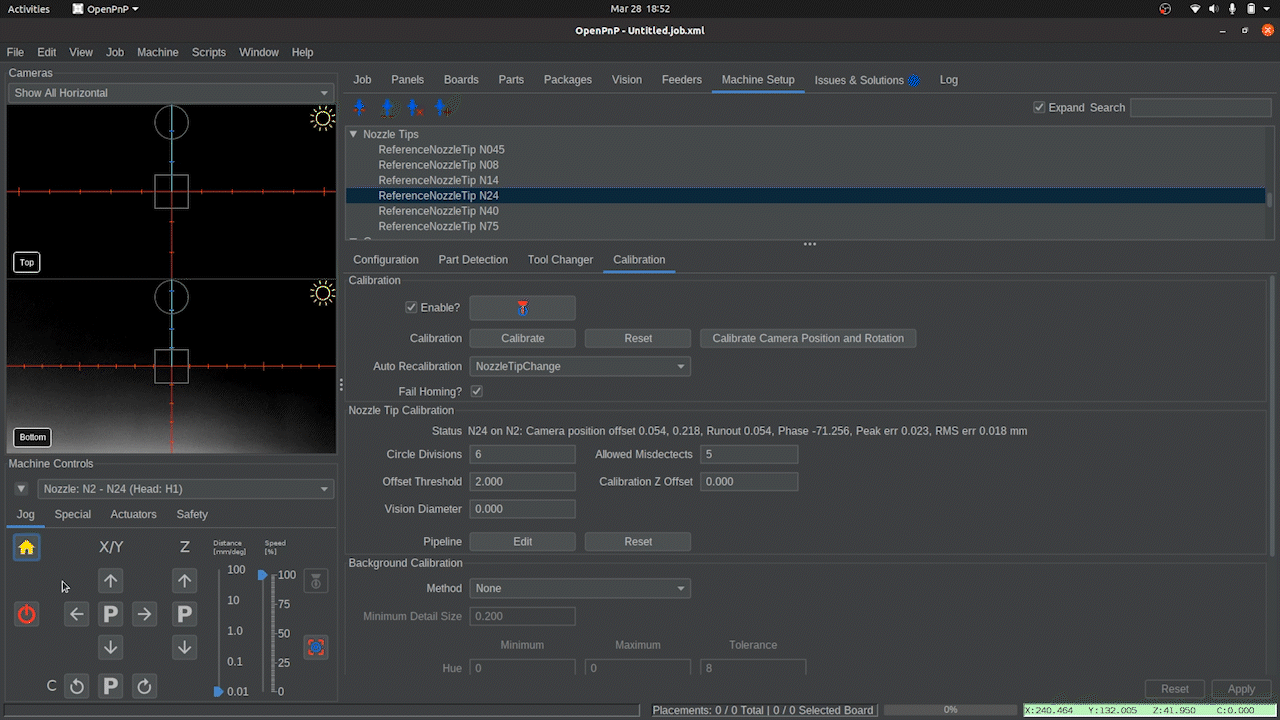
Calibrate the N045 Nozzle Tip Runout.
- Navigate to
Machine Setup > Nozzle Tips > N045 > Calibration, and click theCalibratebutton.
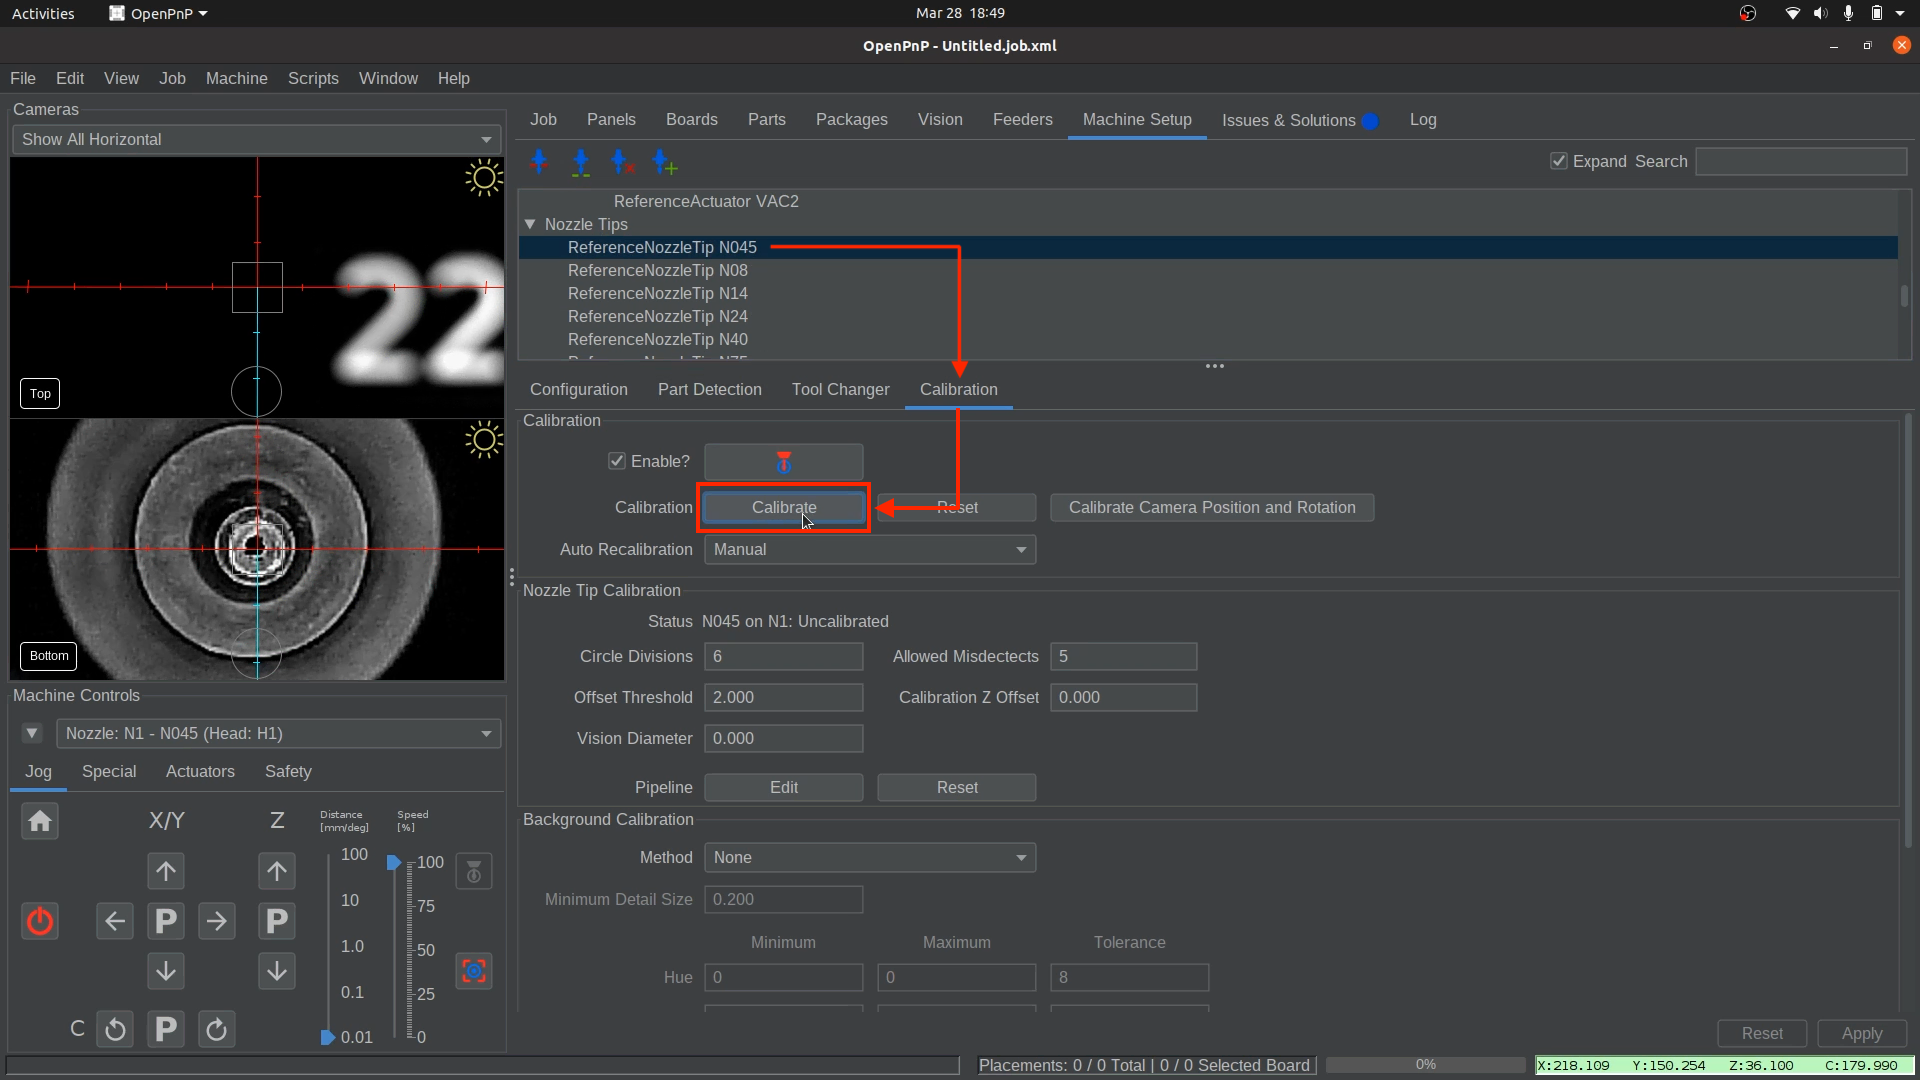
- 🚨 It is very important to closely observe the nozzle runout calibration. As the nozzle rotates, the detection must consistently track the nozzle tip and should not lock onto random circles or features that are clearly not part of the nozzle. If the runout calibration is inaccurate, parts will be placed incorrectly.
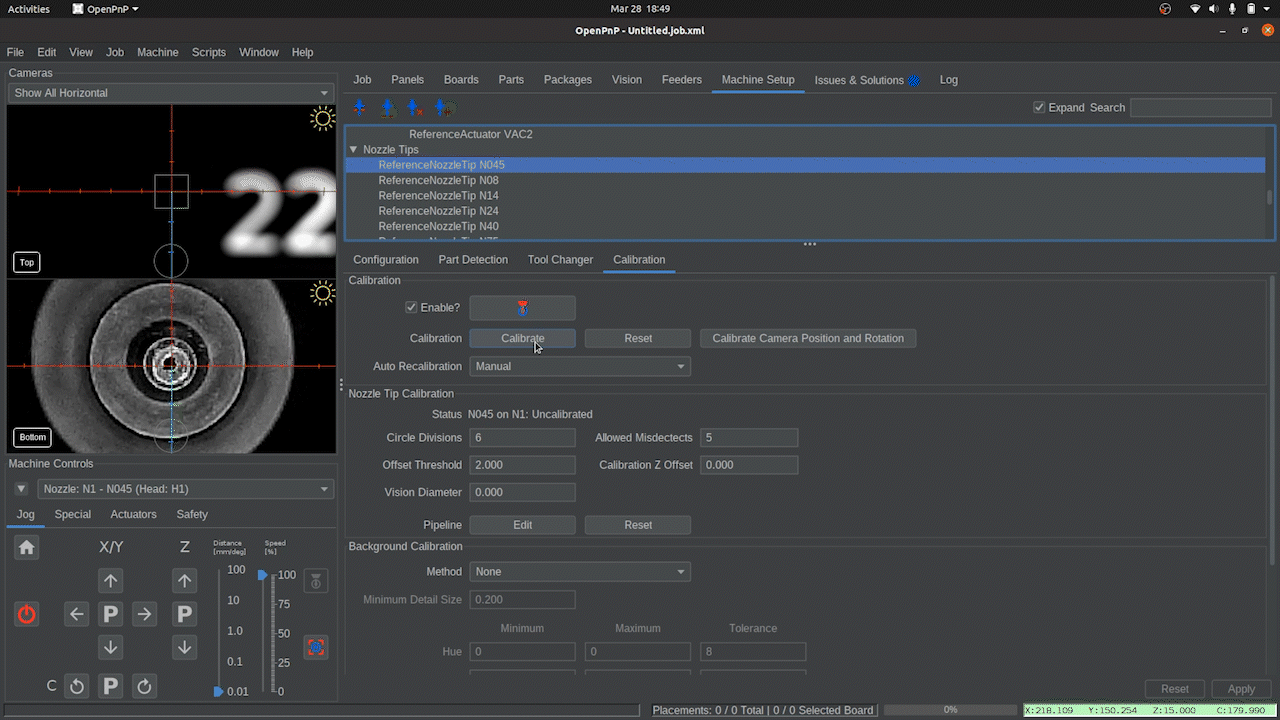
Warning
If calibration fails with an error message stating, "...Too many vision misdetects...", click the Pipeline
Editbutton to adjust the nozzle tip vision pipelinefor Nozzle Tip N045, then retest.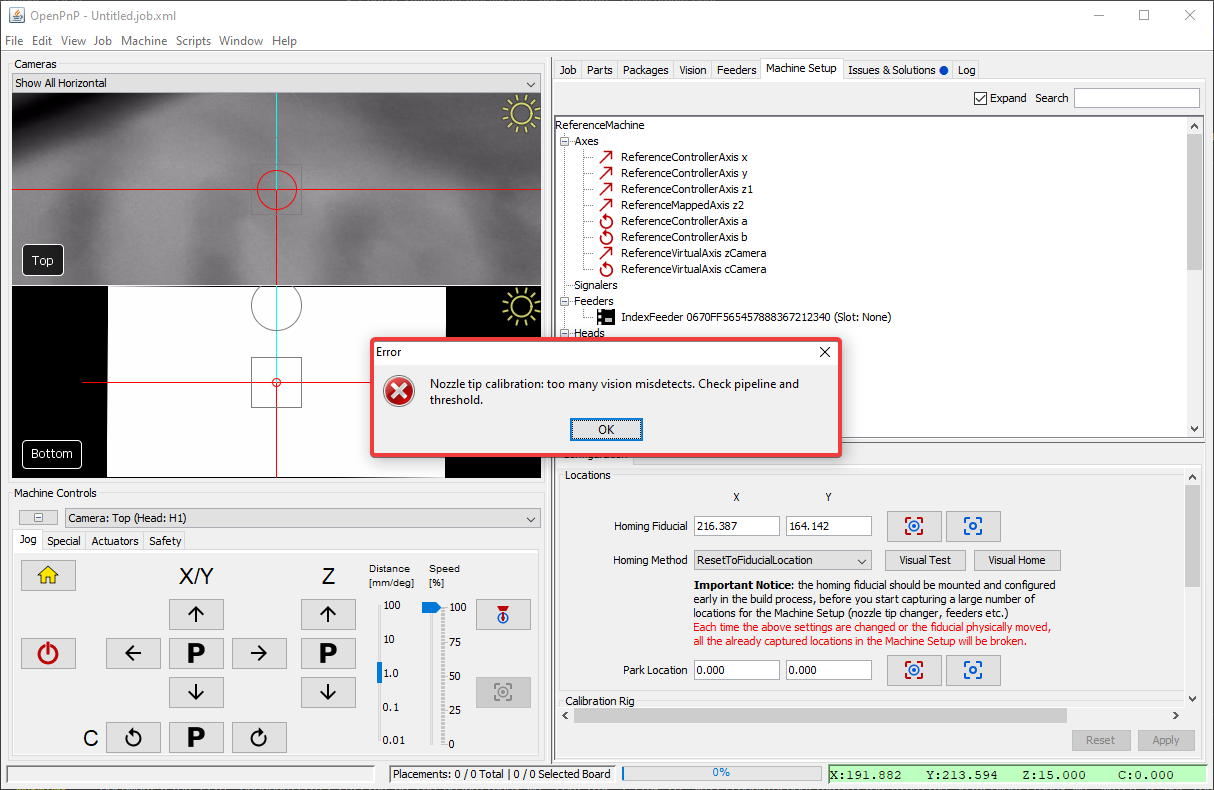
- Navigate to
-
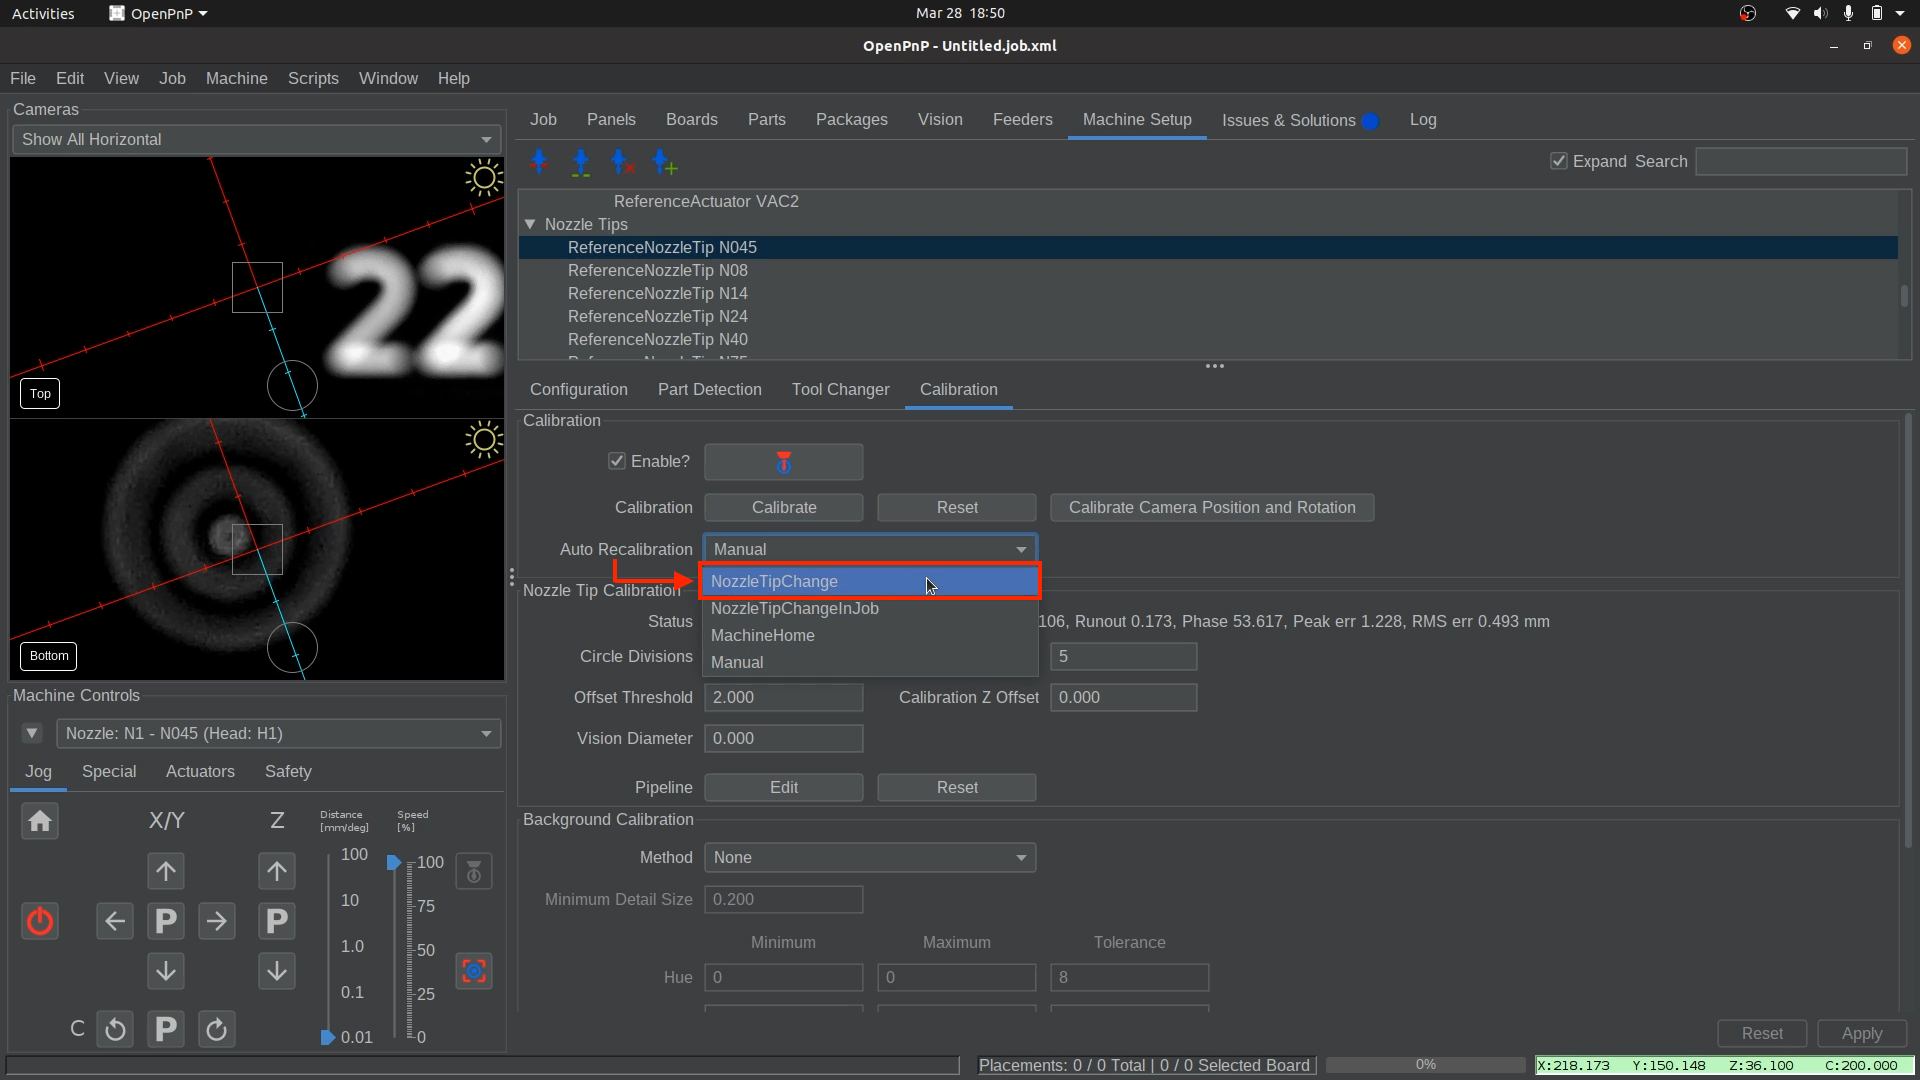
Set Auto Recalibration.
- After successfully calibrating, Auto Recalibration should be set to
NozzleTipChange. If it is set toManual, change the Auto Recalibration setting fromManualtoNozzleTipChange. This ensures that OpenPnP automatically recalibrates any loadedN045nozzle tips after homing or swapping tips.
- After successfully calibrating, Auto Recalibration should be set to
-
Confirm Final Exposure Settings for Nozzle: N1.
- If further exposure adjustments were necessary, update your saved exposure value for Nozzle:
N1. You'll need it when restarting OpenPnP.
- If further exposure adjustments were necessary, update your saved exposure value for Nozzle:
-
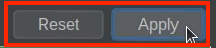
Apply and Save
- Click
Applyin the lower right corner to save your changes. (Applymay be greyed out. That's fine. Continue to save your configuration).
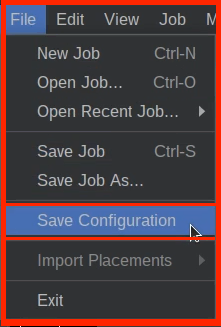
- Save your OpenPnP configuration now.
File > Save Configuration.
- Click
Nozzle Tip Runout Compensation for Nozzle: N2 (right toolhead)
-
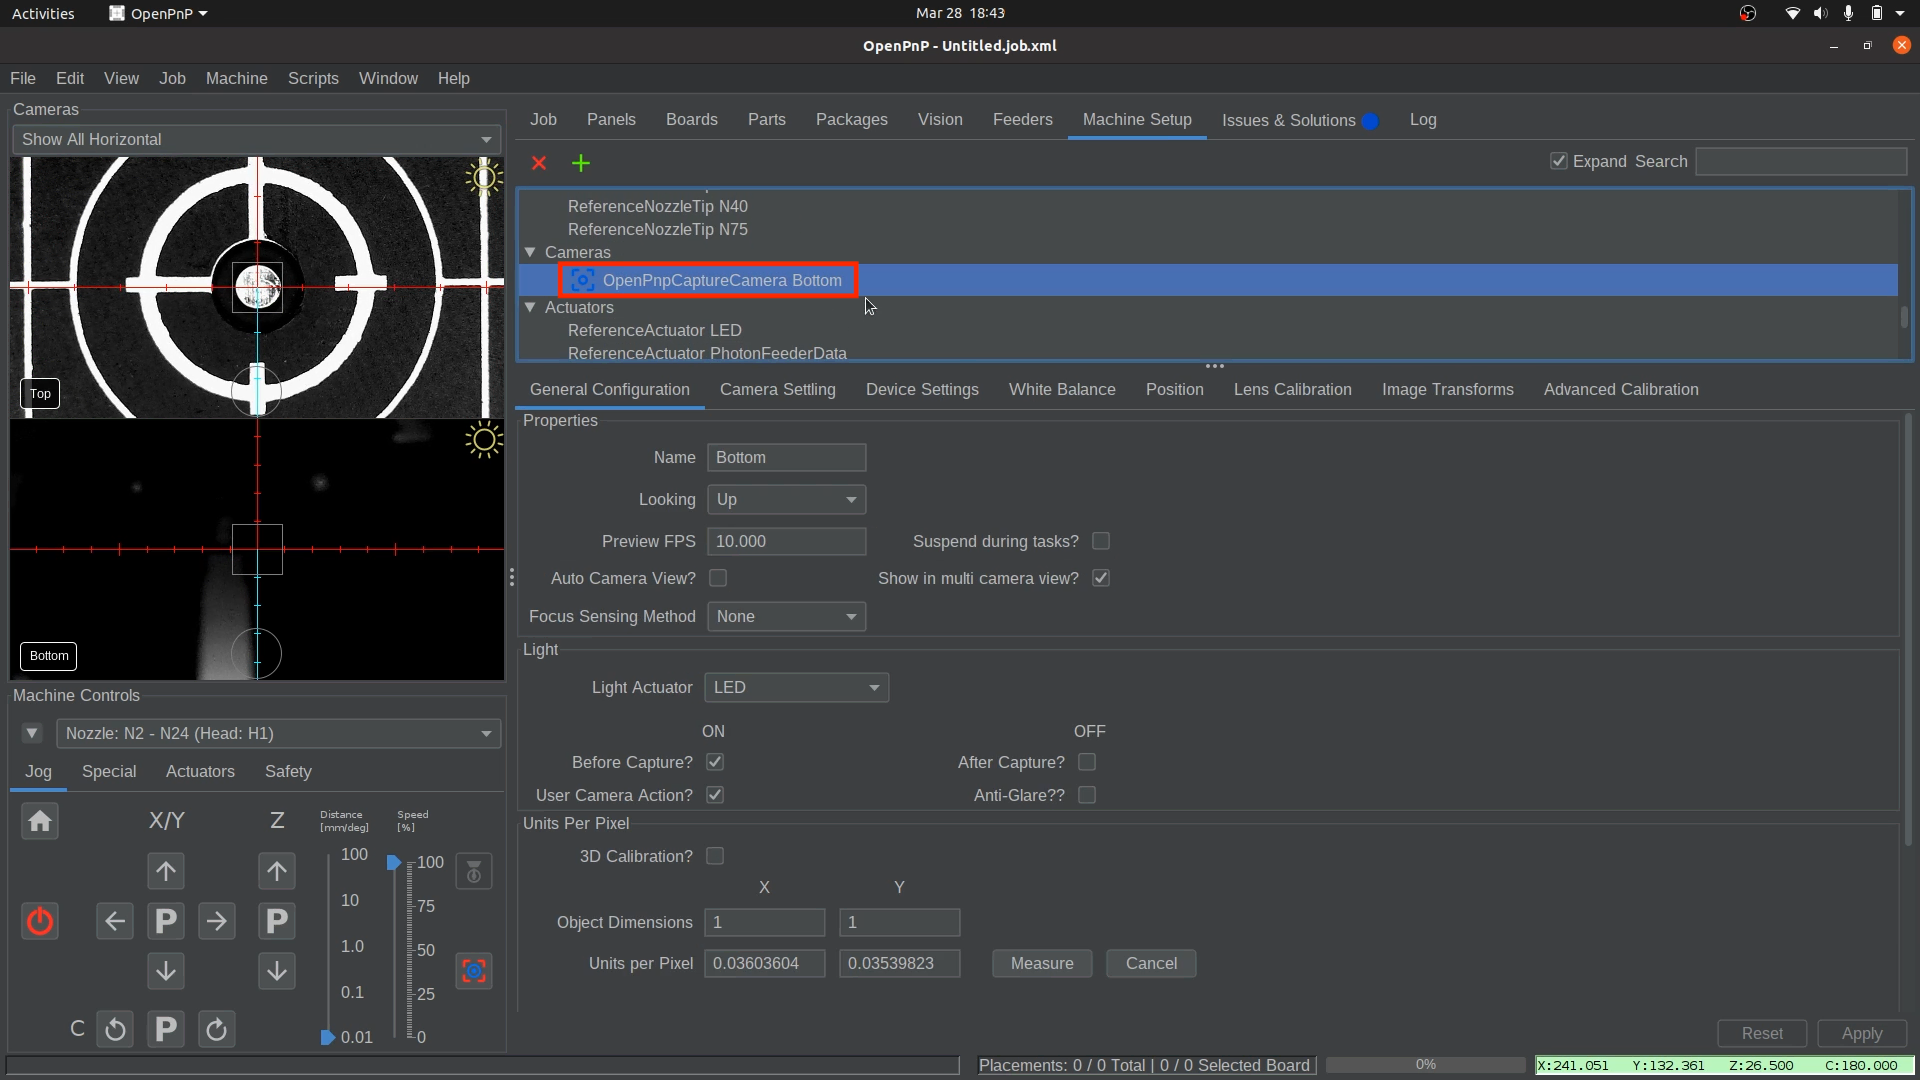
Select Nozzle: N2.
- From the
Machine Controlsdropdown, selectNozzle: N2 - N24 (Head:H2).

- From the
-
Open the bottom Camera Settings.
- Navigate to
Machine Setup > Cameras > OpenPnPCaptureCamera Bottom.
- Navigate to
-
Position Nozzle: N2 over the Bottom Camera.
- Open the "Position" tab, then click the
Position the tool over the center of the locationbutton.
- Open the "Position" tab, then click the
-
Confirm the Correct Exposure.
- The exposure settings from the first nozzle should be close to what Nozzle Tip
N24requires. If minor adjustments are needed, they will be refined in the vision pipeline for Nozzle TipN24in the next steps.
- The exposure settings from the first nozzle should be close to what Nozzle Tip
-
Calibrate the N24 Nozzle Tip Runout.
- Navigate to
Machine Setup > Nozzle Tips > N24 > Calibration, and click theCalibratebutton.
- 🚨 It is very important to closely observe the nozzle runout calibration. As the nozzle rotates, the detection must consistently track the nozzle tip and should not lock onto random circles or features that are clearly not part of the nozzle. If the runout calibration is inaccurate, parts will be placed incorrectly.
Warning
If calibration fails with an error message stating, "...Too many vision misdetects...", click the Pipeline
Editbutton to adjust the nozzle tip vision pipelinefor Nozzle Tip N24, then retest.
- Navigate to
-
Set Auto Recalibration.
- After successfully calibrating, Auto Recalibration should be set to
NozzleTipChange. If it is set toManual, change the Auto Recalibration setting fromManualtoNozzleTipChange. This ensures that OpenPnP automatically recalibrates any loadedN24nozzle tips after homing or swapping tips.
- After successfully calibrating, Auto Recalibration should be set to
-
Apply and Save
- Click
Applyin the lower right corner to save your changes. (Applymay be greyed out. That's fine. Continue to save your configuration).
- Save your OpenPnP configuration now.
File > Save Configuration.
- Click
Final Check
🚨 Critical Warning: Level Nozzles 🚨
⚠️ You must ensure that your nozzles are level.
Failure to do this can cause crashes and potentially damage your machine.
Use the P between the Z-axis up/down arrows to ensure the nozzle tips are out of the way. The P stands for Parking the nozzle out of the way into a safe height that won’t collide with any objects.

-
Retest the N045 Calibration.
- If you made any changes to the bottom camera exposure settings when calibrating Nozzle:
N2, retest theN045nozzle calibration to ensure the settings are compatible and the calibration works with the new exposure.
- If you made any changes to the bottom camera exposure settings when calibrating Nozzle:
-
Home the LumenPnP.
- Level the nozzles to prevent collisions before homing.
- Perform a homing of the LumenPnP to ensure that fiducial detection and nozzle tip calibration finish successfully for the
N1andN2nozzles without errors. - The homing sequence will first scan the homing fiducial, then proceed to scan and calibrate both nozzle tips.
-
Update Saved Exposure Settings for Nozzle: N2 (If Needed).
- If you had to change your saved exposure value for your bottom camera to get a nozzle tip to complete runout calibration successfully, record the new exposure value. You'll need it when restarting OpenPnP. We recommend saving these values to a text file and storing it somewhere convenient.
- If you had to change your saved exposure value for your bottom camera to get a nozzle tip to complete runout calibration successfully, record the new exposure value. You'll need it when restarting OpenPnP. We recommend saving these values to a text file and storing it somewhere convenient.
Next is configuring the vacuum sensor.