Top Camera to Nozzle Offset
![]()
Calibrating the top camera to nozzle tip offset ensures precise alignment between the nozzle tips and the top camera. This process involves capturing the exact position of the nozzle tip and aligning the top camera to the same reference point. The calibration is essential for accurate component placement and must be performed carefully.
The calibration of the top camera to nozzle tip (this page we're on), and the bottom camera position (the next page) are by far the most important calibrations to be accurate, as most all other calibrations use these as a baseline for their calculations. For this reason, it is very important that the bottom camera position is set directly after the top camera to nozzle tip offset is calibrated.
This guide will calibrate both nozzles, ensuring they share the same focal plane as your datum board, components, and PCBs.
In the previous section, you validated nozzle N2's MM/Pixel calibration. We will switch back to Nozzle N1 to start this calibration.
Nozzle: N1 Offset (Left Toolhead)
🚨 Critical Warning: Level Nozzles 🚨
⚠️ You must ensure that your nozzles are level.
Failure to do this can cause crashes and potentially damage your machine.
Use the P between the Z-axis up/down arrows to ensure the nozzle tips are out of the way. The P stands for Parking the nozzle out of the way into a safe height that won’t collide with any objects.

-
Select the correct nozzle to control.
- In the bottom left of OpenPnP, select
Nozzle: N1 - N045 (Head:H1)from the machine controls dropdown. This ensures that movements and adjustments apply to the left nozzle equipped with theN045nozzle tip.
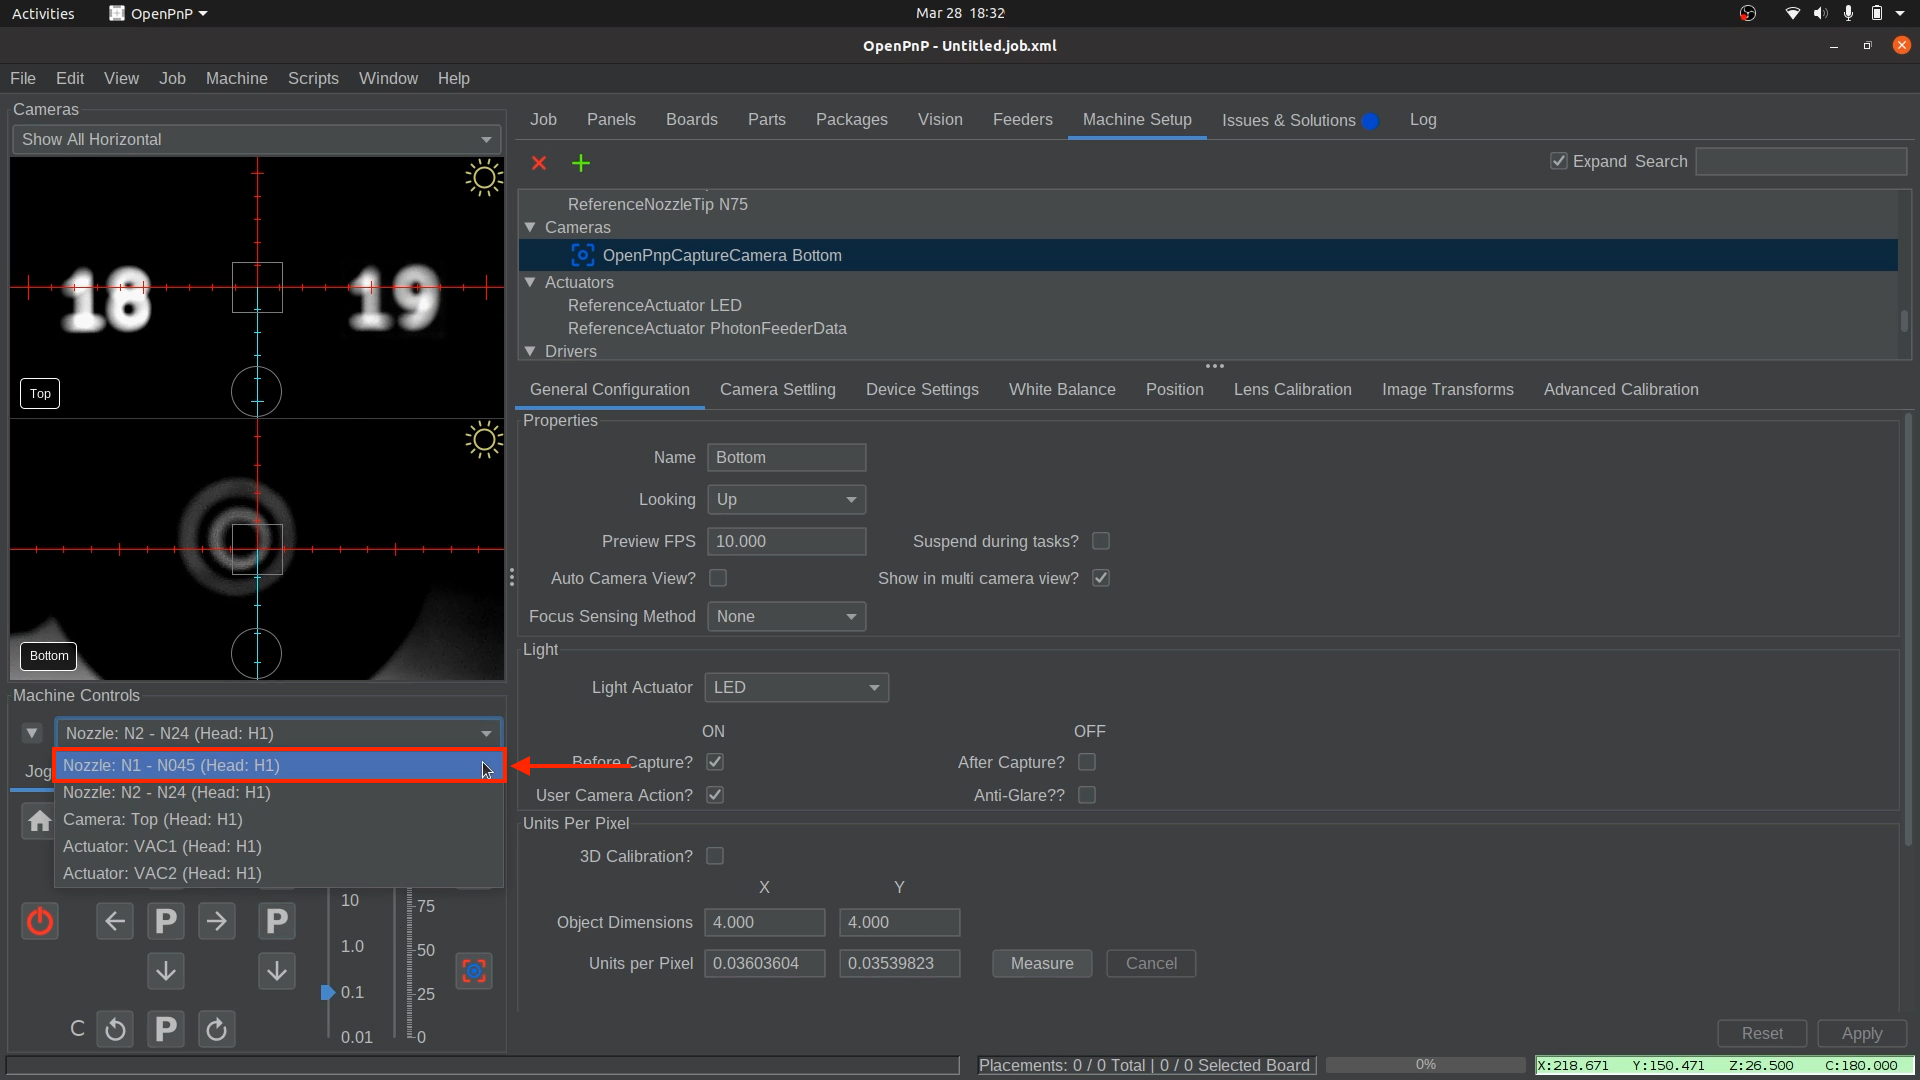
- In the bottom left of OpenPnP, select
-
Confirm the correct nozzle tip is installed.
- Confirm that the
N045nozzle tip is securely attached to Nozzle: N1 (left toolhead).
- Confirm that the
-
Park the nozzle rotation.
- It is very important that nozzle N1 stays in the same rotational direction throughout this testing, as nozzle runout has not been configured yet. The camera's crosshair reticle represent the angle of the rotation of a nozzle. This is easily done by "parking" the nozzle rotation, which should always bring it back to the same rotational degree every time.
- Within Machine Controls (bottom left of OpenPnP),locate the rotational controls, which can be found below the main directional arrows. The rotational control is labeled "C" with a Park button in between its left and right arrows. This adjusts the rotation.
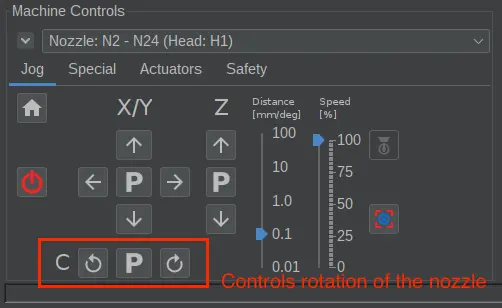
- Press the P button to park the rotation, which should make the lines perfectly straight up and down, like a plus sign.
-
Open the Nozzle: N1 settings.
- Click through the following path:
Heads > ReferenceHead H1 > Nozzles > ReferenceNozzle N1.
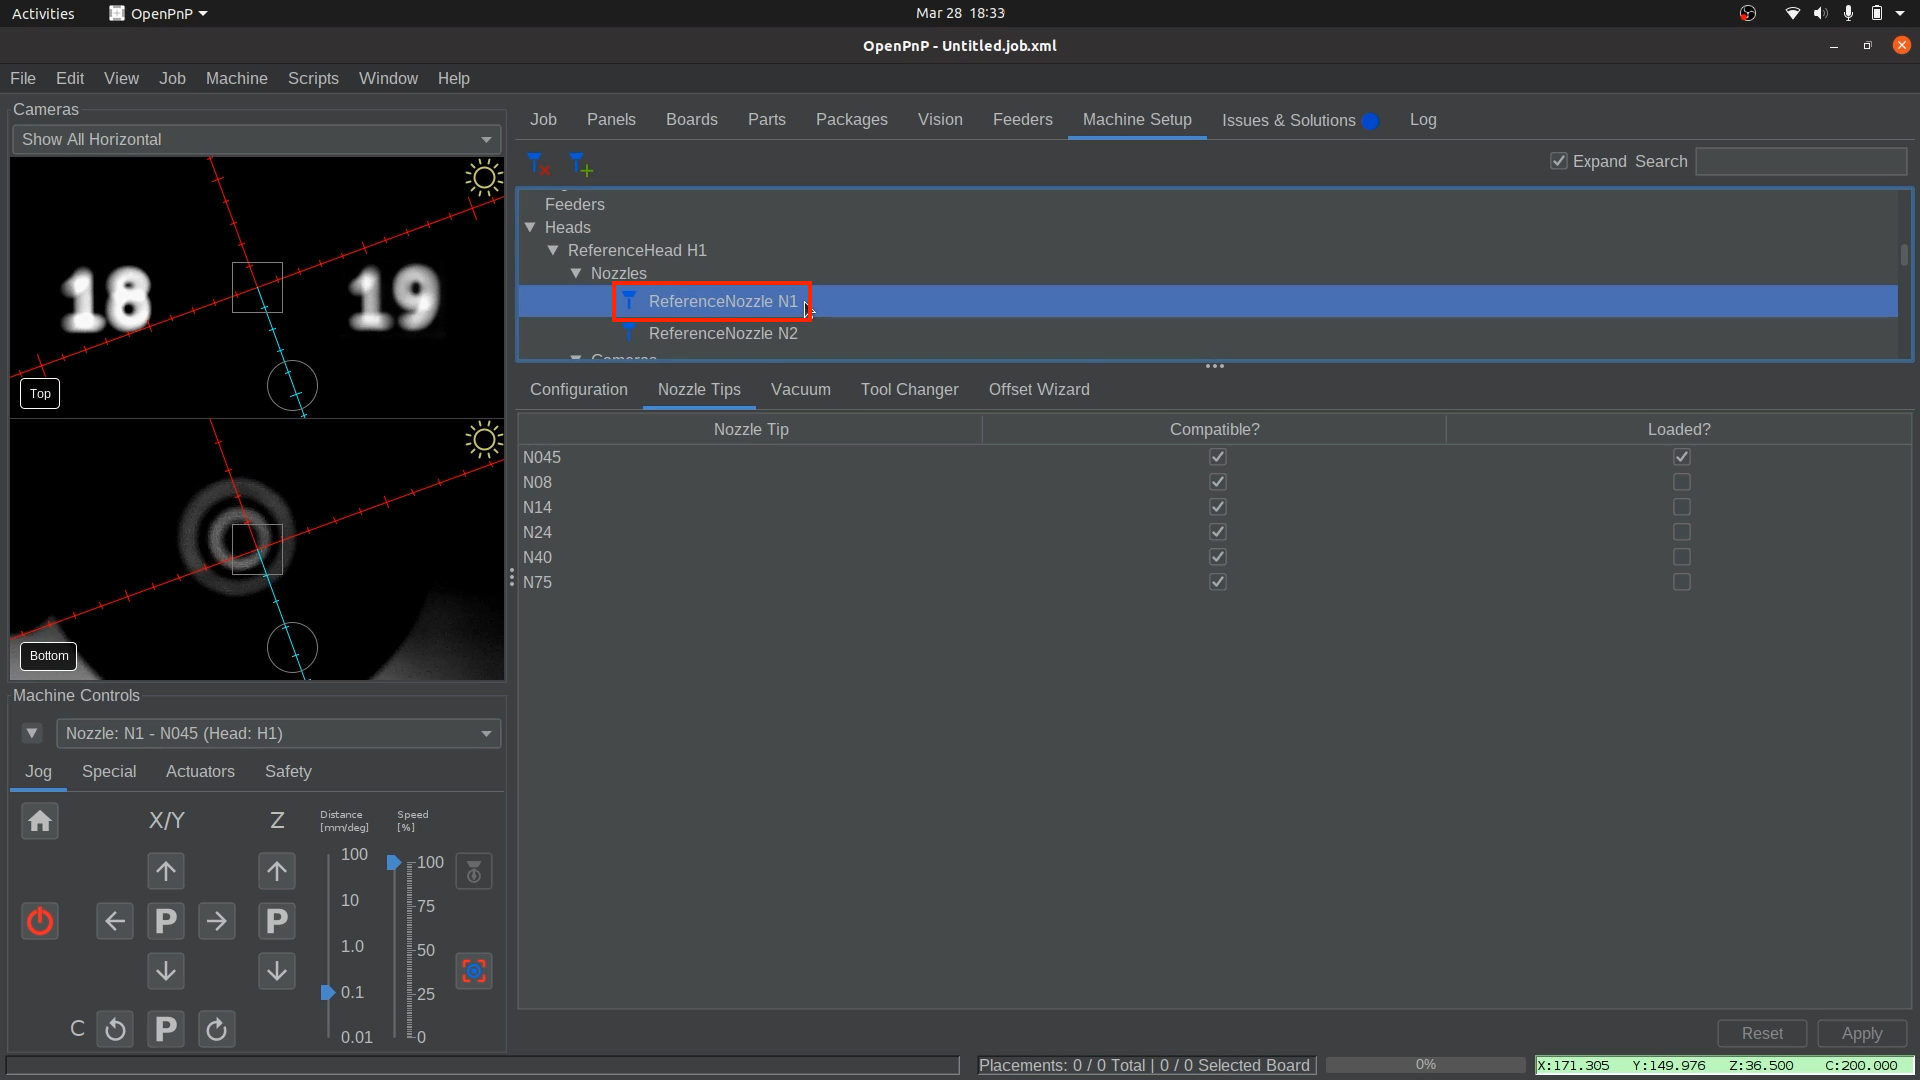
- Click through the following path:
-
Open the Offset Wizard tab.
- Navigate to the
Offset Wizardtab, where the nozzle offset calibration process will be performed.
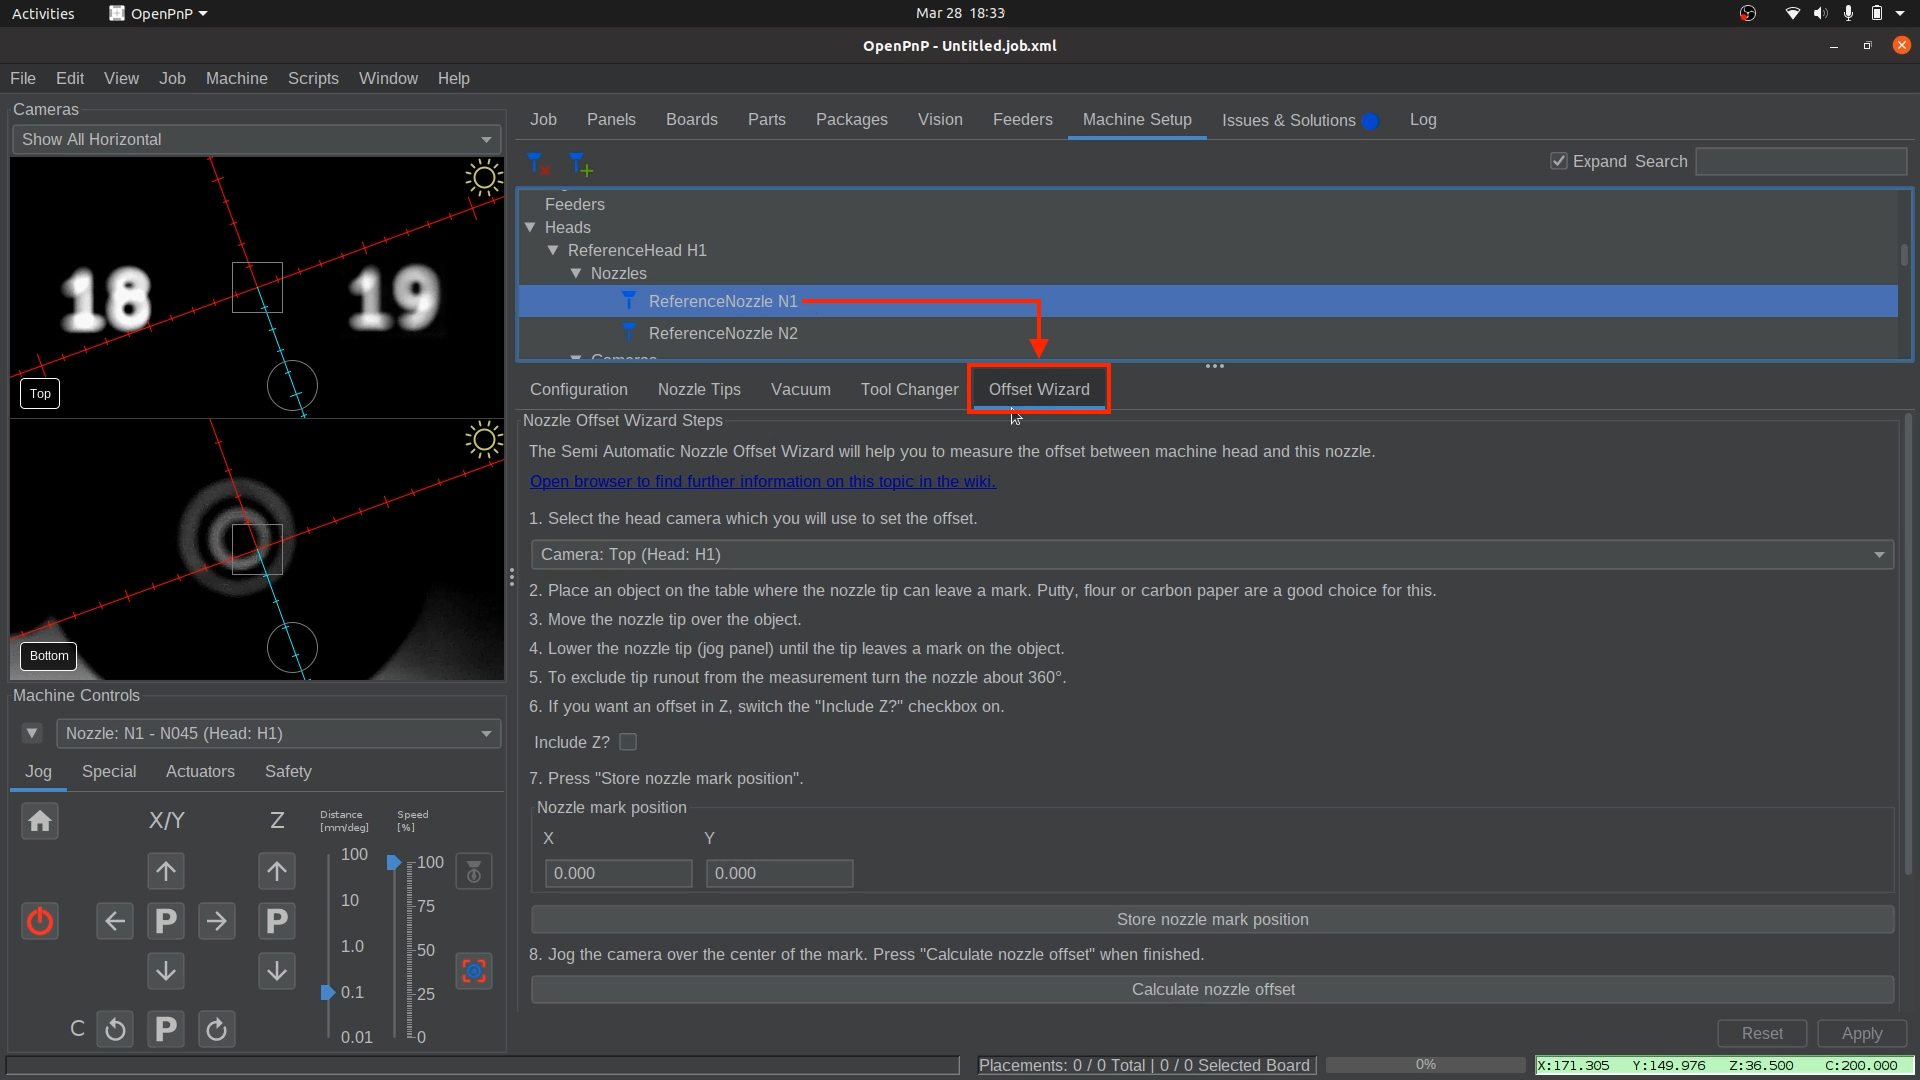
- Navigate to the
-
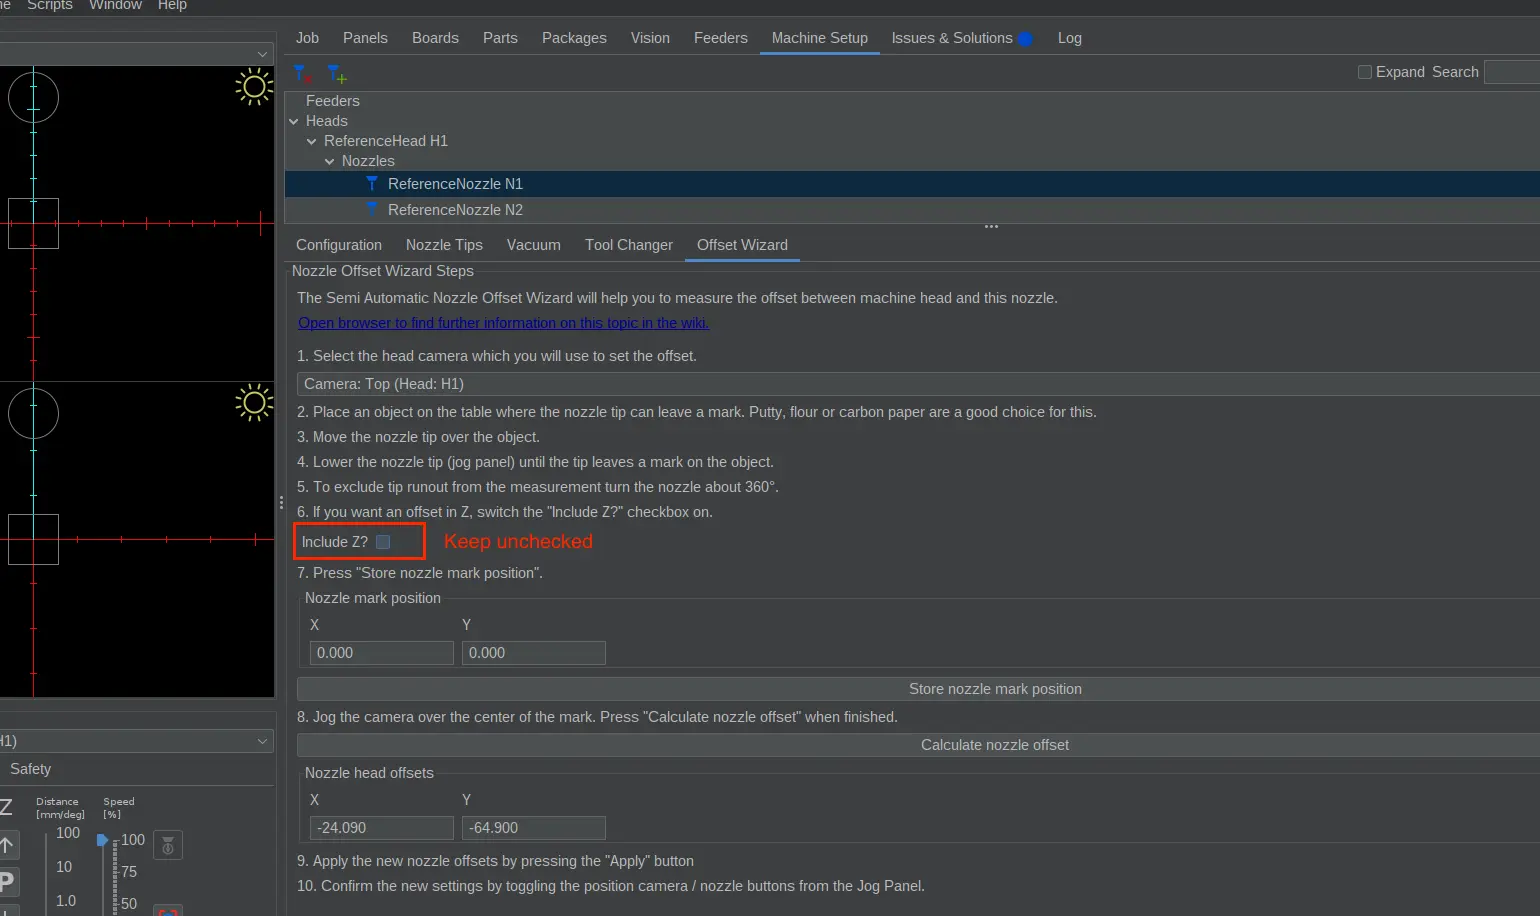
keep the ‘Include Z?’ checkbox unchecked.
- Ensure that the
Include Z?checkbox is NOT selected, and is left unchecked. You already should have entered the correct Z height for nozzle N1 earlier, so we do shouldn't need to apply an Z-offset to it.
- Ensure that the
-
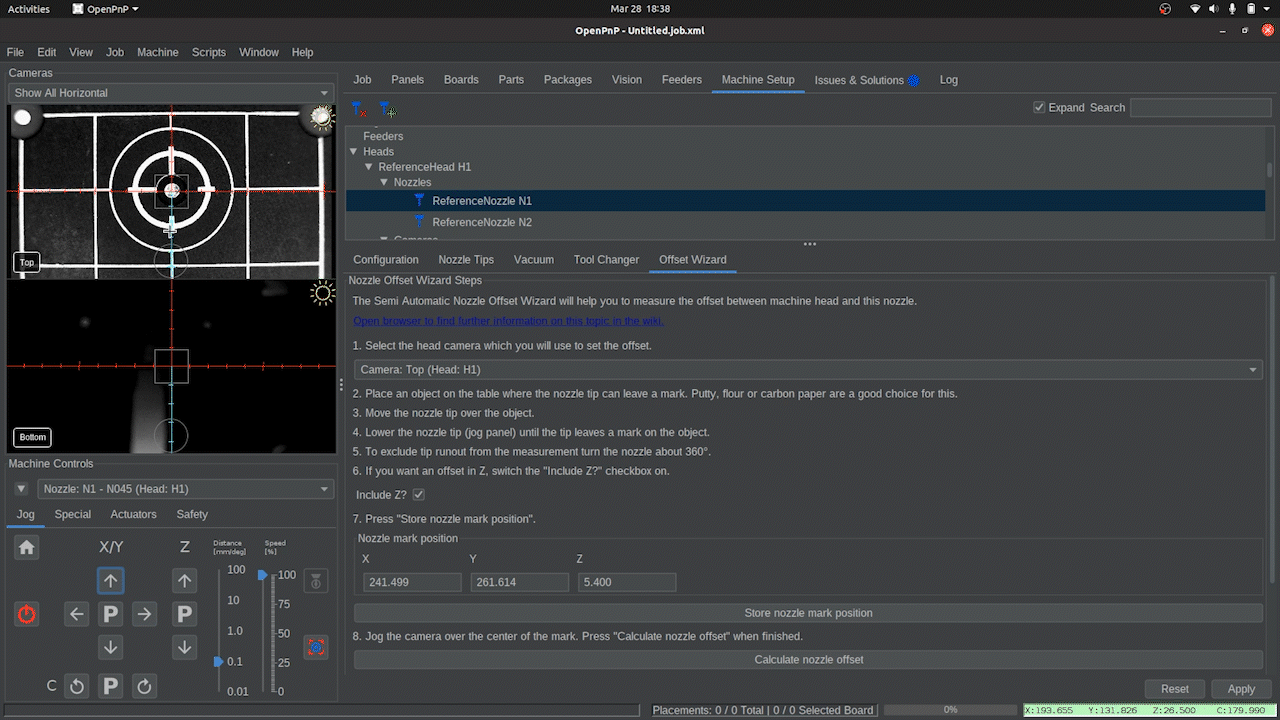
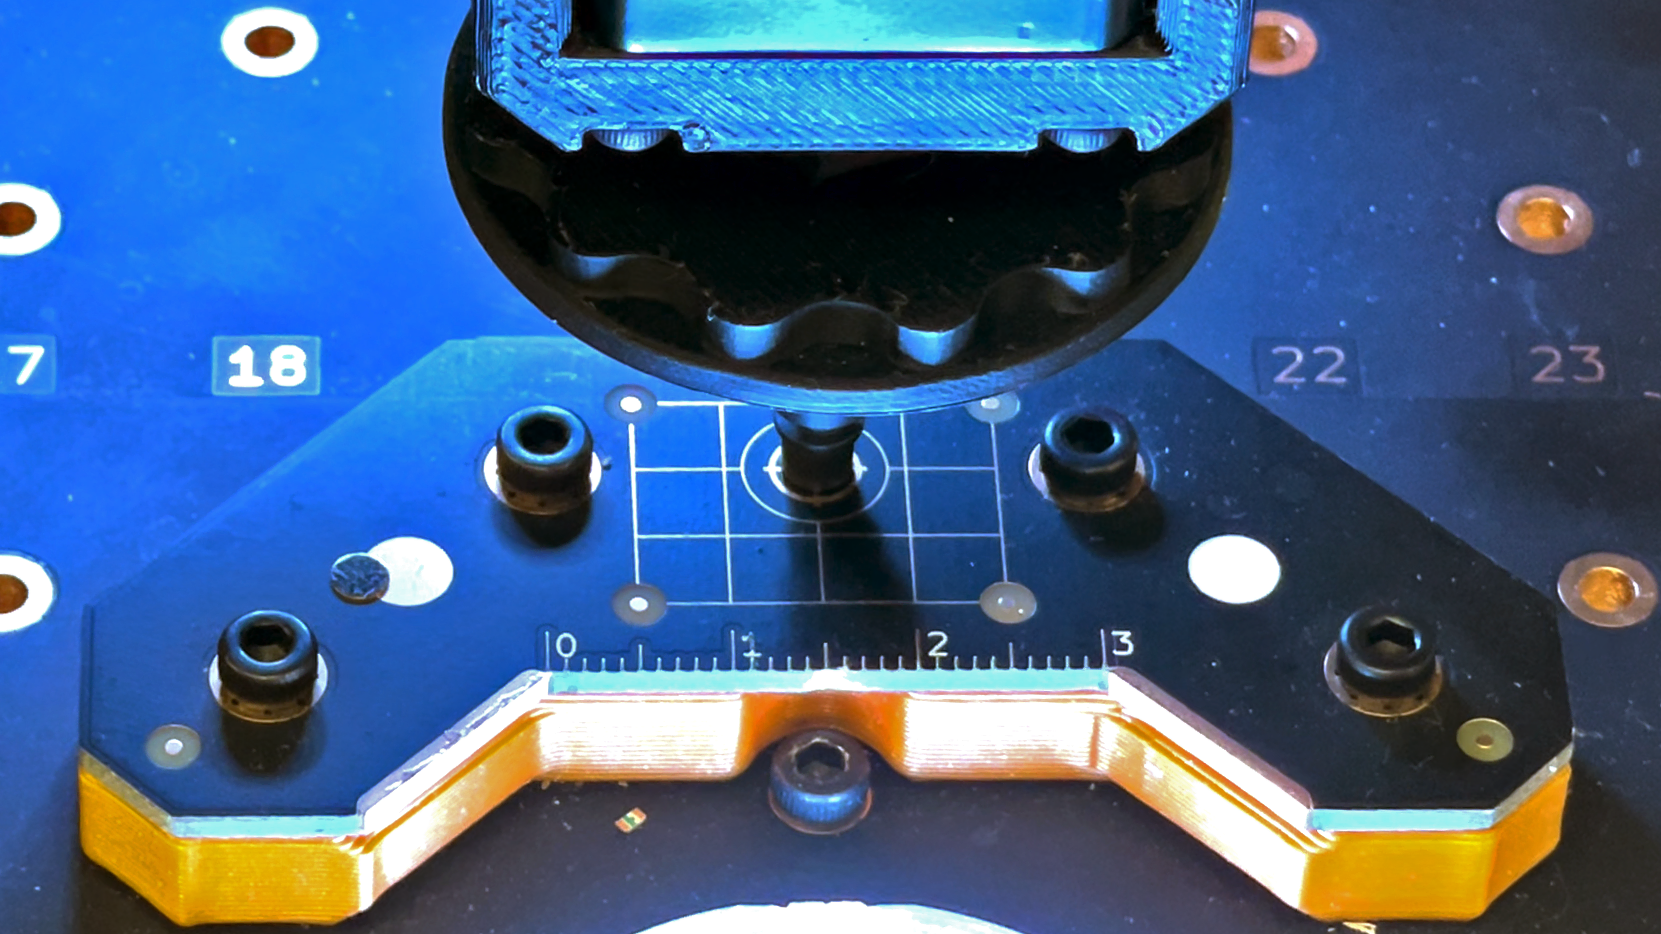
Position Nozzle: N1 over the homing fiducial.
- Jog Nozzle: N1 (left toolhead) so that the nozzle tip barely touches the datum board and is perfectly centered over the homing fiducial. Avoid collisions while jogging the nozzle tip.
- Use the shiny edges of the fiducial that are visible around the nozzle tip to determine proper centering. Accuracy here is crucial to achieving precise placements, so please take your time with this and ensure it is dead center.


- Jog Nozzle: N1 (left toolhead) so that the nozzle tip barely touches the datum board and is perfectly centered over the homing fiducial. Avoid collisions while jogging the nozzle tip.
-
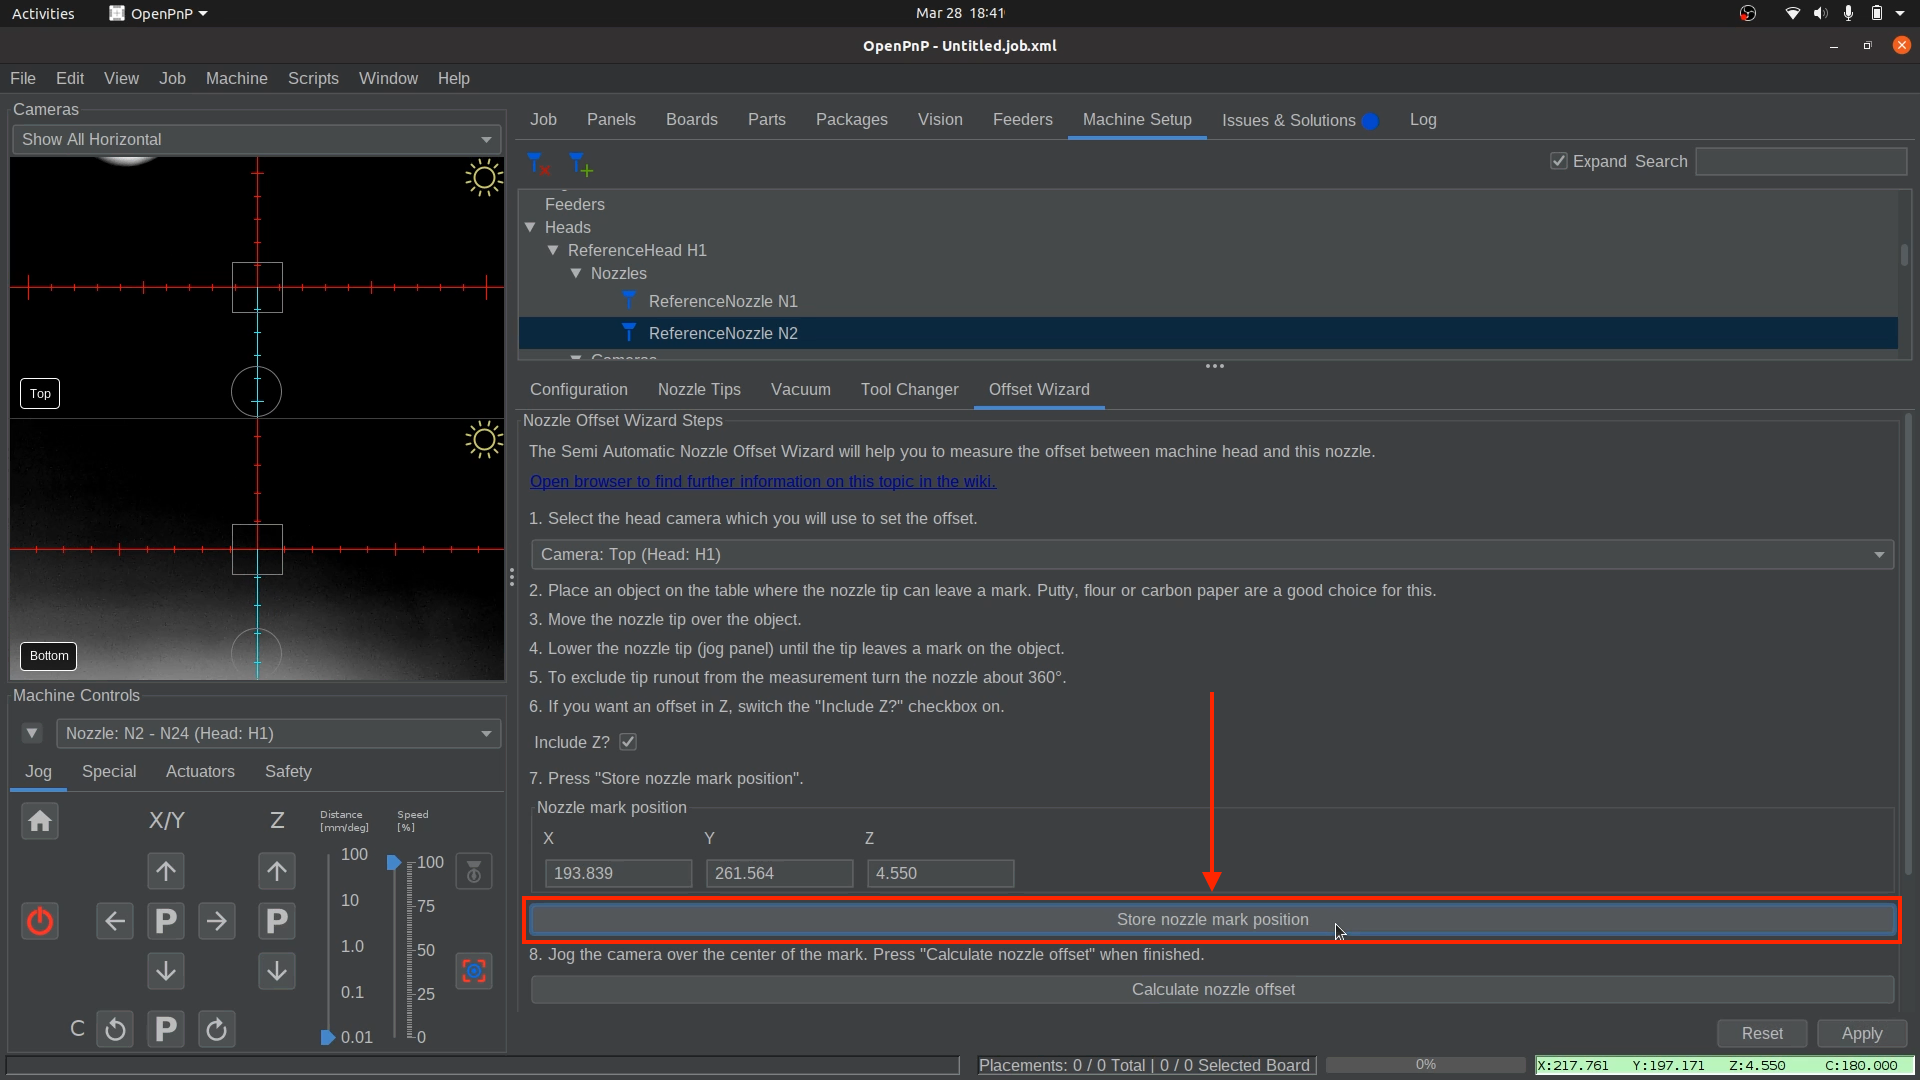
Capture Nozzle: N1’s position.
- Click the
Store nozzle mark positionbutton within the Offset Wizard tab to capture the Nozzle: N1's location for calibration purposes. - Do not navigate away from the Offset Wizard tab while you go through the following steps to capture the nozzle offset.

- Click the
-
Raise Nozzle: N1 off the datum board.
- Click the letter
Pbetween the Z up/down arrows to “Park” the nozzle at a safe height. This prevents collisions when moving the top camera into position.
Note
The nozzles may not be level when clicking the “Park” button, which is okay. The nozzle only moves to the point that it reaches the “safe zone” and then stops.
- Click the letter
-
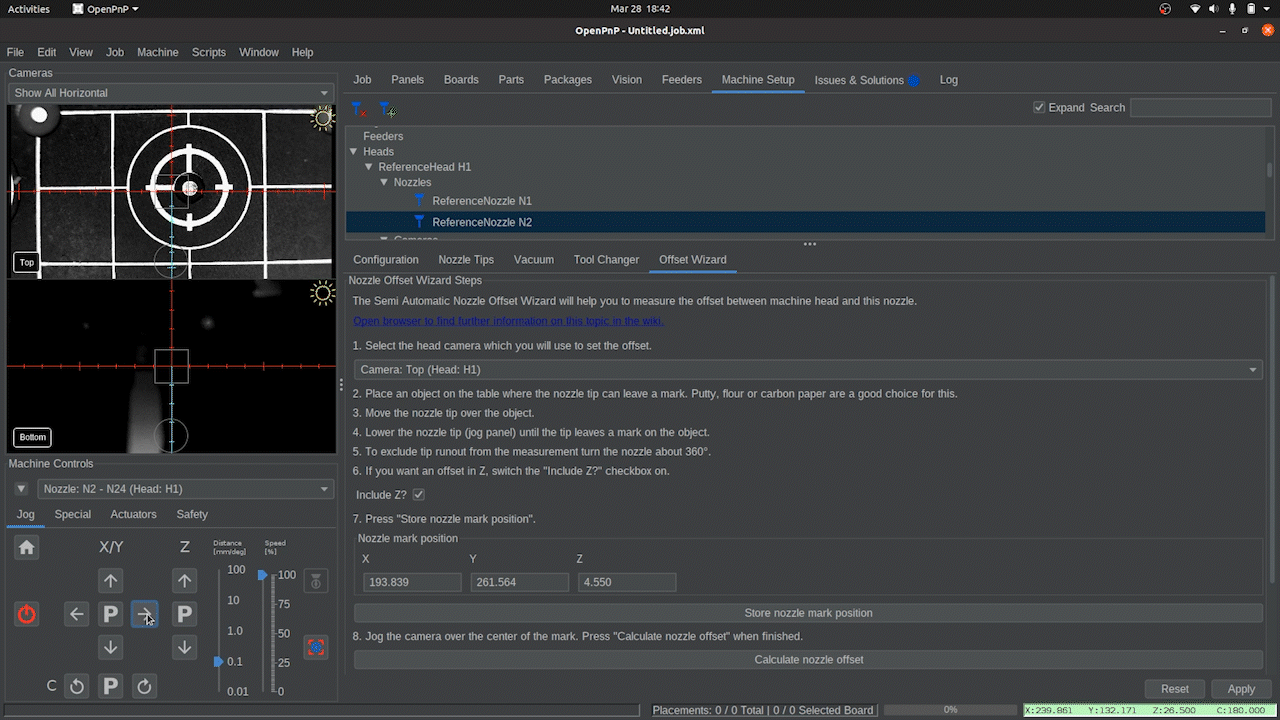
Align the top camera over the homing fiducial.
- Jog the X and Y axes to bring the top camera directly over the same homing fiducial used in the previous step so it is in the exact center of the camera feed. Do not switch away from the Offset Wizard tab. OpenPnP will not save your nozzle mark position.
- Jog the X and Y axes to bring the top camera directly over the same homing fiducial used in the previous step so it is in the exact center of the camera feed. Do not switch away from the Offset Wizard tab. OpenPnP will not save your nozzle mark position.
-
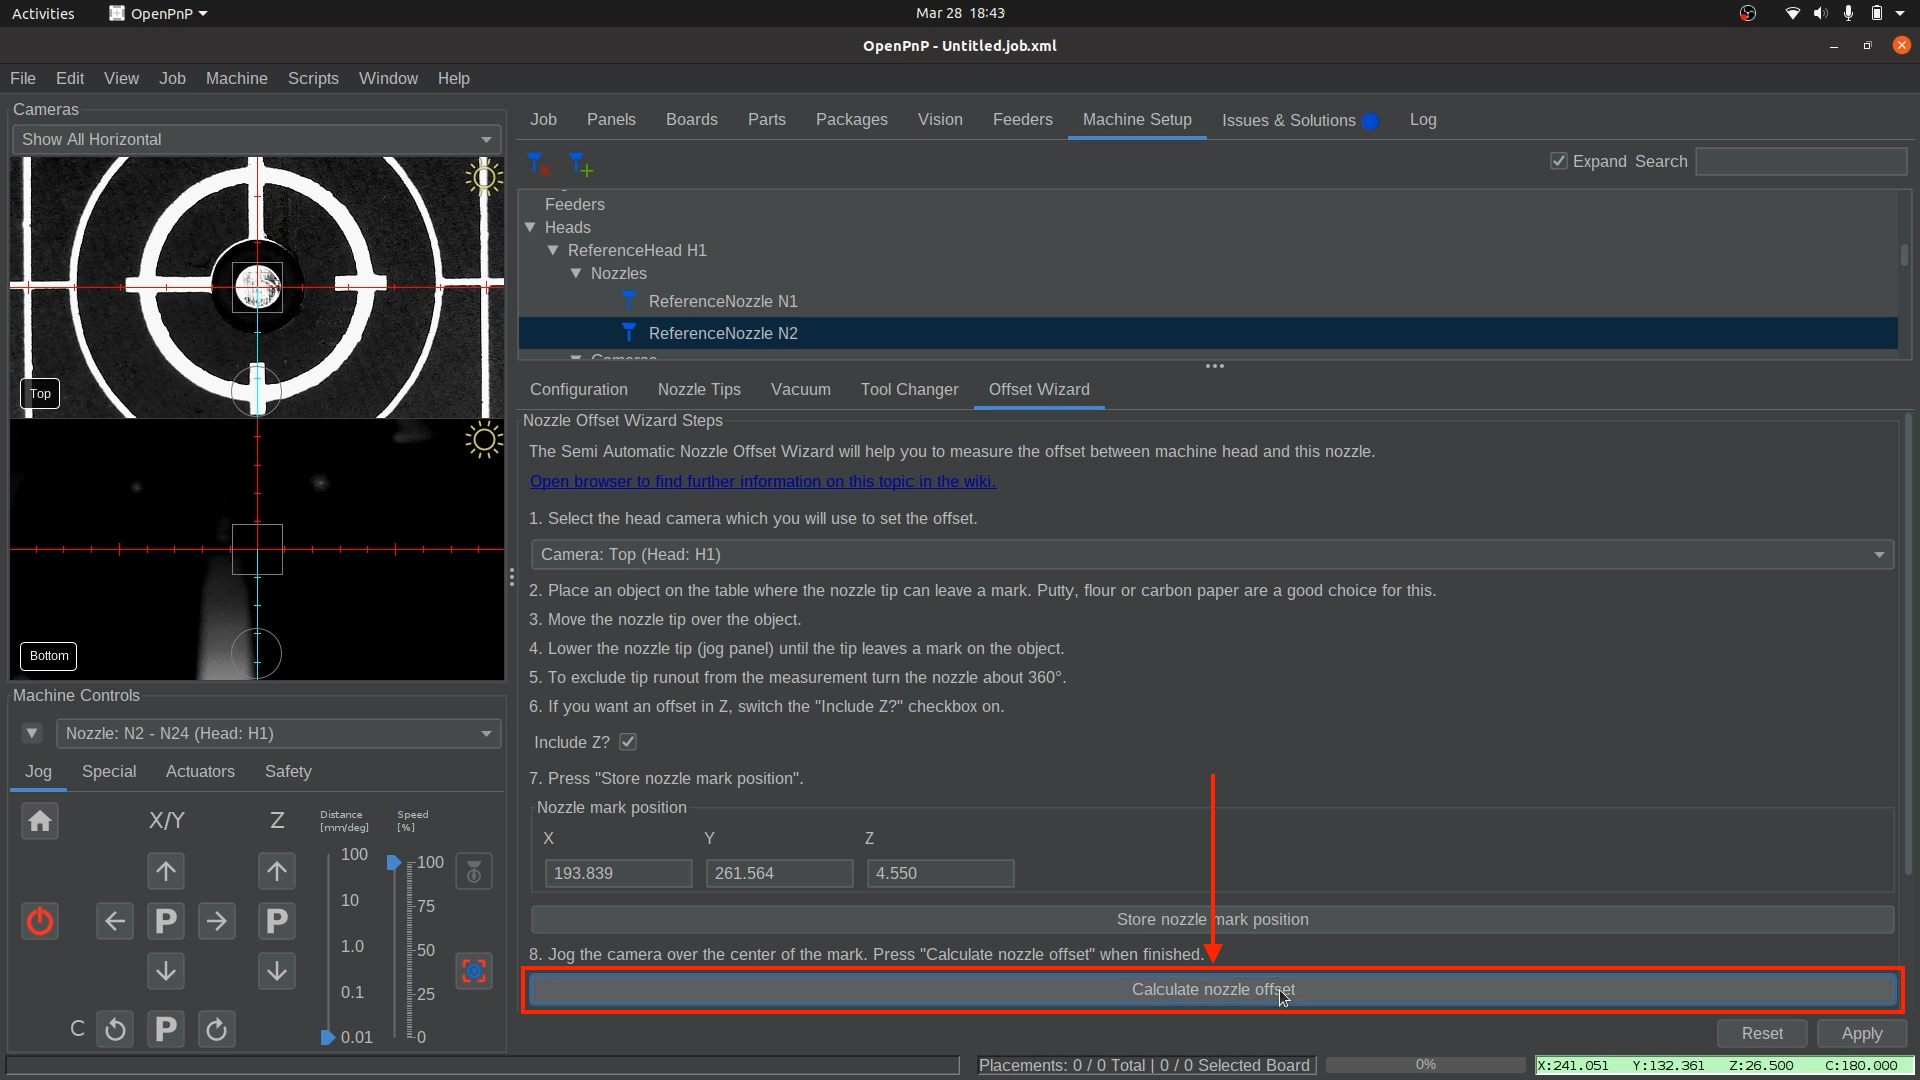
Calculate the nozzle offset.
- Once the homing fiducial is centered in the top camera view, click
Calculate nozzle offset. This determines the offset distance between the nozzle and the top camera based on their recorded positions.
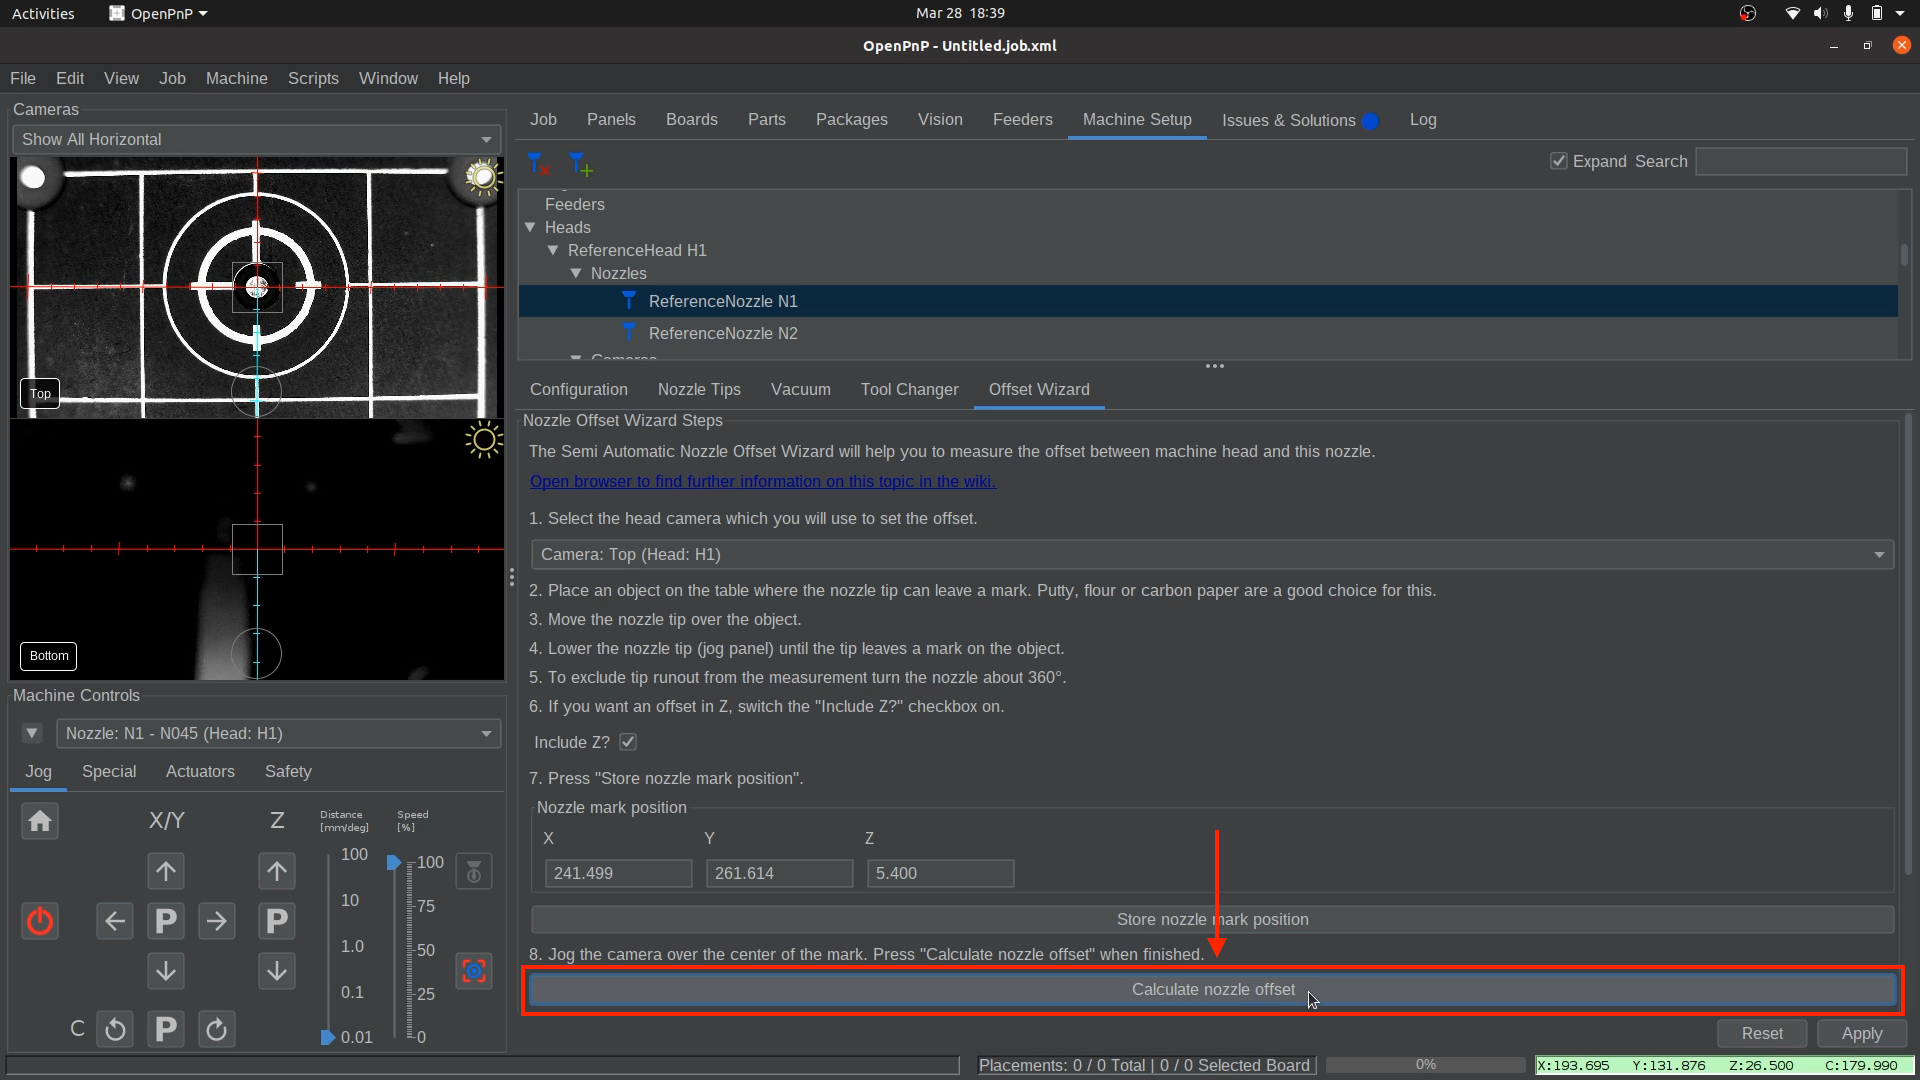
- Once the homing fiducial is centered in the top camera view, click
-
Apply and Save Nozzle offset.
- Click
Applyin the lower right corner to store the calculated offset for the left N045 nozzle tip.
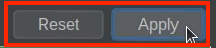
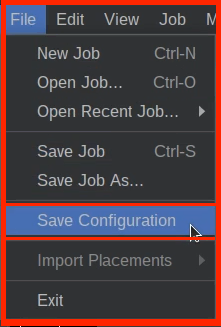
- Save your OpenPnP configuration now.
File > Save Configuration.
- Click
Validate Nozzle N1's Offset
Once you have completed the top camera to nozzle tip offset calibration for the first nozzle, you need to validate that the alignment is accurate before continuing to the second one. This ensures that both the camera and nozzle tips are correctly aligned with the homing fiducial before continuing with production.
Before starting, ensure you have Nozzle N1 selected in the Control Center.
-
Confirm camera alignment
- Go to
Machine Setup > Heads > ReferenceHead H1 > Primary Fiducial
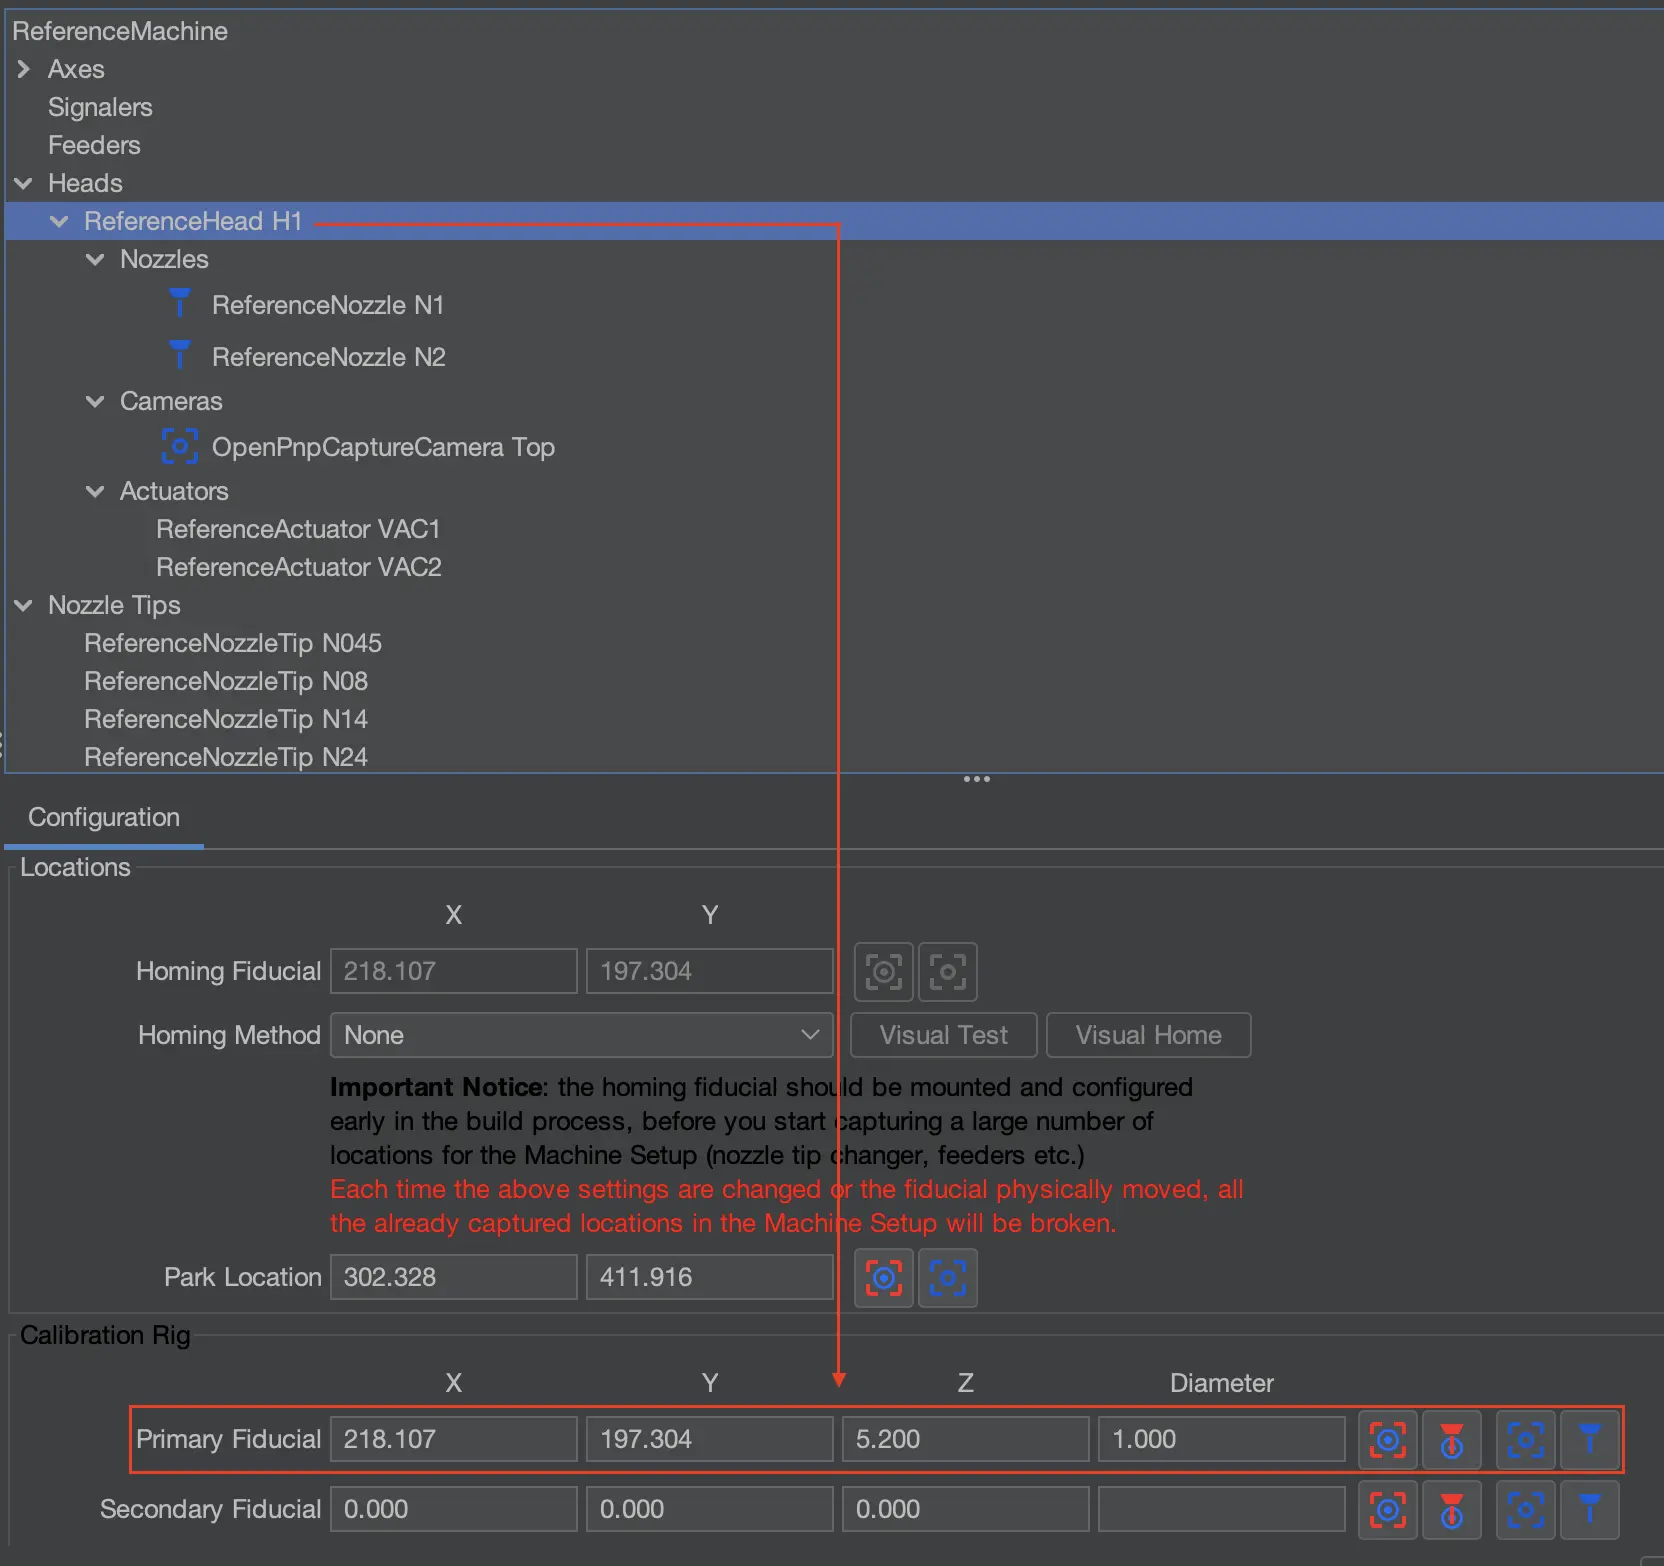
- Click the button to bring the Top Camera to the Homing Fiducial.

- Check the camera view: the homing fiducial should appear exactly centered.
- ❌ If it is not centered, restart the camera-to-fiducial calibration.
- ✅ Do not continue until the fiducial is showing accurately centered in the camera feed.
- Go to
-
Check nozzle tip alignment
- Click the button to place the selected nozzle tip on the Homing Fiducial. It is directly beside the button used for the camera in step 1.
- Please keep in mind that the images are for a V4, which uses a different Z-height. You can ignore the difference in Z-height in the images below compared to your LumenPnP V3's Z-height of 31.5.

- The machine should move the nozzle tip to its calculated position.
- Inspect the nozzle tip visually.
- ✅ If the nozzle tip sits directly on the fiducial, no correction is needed. Proceed to calibrating Nozzle N2's offset.
- ❌ If it is off, note whether it is left, right, in front, or behind the homing fiducial.
-
Adjust nozzle offsets, if needed
- When the nozzle tip does not land perfectly on the fiducial, adjust its offset.
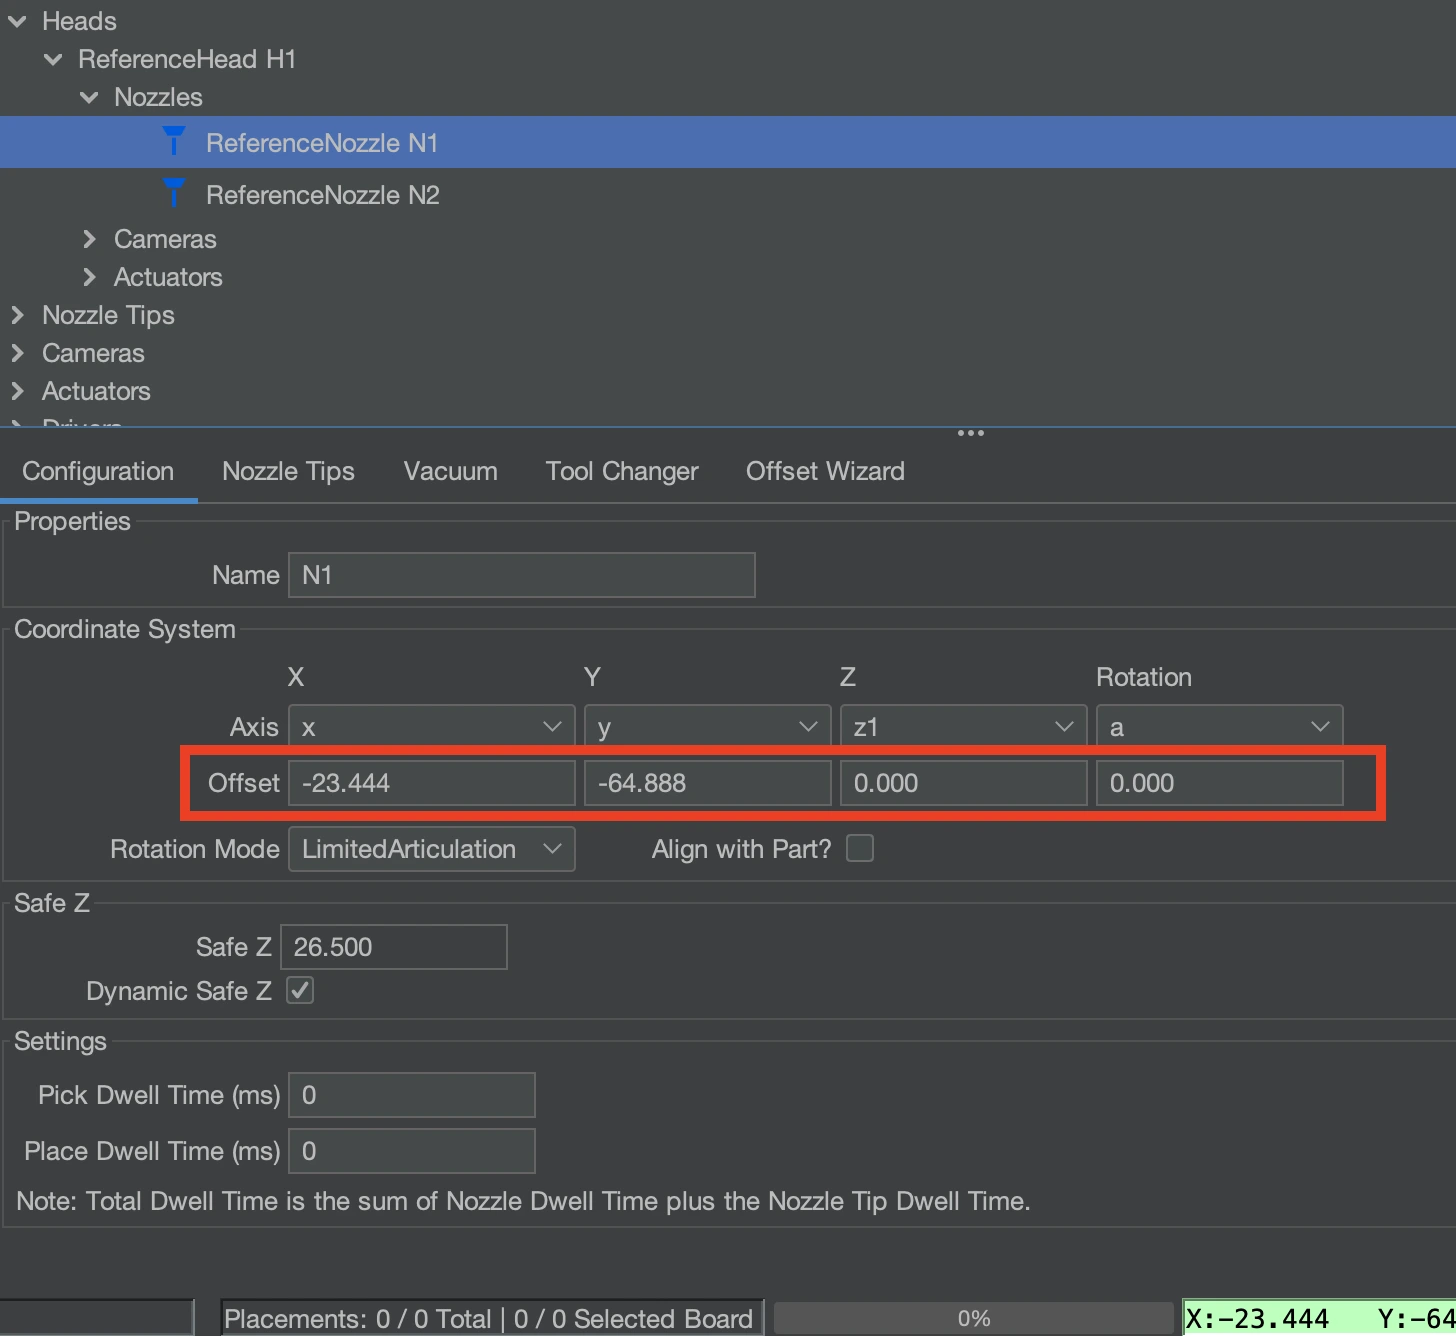
- Go to
Machine Setup > Heads > ReferenceHead H1 > Nozzles > ReferenceNozzle N1and locate the Offset values on that page. - Start with fine adjustments to the decimal values so you can dial in the offset gradually. This helps get an idea of how much you need to adjust to get it spot on.
- When speaking of increasing values, this is always meaning that we are adding positive value to the number. Meaning a negative (-) number would go closer to zero.
- When speaking of decreasing values, this is always meaning that we are adding negative value to the number. Meaning a negative (-) number would go further away from zero.
- Example: If the nozzle tip is sitting to the right of the homing fiducial, change the fake x-value offset of -24.360 to be -24.330, which increases this value, so the nozzle will move to the left.
- Key points to remember:
- Increasing a value will move Nozzle N1 left (X) or forward (Y)
- Decrease a value will move Nozzle N1 right (X) or backward (Y)
- Whether the value is positive or negative, you still “increase” or “decrease” to move in the correct direction.
-
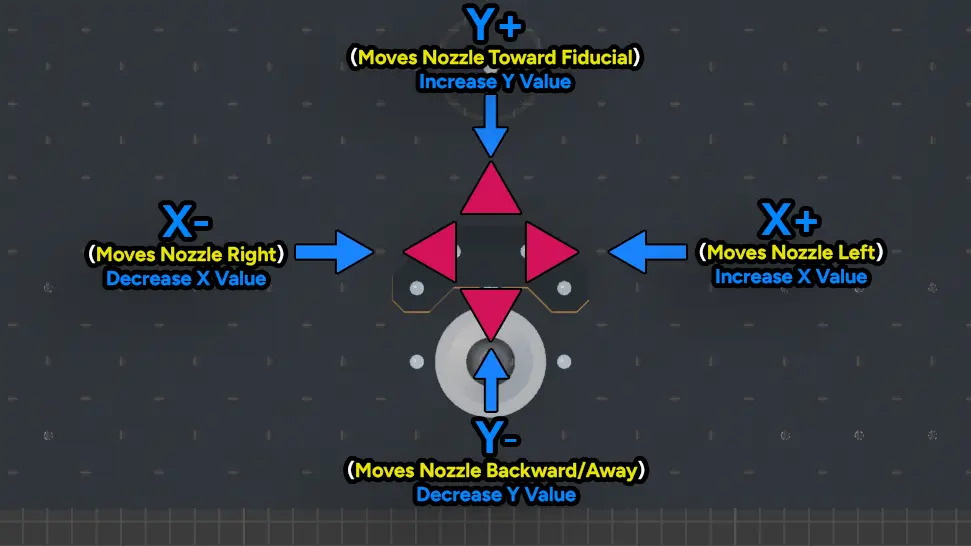
Visual aid
- Use the table below to decide which way to change the value.
- Red arrows represent the direction the nozzle is from the fiducial.
- Blue arrows represent the direction the nozzle will move when that given axis value is raised or lowered.
-
Once you've adjusted it to be accurate, Validate one last time before moving to the second nozzle.
- Click the button to bring the Top Camera to the Homing Fiducial and confirm it is still accurate.
- Click the button to place the selected nozzle tip to our newly adjusted position on the Homing Fiducial, and confirm it is still good.
- If both are accurate, proceed to next step.
- Click the button to bring the Top Camera to the Homing Fiducial and confirm it is still accurate.
-
Apply and Save Adjusted Nozzle offset.
- Click
Applyin the lower right corner to store the calculated offset for the left nozzle.
- Save your OpenPnP configuration now.
File > Save Configuration.
- Click
Nozzle: N2 Offset (Right Toolhead)
🚨 Critical Warning: Level Nozzles 🚨
⚠️ You must ensure that your nozzles are level.
Failure to do this can cause crashes and potentially damage your machine.
Use the P between the Z-axis up/down arrows to ensure the nozzle tips are out of the way. The P stands for Parking the nozzle out of the way into a safe height that won’t collide with any objects.
-
Confirm the correct nozzle is installed.
- Confirm that the
N24nozzle tip is still securely attached to Nozzle: N2 (right toolhead).
- Confirm that the
-
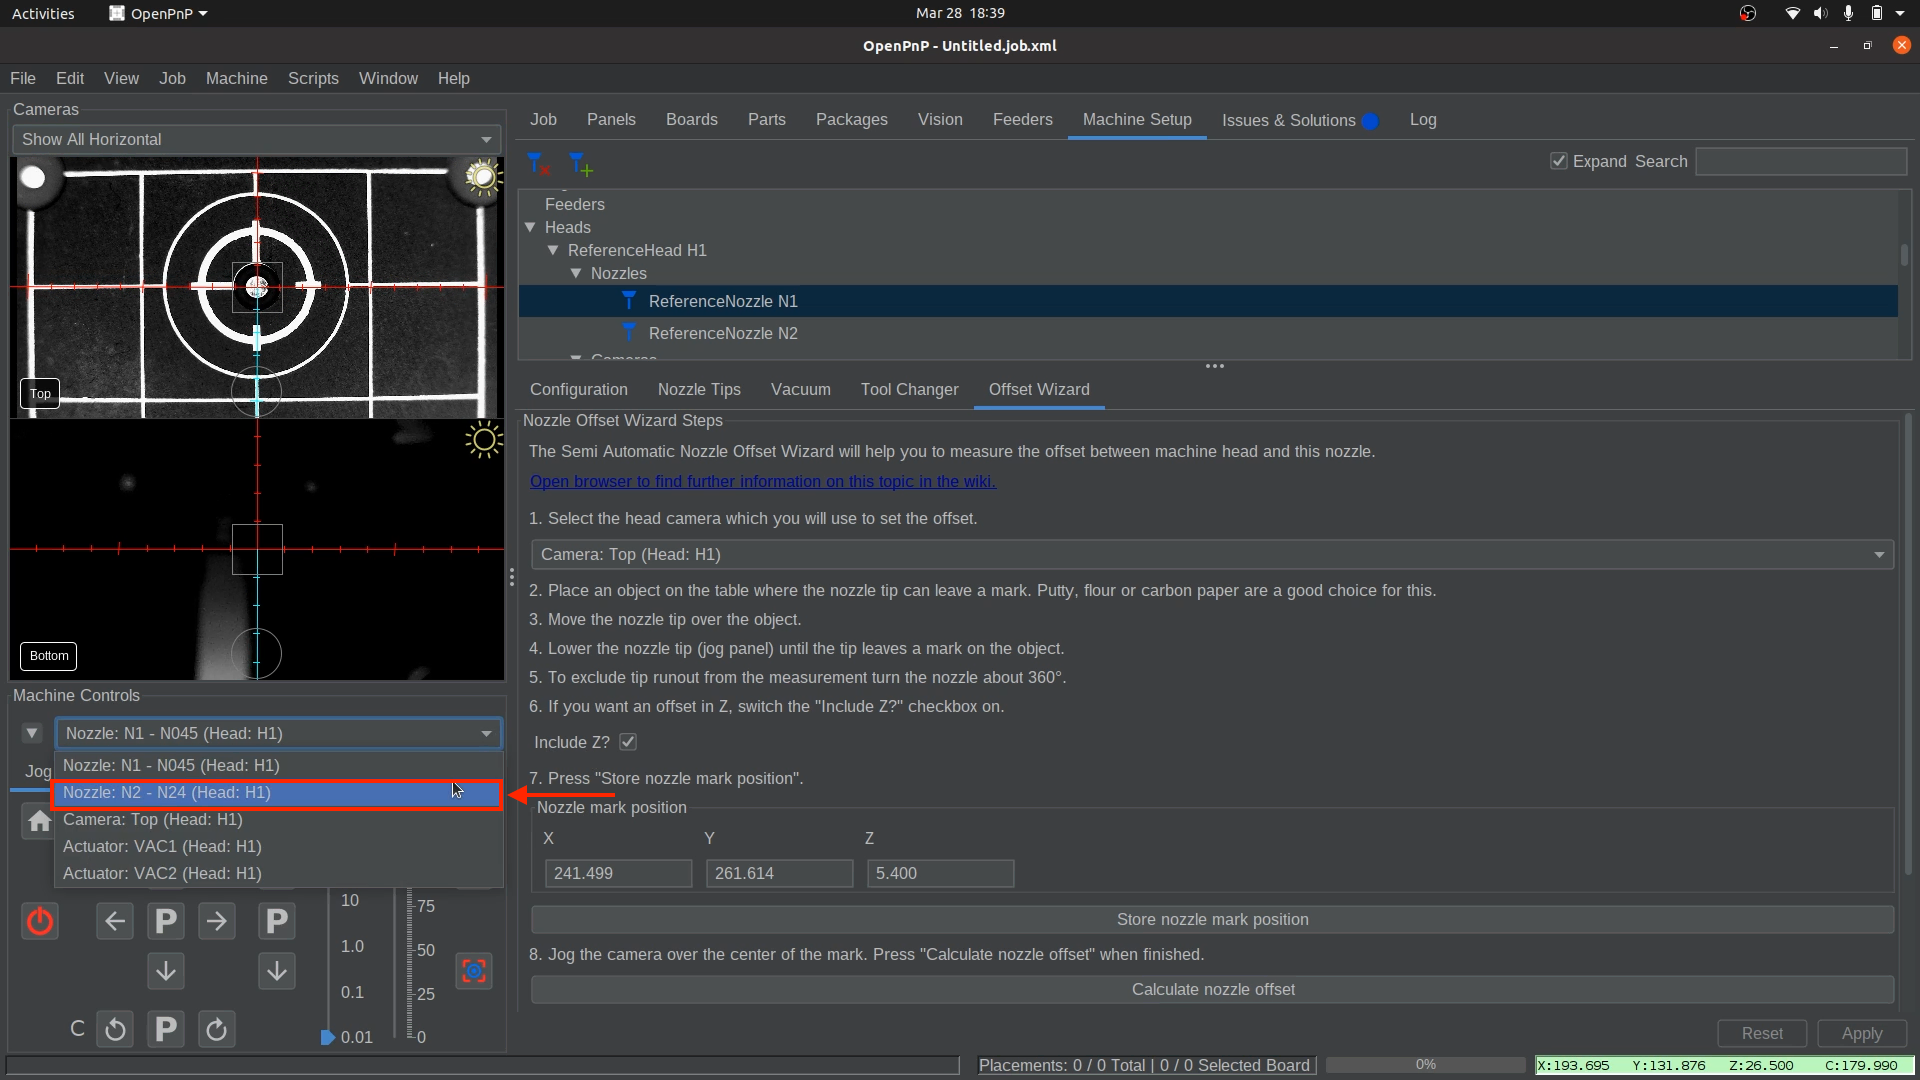
Select the correct nozzle to control.
- In the bottom left of OpenPnP, select
Nozzle: N2 - N24 (Head:H2)from the machine controls dropdown. This ensures that movements and adjustments apply to the right nozzle equipped with theN24nozzle tip.
- In the bottom left of OpenPnP, select
-
Open the Nozzle: N2 settings.
- Click through the following path:
Heads > ReferenceHead H1 > Nozzles > ReferenceNozzle N2.
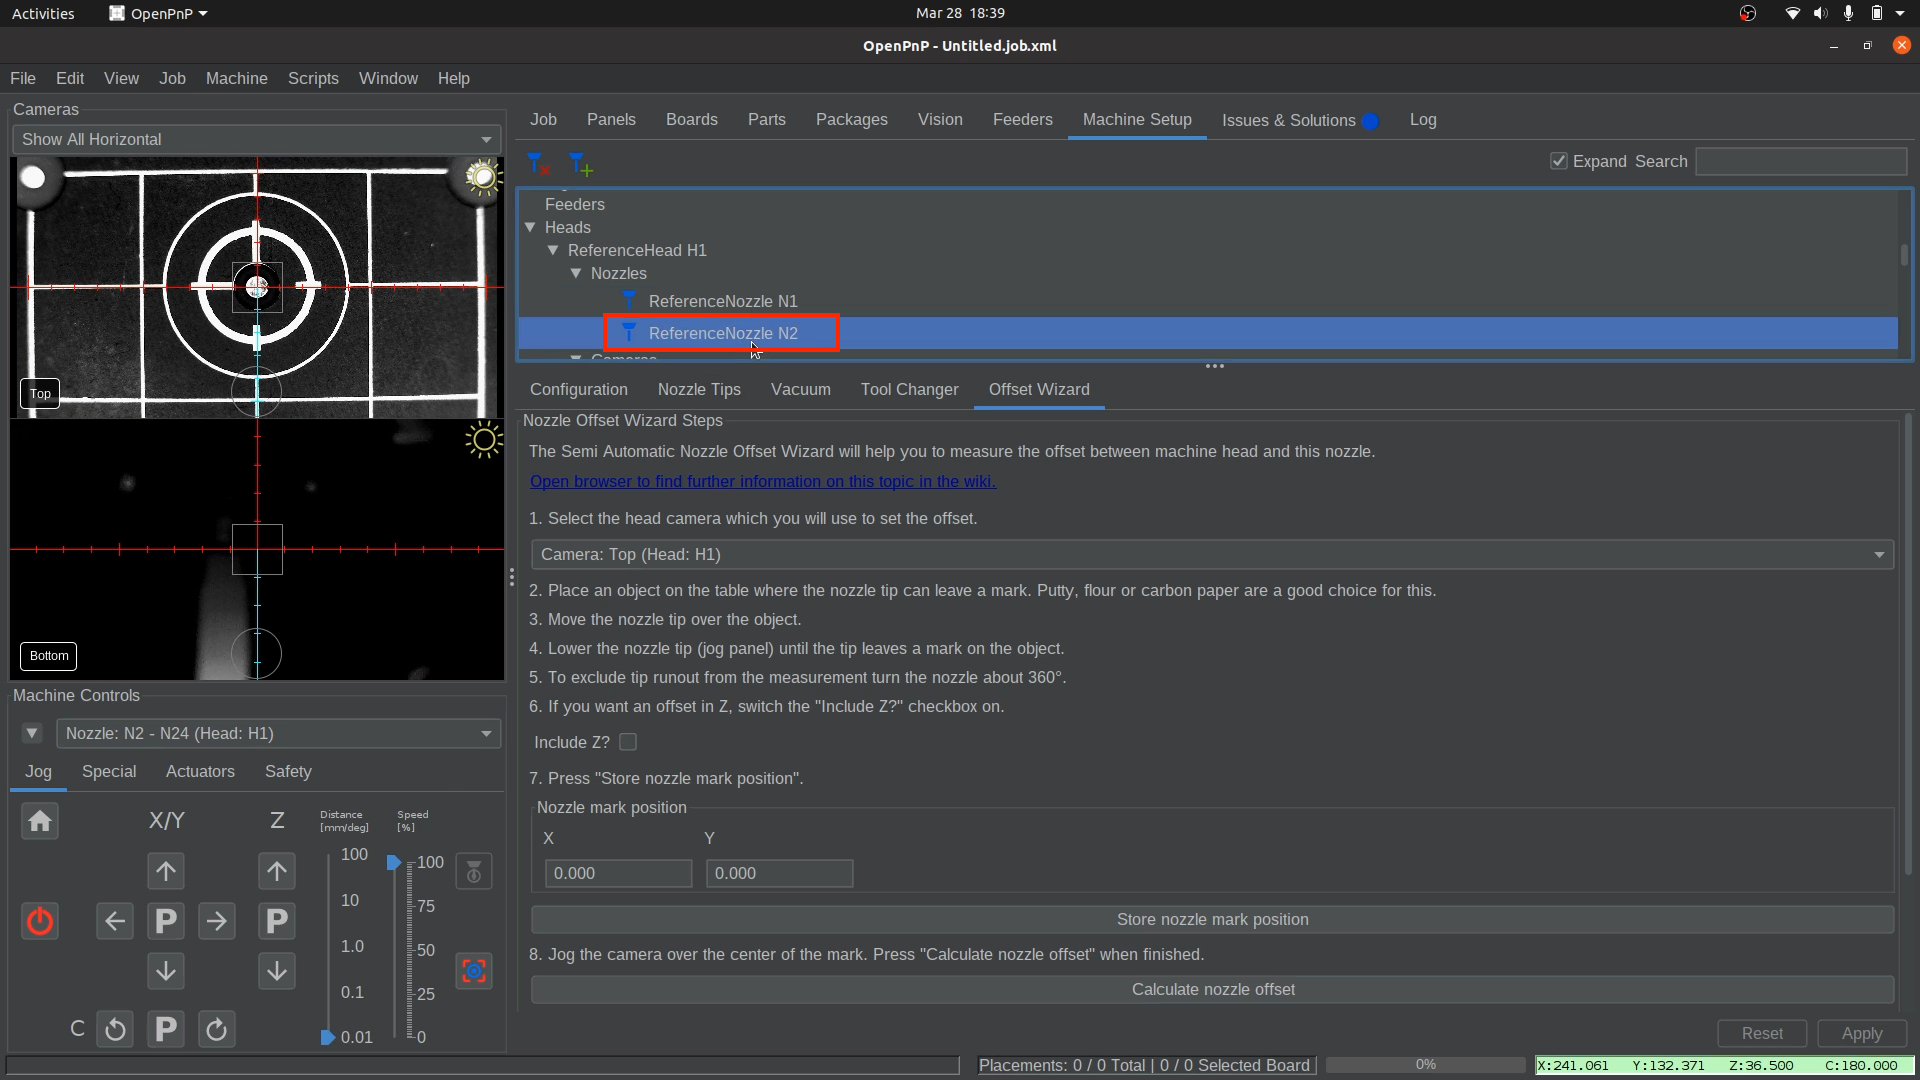
- Click through the following path:
-
Open the Offset Wizard tab.
- Navigate to the
Offset Wizardtab if you are not already there.
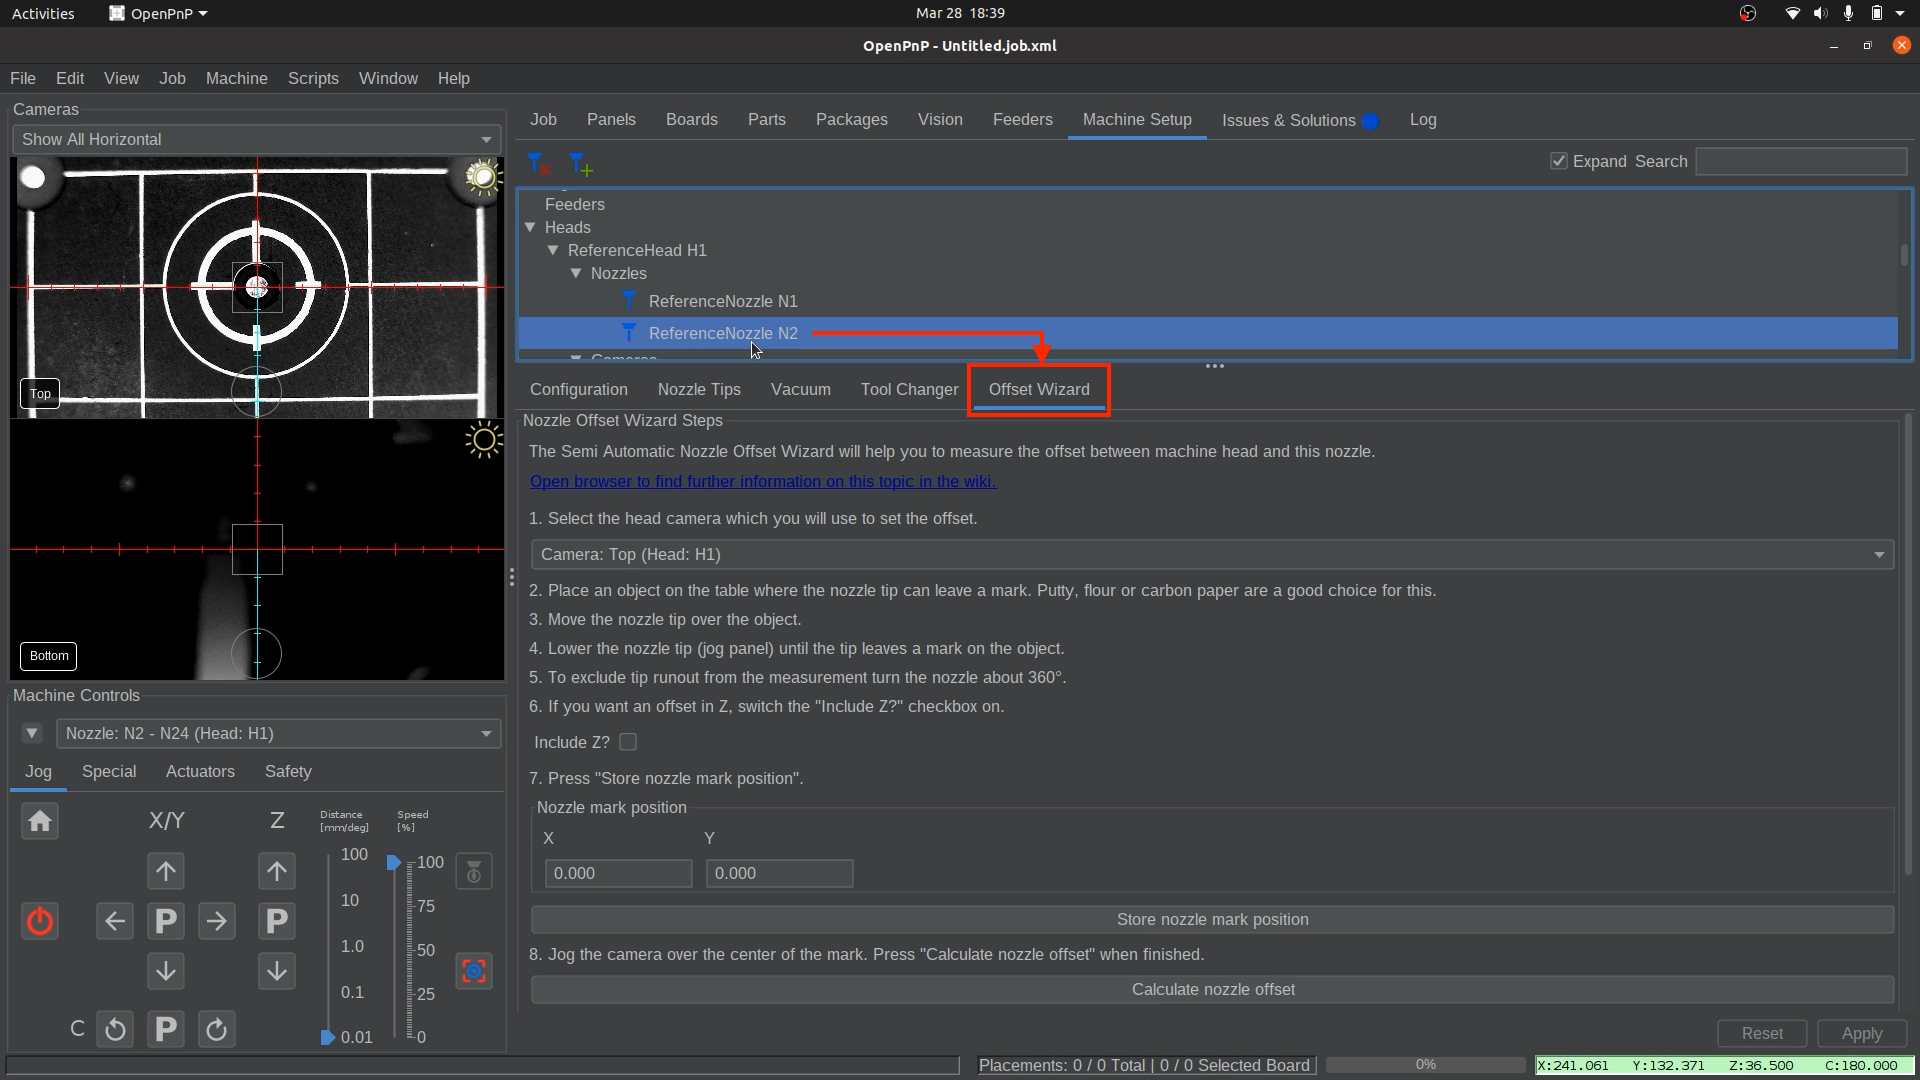
- Navigate to the
-
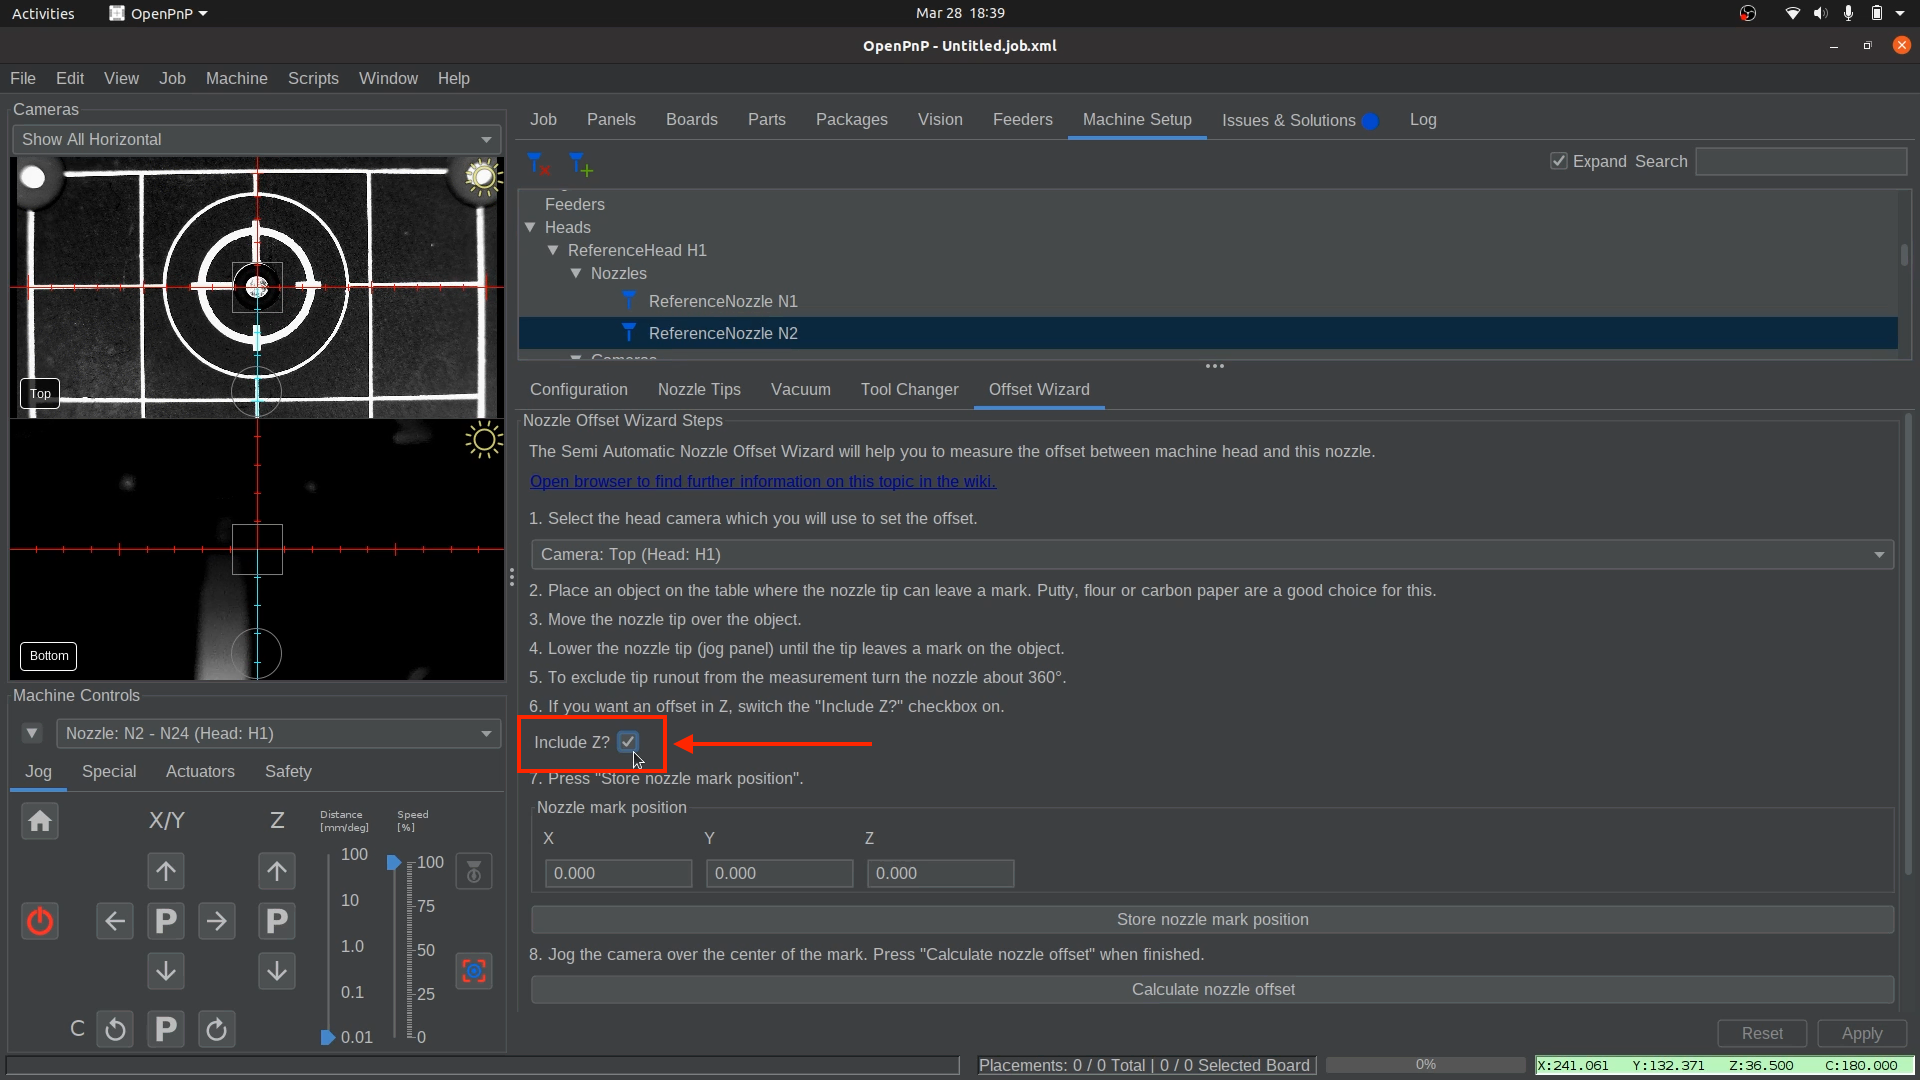
click the ‘Include Z?’ checkbox.
- To ensure that Nozzle N2's Z-height registers as the same height as the primary fiducial's Z-height value, we must make sure that Z is included when calibrating these offsets.
- To calibrate the Z2 offset, make sure the
Include Z?checkbox is selected. This will find the difference between the primary fiducial's Z-height value and Nozzle N2's Z-height. Then adds the appropriate offset to Nozzle N2's Z-height.
-
Position the nozzle over the homing fiducial.
- Jog Nozzle: N2 (right toolhead) so that it is perfectly centered over the homing fiducial, while barely touching the datum board. Avoid collisions while jogging the nozzle tip.
- This nozzle tip is larger than the last one, which is okay. We will use the circle just outside of the homing fiducial to determine if you've centered it correctly. Please take your time with this and ensure it is dead center.
- Jog Nozzle: N2 (right toolhead) so that it is perfectly centered over the homing fiducial, while barely touching the datum board. Avoid collisions while jogging the nozzle tip.
-
Capture the Nozzle: N2’s position.
- Click the
Store nozzle mark positionbutton within the Offset Wizard tab to capture Nozzle: N2's location for calibration purposes. - Do not navigate away from the Offset Wizard tab while you go through the following steps to capture the nozzle offset.
- Click the
-
Raise Nozzle: N2 off the datum board.
- Click the letter
Pbetween the Z up/down arrows to “Park” the nozzle at a safe height. This prevents collisions when moving the top camera into position.
Note
The nozzles may not be level when clicking the “Park” button, which is okay. The nozzle only moves to the point that it reaches the “safe zone” and then stops.
- Click the letter
-
Align the top camera over the homing fiducial.
- Jog the top camera to be directly over the homing fiducial so it is in the exact center of the camera feed. Do not switch away from the Offset Wizard tab. OpenPnP will not save your nozzle mark position if so.
- Jog the top camera to be directly over the homing fiducial so it is in the exact center of the camera feed. Do not switch away from the Offset Wizard tab. OpenPnP will not save your nozzle mark position if so.
-
Calculate the nozzle offset.
- Once the homing fiducial is centered in the top camera view, click
Calculate nozzle offset. This determines the offset distance between the nozzle and the top camera based on their recorded positions.
- Once the homing fiducial is centered in the top camera view, click
-
Apply and Save Nozzle offset.
- Click
Applyin the lower right corner to store the calculated offset for the right N24 nozzle tip.
- Save your OpenPnP configuration now.
File > Save Configuration.
- Click
Validate Nozzle N2's Offset
Once you have completed the top camera to nozzle tip offset calibration for the second nozzle, you need to validate that the alignment is accurate before continuing to the next calibration steps. This ensures that both the camera and nozzle tips are correctly aligned with the homing fiducial before continuing with production.
Before starting, ensure you have Nozzle N2 selected in the Control Center.
-
Confirm camera alignment
- Go to
Machine Setup > Heads > ReferenceHead H1 > Primary Fiducial
- Click the button to bring the Top Camera to the Homing Fiducial.
- Check the camera view: the homing fiducial should appear exactly centered.
- ❌ If it is not centered, restart the camera-to-fiducial calibration.
- ✅ Do not continue until the fiducial is showing accurately centered in the camera feed.
- Go to
-
Check nozzle tip alignment
- Click the button to place the selected nozzle tip on the Homing Fiducial. It is directly beside the button used for the camera in step 1.
- The machine should move the nozzle tip to its calculated position.
- Inspect the nozzle tip visually.
- ✅ If the nozzle tip sits directly on the fiducial, no correction is needed, and both your nozzle tips are validated. Proceed to the next section.
- ❌ If it is off, note whether it is left, right, in front, or behind the homing fiducial.
- Click the button to place the selected nozzle tip on the Homing Fiducial. It is directly beside the button used for the camera in step 1.
-
Correct nozzle offsets
- When the nozzle tip does not land perfectly on the fiducial, adjust its offset.
- Go to
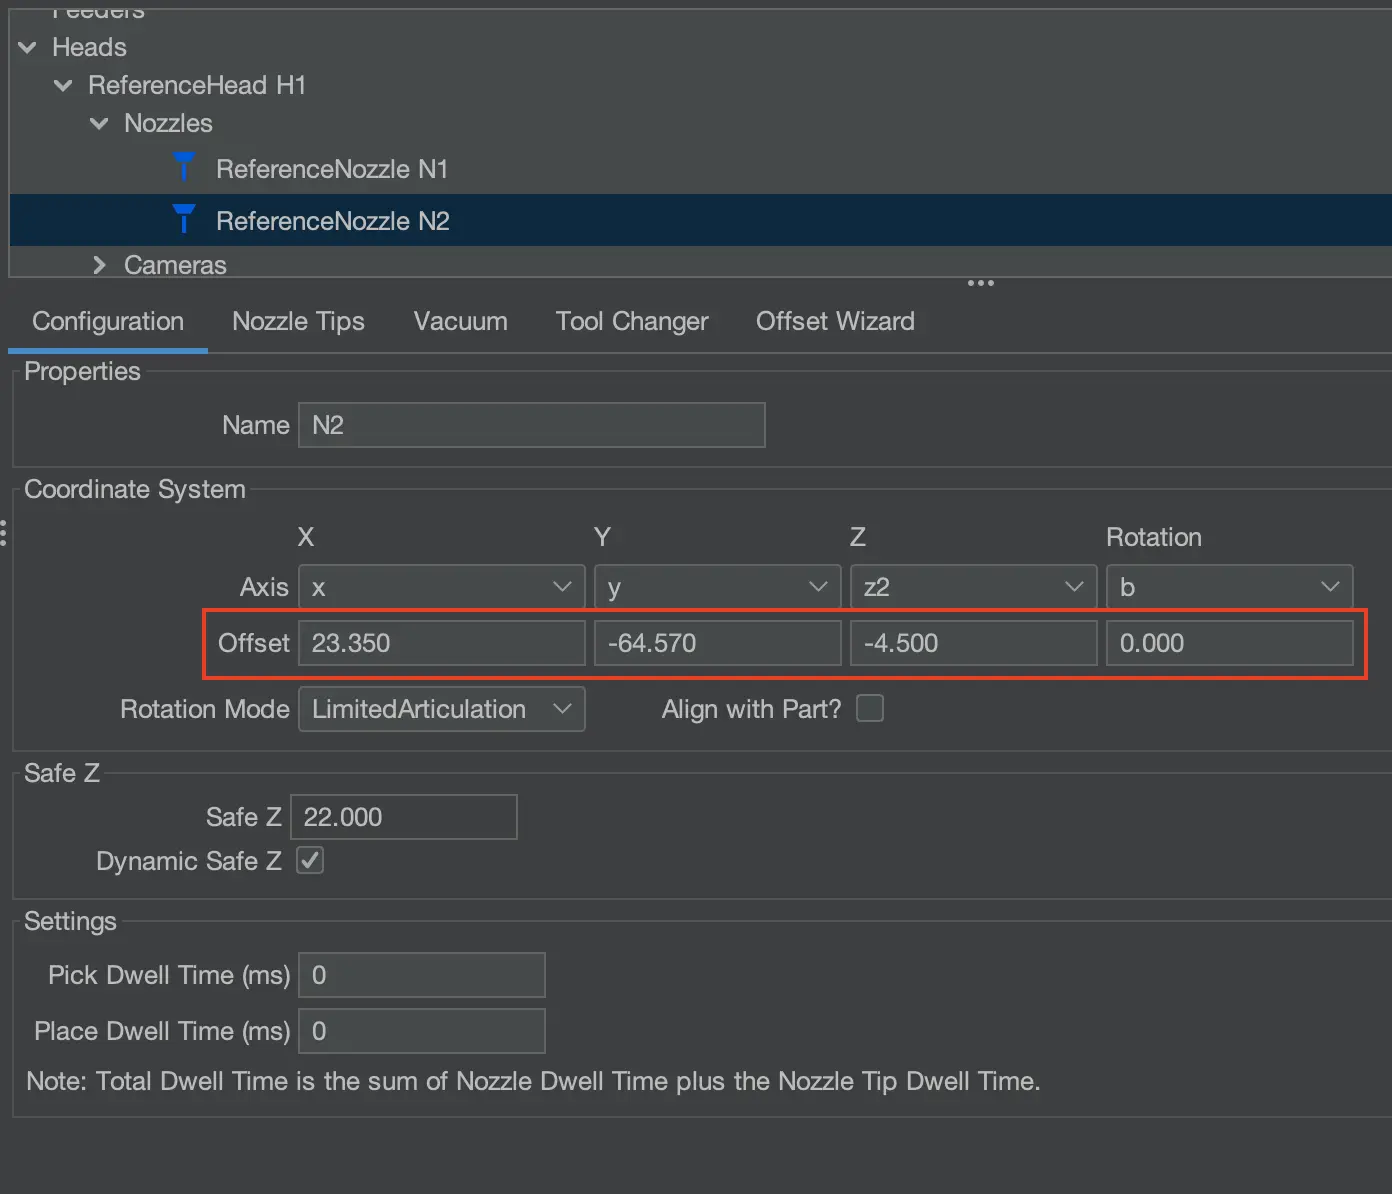
Machine Setup > Heads > ReferenceHead H1 > Nozzles > ReferenceNozzle N2and locate the Offset values on that page. - Start with fine adjustments to the decimal values so you can dial in the offset gradually. This helps get an idea of how much you need to adjust to get it spot on. Example: If the nozzle tip is sitting to the right of the homing fiducial, change the fake x-value offset of 23.350 to be 23.380, which increases this value, so the nozzle will move to the left.
- Key points to remember:
- Increasing a value will move Nozzle N2 left (X) or forward (Y)
- Decrease a value will move Nozzle N2 right (X) or backward (Y)
- Whether the value is positive or negative, you still “increase” or “decrease” to move in the correct direction.
-
Visual aid
- Use the table below to decide which way to change the value.
- Red arrows represent the direction the nozzle is from the fiducial.
- Blue arrows represent the direction the nozzle will move when that given axis value is raised or lowered.
-
Once you've adjusted it to be accurate, Validate one last time before moving on.
- Click the button to bring the Top Camera to the Homing Fiducial and confirm it is still accurate.
- Click the button to place the selected nozzle tip to our newly adjusted position on the Homing Fiducial, and confirm it is still good.
- If both are accurate, proceed to next step.
- Click the button to bring the Top Camera to the Homing Fiducial and confirm it is still accurate.
-
Apply and Save Adjusted Nozzle offset.
- Click
Applyin the lower right corner to store the newly adjusted offset for the right nozzle.
- Save your OpenPnP configuration now.
File > Save Configuration.
- Click
Next Steps
Do not home the machine between this step and setting your bottom camera position!**
The top camera to nozzle tip offset is meant to be done directly before setting your bottom camera position. Homing the machine between these steps has the chance to ruin the precise calibration you've done so far.
If you have confirmed that the Top camera and nozzle tip locations are perfectly accurate, you MUST immediately set your bottom camera position, which is the next section. It is crucial that the bottom camera position is set after the top camera to nozzle tip offset has been perfectly aligned, as this ensures the bottom camera position is now 100% accurate.
All other calibrations are based on the bottom camera's accurate location, which is why it is crucial that this step is performed in this order.
Next is Bottom Camera Position.